
Charming Woven Crochet Bag with Squares. Very Useful!

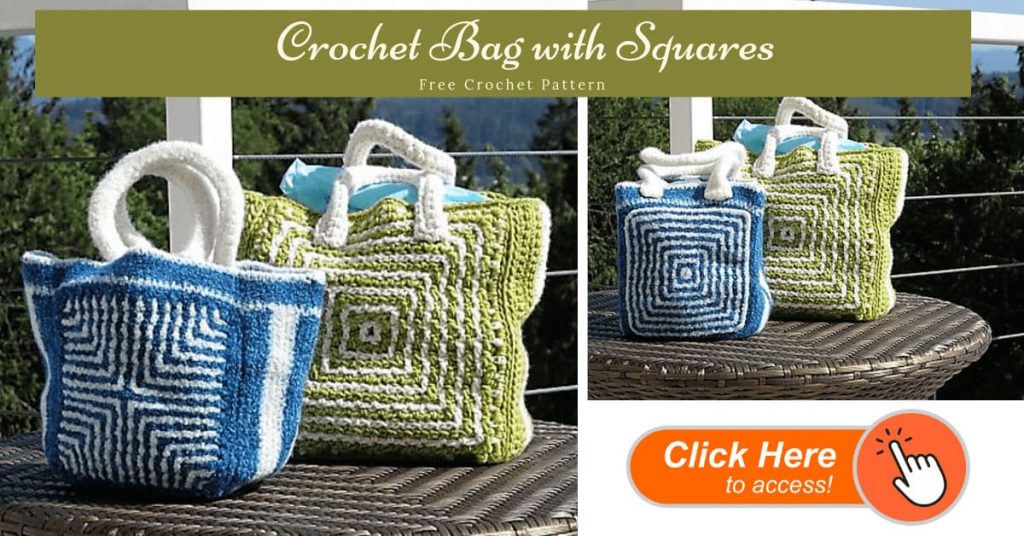
Today we want to share with you a special post:
The Elegant and Practical Charming Woven Crochet Bag with Square Pattern
Woven crochet is a technique that uses a simple double crochet chain 1 grid woven with a second double crochet chain 1 grid of a contrasting color.
By double crocheting in front or in the back of the opposite color, into the top of the double crochet from the row below, you are able to create a variety of intricate patterns.
Are you in search of a stylish and functional accessory for your daily outfits? Look no further, the Charming Woven Crochet Bag with Squares is here to fulfill your needs.
Refill Your Creative Cup
Feeling stuck or out of ideas? Let us bring the spark back to your hook. Our weekly emails deliver patterns, tips, and inspiration to keep your creativity blooming.
😍 Bring Your Crochet Mojo Back – Sign Up Now! Click on the image 👆🏼
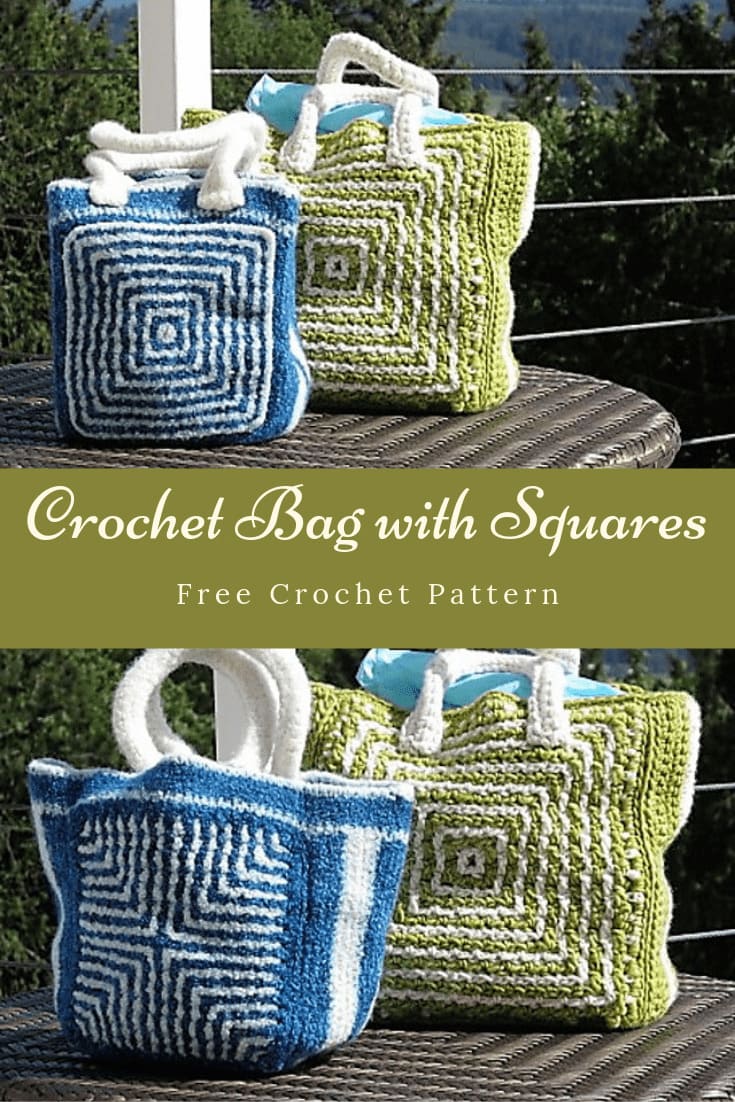
This beautiful handcrafted bag is made with intricate crochet techniques that feature a unique square pattern.
The charming design will add a touch of elegance to any outfit, while the spacious interior provides ample room for your essentials.
Whether you're running errands or going out for a night on the town, this bag is the perfect companion.
The crochet material used in the bag is not only visually appealing, but also durable and long-lasting.
The woven squares provide added texture and depth to the bag, making it stand out from your average tote.
The versatile color options available make it easy to find the perfect match for your personal style.
With a comfortable shoulder strap and a secure clasp, you can wear the bag with ease and peace of mind, knowing that your belongings are safe inside.
This Charming Woven Crochet Bag with Squares is not just a fashion statement, but a practical and functional accessory that will come in handy for years to come.
Whether you're a busy mom, a student, or simply someone who loves to stay organized, this bag is the perfect addition to your wardrobe.
So don't wait any longer, get your hands on this charming and useful bag today!
Enjoy The Crochet Tutorial
Materials: 2 skeins 100 g Malabrigo Worsted (Main Color and Contrast Color)
Size G crochet hook
Notions: 2 locking stitch markers
Abbreviations
- MC—main color
- CC—contrast color
- ch—chain
- dc—double crochet
- dcib—double crochet in back
- dcif—double crochet in front
- sc—single crochet
- sl st—slip stitch
Set-up:
With Main Color (MC), chain 35. Double crochet (dc) in the 5th chain (ch) from hook. *Ch 1, skip 1 ch, dc in next ch.* Repeat from * to * across. (16 windows)
With Contrast Color (CC), chain 33. Place MC work on a flat surface with right-side-up and active loop to the left. Weave CC beginning chain through MC windows, starting from the right, front side. Clip chain near the end to active loop of MC to hold in place. (Note: your active loop for CC will be on the right). Double crochet in the back (dcib) in the 5th chain (ch) from hook. (Ch 1, skip 1 ch, dcib in next ch.) 13 x’s. Ch 1, double crochet in front (dcif) in the final chain. Chain 3 and turn.
Note: The set-up row is worked into the base chains, but the remaining double crochets are worked into the top of the double crochet of the same color in the row below. When you’ve worked one color, place the active loop on a locking stitch marker and begin work with the other color. Row a is worked in the main color and Row b is worked in contrast color.
Drop CC in back.
Row 1a: Dcib, ch 1. (Dcif, ch 1) 13 x’s. Dcib, ch 1, dc in the last window.
Row 1b: Dcib, ch 1. (Dcif, ch 1) 12 x’s. Dcib, ch 1, dcib in the last window. Chain 3 and turn.
Drop CC in front.
Row 2a: (Dcif, ch 1) 2 x’s. (Dcib, ch 1) 11 x’s. (Dcif, ch 1) 2 x’s. Dc in last window.
Row 2b: (Dcif, ch 1) 2 x’s. (Dcib, ch 1) 10 x’s. (Dcif, ch 1) 2 x’s. Dcif in the last window. Chain 3 and turn.
Drop CC in back.
Row 3a: (Dcib, ch 1) 3 x’s. (Dcif, ch 1) 9 x’s. (Dcif, ch 1) 3 x’s. Dc in the last window.
Row 3b: (Dcib, ch 1) 3 x’s. (Dcif, ch 1) 8 x’s. (Dcif, ch 1) 3 x’s. Dcib in the last window. Chain 3 and turn.
Drop CC in front.
Row 4a: (Dcif, ch 1) 4 x’s. (Dcib, ch 1) 7 x’s. (Dcif, ch 1) 4 x’s. Dc in the last window.
Row 4b: (Dcif, ch 1) 4 x’s. (Dcib, ch 1) 6 x’s. (Dcif, ch 1) 4 x’s. Dcif in the last window. Chain 3 and turn.
Drop CC in back.
Row 5a: (Dcib, ch 1) 5 x’s. (Dcif, ch 1) 5 x’s. (Dcif, ch 1) 5 x’s. Dc in the last window.
Row 5b: (Dcib, ch 1) 5 x’s. (Dcif, ch 1) 4 x’s. (Dcif, ch 1) 5 x’s. Dcib in the last window. Chain 3 and turn.
Drop CC in front.
Row 6a: (Dcif, ch 1) 6 x’s. (Dcib, ch 1) 3 x’s. (Dcif, ch 1) 6 x’s. Dc in last window.
Row 6b: (Dcif, ch 1) 6 x’s. (Dcib, ch 1) 2 x’s. (Dcif, ch 1) 6 x’s. Dcif in the last window. Chain 3 and turn.
Drop CC in back.
Row 7a: (Dcib, ch 1) 7 x’s. Dcif, ch 1 (Dcif, ch 1) 7 x’s. Dc in the last window.
Row 7b: (Dcib, ch 1) 14 x’s. Dcib in the last window. Chain 3 and turn.
Drop CC in front.
Row 8a: (Dcif, ch 1) 7 x’s. Dcib, ch 1. (Dcif, ch 1) 7 x’s. Dc in the last window.
Row 8b: (Dcif, ch 1) 6 x’s. (Dcib, ch 1) 2 x’s. (Dcif, ch 1) 6 x’s. Dcif in the last window. Chain 3 and turn.
Drop CC in back.
Row 9a: (Dcib, ch 1) 6 x’s. (Dcif, ch 1) 3 x’s. (Dcif, ch 1) 6 x’s. Dc in the last window.
Row 9b: (Dcib, ch 1) 5 x’s. (Dcif, ch 1) 4 x’s. (Dcif, ch 1) 5 x’s. Dcib in the last window. Chain 3 and turn.
Drop CC in front.
Row 10a: (Dcif, ch 1) 5 x’s. (Dcib, ch 1) 5 x’s. (Dcif, ch 1) 5 x’s. Dc in last window.
Row 10b: (Dcif, ch 1) 4 x’s. (Dcib, ch 1) 6 x’s. (Dcif, ch 1) 4 x’s. Dcif in the last window. Chain 3 and turn.
Drop CC in back.
Row 11a: (Dcib, ch 1) 4 x’s. (Dcif, ch 1) 7 x’s. (Dcif, ch 1) 4 x’s. Dc in the last window.
Row 11b: (Dcib, ch 1) 3 x’s. (Dcif, ch 1) 8 x’s. (Dcif, ch 1) 3 x’s. Dcib in the last window. Chain 3 and turn.
Drop CC in front.
Row 12a: (Dcif, ch 1) 3 x’s. (Dcib, ch 1) 9 x’s. (Dcif, ch 1) 3 x’s. Dc in last window.
Row 12b: (Dcif, ch 1) 2 x’s. (Dcib, ch 1) 10 x’s. (Dcif, ch 1) 2 x’s. Dcif in the last window. Chain 3 and turn.
Drop CC in back.
Row 13a: (Dcib, ch 1) 2 x’s. (Dcif, ch 1) 11 x’s. (Dcif, ch 1) 2 x’s. Dc in last window.
Row 13b: (Dcib, ch 1). (Dcif, ch 1) 12 x’s. (Dcif, ch 1). Dcib in the last window. Chain 3 and turn.
Drop CC in front.
Row 14a: Dcif, ch 1. (Dcib, ch 1) 13 x’s. Dcif, ch 1. Dc in the last window.
Row 14b: Dcib, ch 1) 14 x’s. Dcif in the last window. Fasten off.
Row 15a: Dcif across. Dc in the last window. Ch 1 and turn.
Border (While this is not technically necessary, it will hold both sides of the fabric together.)
Work 2 sc in the corner over both MC and CC (for felted version, work over MC only). Working down the side of the square, sc between MC and CC. 3 sc in corner. Repeat around working one sc in the beginning corner. Join with sl st in first sc.
(124 sc). Fasten off.
Make 2 squares.
Side and Bottom Panel
With MC, ch 94. Sc in second sc from hook and in each remaining chain. Chain 1 and turn. (93 sts) Sc in each st across. Chain 1 and turn. (93 sts) Repeat the last row 2 times. Fasten off.
Working into the unused loop of the base chain, with CC sc in each stitch across. Chain 1 and turn. (93 sts) Sc in each sc across. Chain 1 and turn. (93 sts) Repeat the last row 2 times. Fasten off.
Join MC, sc in each stitch across, chain 1 and turn. (93 sts). Repeat the last row 3 times. Fasten off. For felted bag, add another section in both MC and in CC.
Join Squares and Sides
Beginning in center stitch of the top corner, using the zipper join (slip stitching through the back loop of stitches from each side in a one-to-one ratio) or favorite join, attach the side panel to one square. Repeat with other square being careful to make sure the set-up row (which tends to be a little fuller) is at the bottom of the bag on each side.
For felted bag, join CC to top of bag and sc in each stitch around. Join with sl st in first sc and fasten off. Join MC and work 3 rows of sc in the same manner. Finish with one row of sc in CC and fasten off. Weave in ends.
Handles
Row 1: With CC held double, leaving an 8” tail chain 35 (48), sc in the second chain from hook and each chain across. (34/47 sts) Chain 1 and turn.
Row 2: Sc in each stitch across. Chain 1 and turn.
Row 3: Repeat Row 2.
Row 4: Slip stitch in first 4 sts. Fold work in half lengthwise so edges line up. Slip st top of the last row and base chain together until 4 sts remain. Slip stitch in the last 4 sts. Fasten off leaving an 8” tail.
For unfelted bag, use tails to sew handles to the bag with small whip stitches using the square motif to center handles.
For felted bag, simply run bag and handles through a load of wash and allow to dry molding bag and handles into wished-for shape. The bag will end up at about 75% of the size of the original bag. Use a thread to sew handles in place.
This makes a cute gift or project bag. Upsize it and you have a beach bag; downsize it and you’ve made a little girls purse. Bonus, it’s totally reversible.
More crochet projects for you