
Create Your Own Crochet Bucket Hat: Easy and Fun for All Levels

If you’ve been wanting a stylish hat you can actually wear (and make again and again), this basic crochet bucket hat is a perfect place to start. The tutorial below walks you through the full process in a clear, beginner-friendly way.
Even if you’re newer to crochet, you’ll see how a bucket hat is built step by step—so you can follow along, pause when needed, and confidently shape your hat as you go.
How a Basic Crochet Bucket Hat Is Constructed (Crown, Sides, Brim)
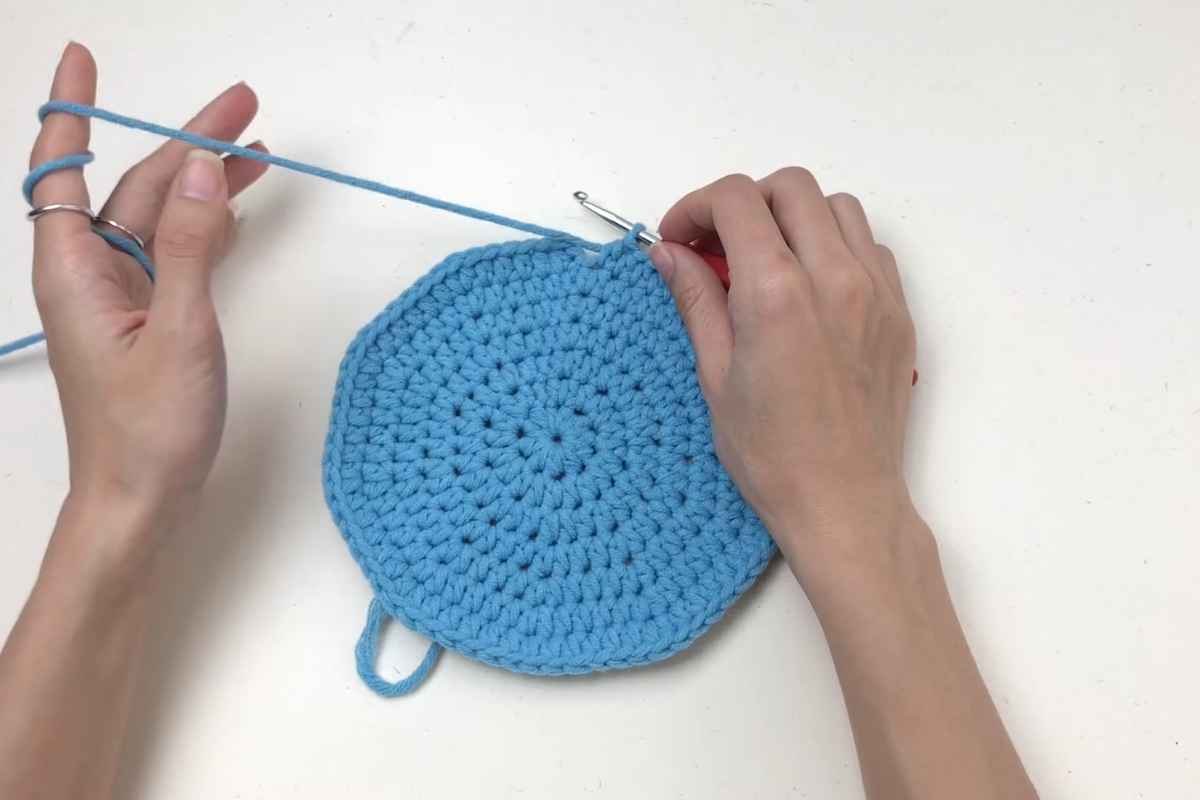
A classic crochet bucket hat is made in three main sections: the crown (top), the bucket/sides, and the brim. Once you understand that structure, the whole project feels much more manageable—because you’re just repeating simple steps while the shape forms naturally.
Refill Your Creative Cup
Feeling stuck or out of ideas? Let us bring the spark back to your hook. Our weekly emails deliver patterns, tips, and inspiration to keep your creativity blooming.
😍 Bring Your Crochet Mojo Back – Sign Up Now! Click on the image 👆🏼
In the video, you’ll see how to keep your rounds neat and how to adjust the shaping so the hat doesn’t come out too stiff, too floppy, or wavy. Pay extra attention to the moments where the hat transitions from the flat top into the sides—those small changes are what create that clean bucket-hat silhouette.
One more bonus: this is the kind of project you can easily customize after your first try—think different colors, different brim width, or a slightly taller bucket section for your preferred fit.
Crochet Bucket Hat Sizing + Shaping Tips You’ll See in the Tutorial

Images and patterns courtesy of ABoC Studio
Fit is everything with hats, and this tutorial covers the practical details (like yarn/hook choices and sizing guidance) inside the video, so you can match the hat to your head shape and style.
As you crochet along, keep an eye on:
- The crown diameter (this heavily affects final size)
- How the sides start to “drop” once increases change
- The brim rounds—small tweaks can change the brim from subtle to statement
If you’re a beginner, don’t worry about memorizing it all upfront—just follow the tutorial and let the hat take shape one round at a time.

Source: ABoC Studio
Hope you enjoy making this one—basic bucket hats are addictive in the best way, and they’re such a fun canvas for your own tweaks once you’ve got the construction down. If you make one, save your notes for next time so your second hat is even smoother.
—Maggie
More crochet projects for you