
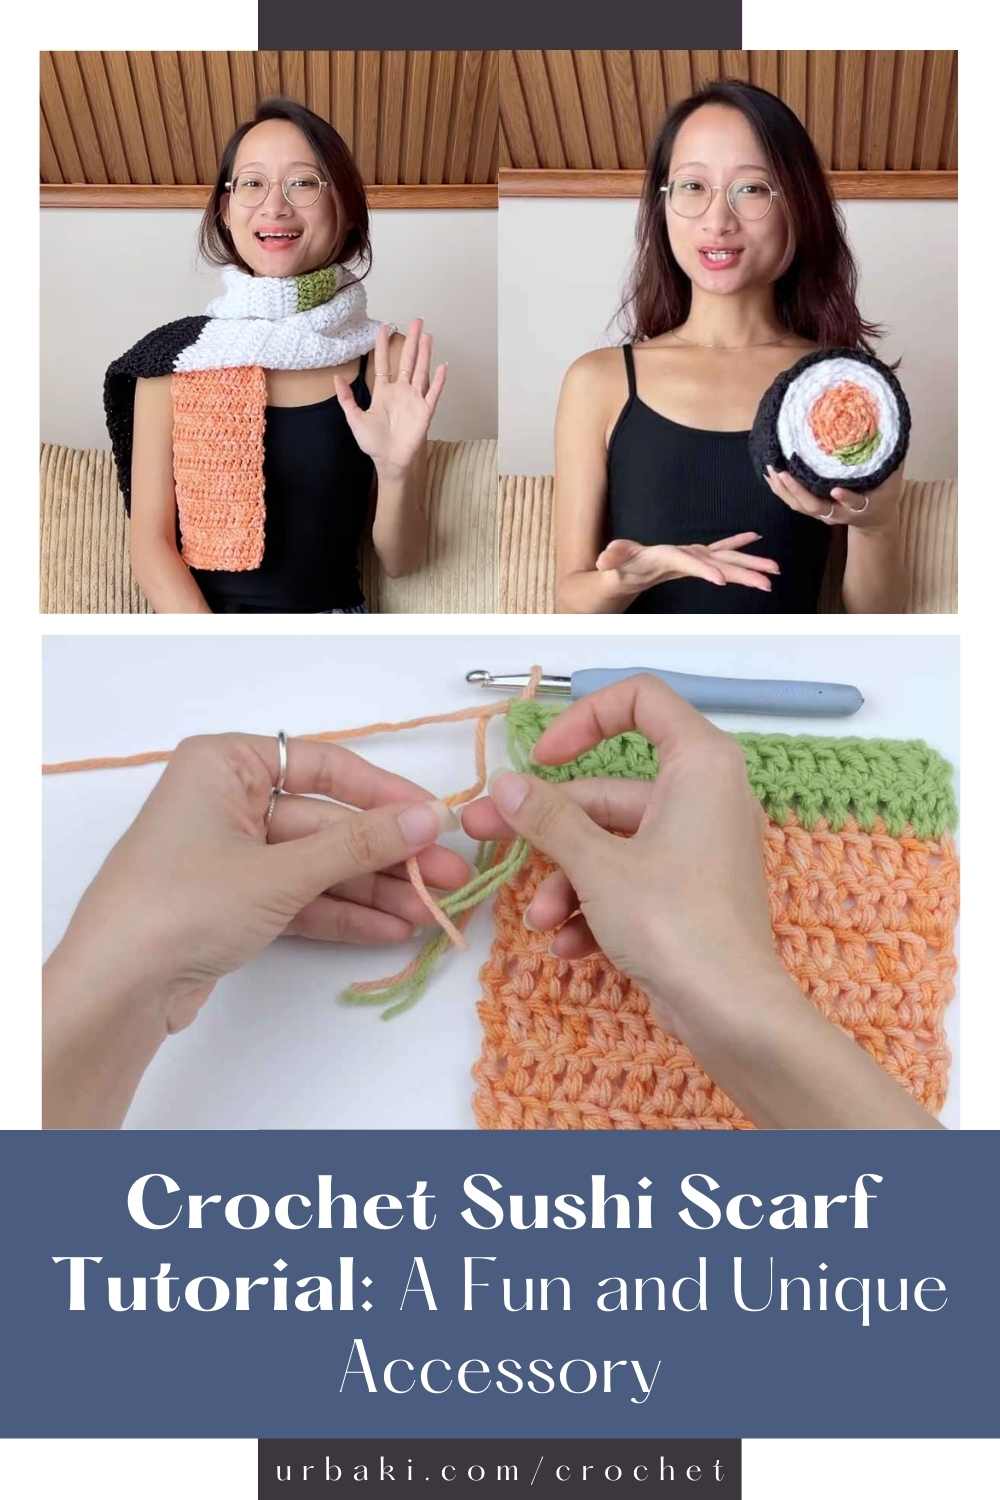
Crochet Sushi Scarf Tutorial: A Fun and Unique Accessory

Crochet is an exciting and versatile craft that can be both relaxing and rewarding. If you're new to crochet or looking to try something fun and creative, the Crochet Sushi Scarf is a perfect project for you!
In this tutorial, we’ll guide you through every step to create your very own sushi-inspired scarf. Whether you're a beginner or have some experience, this scarf will be a fun and functional accessory to add to your wardrobe. Let’s dive in!
What You’ll Need
Before you start crocheting your Sushi Scarf, let’s gather the necessary materials. The following supplies will help you create a unique scarf with sushi-themed elements:
- Yarn: For this project, you’ll need a few colors of yarn. We recommend using a soft worsted weight yarn in white, green, orange, and brown to represent the rice, seaweed, sushi fillings, and wasabi, respectively.
- Crochet Hook: A 5mm (H-8) crochet hook will work perfectly for this project.
- Yarn Needle: This will help you weave in the ends when you’re finished.
- Scissors: To cut the yarn once you finish each part.
- Stitch Markers: These can be handy to mark your starting point or to separate sections of the scarf.
With your materials ready, let’s jump into the steps!
Making the Sushi Rice Base
The foundation of the scarf will mimic the sushi rice. This part will be white and will give the scarf its distinctive look.
Start with a Foundation Chain
Begin by creating a foundation chain of 30 stitches. This will determine the width of your scarf. Feel free to adjust the number of stitches to make it wider or narrower depending on your preference.
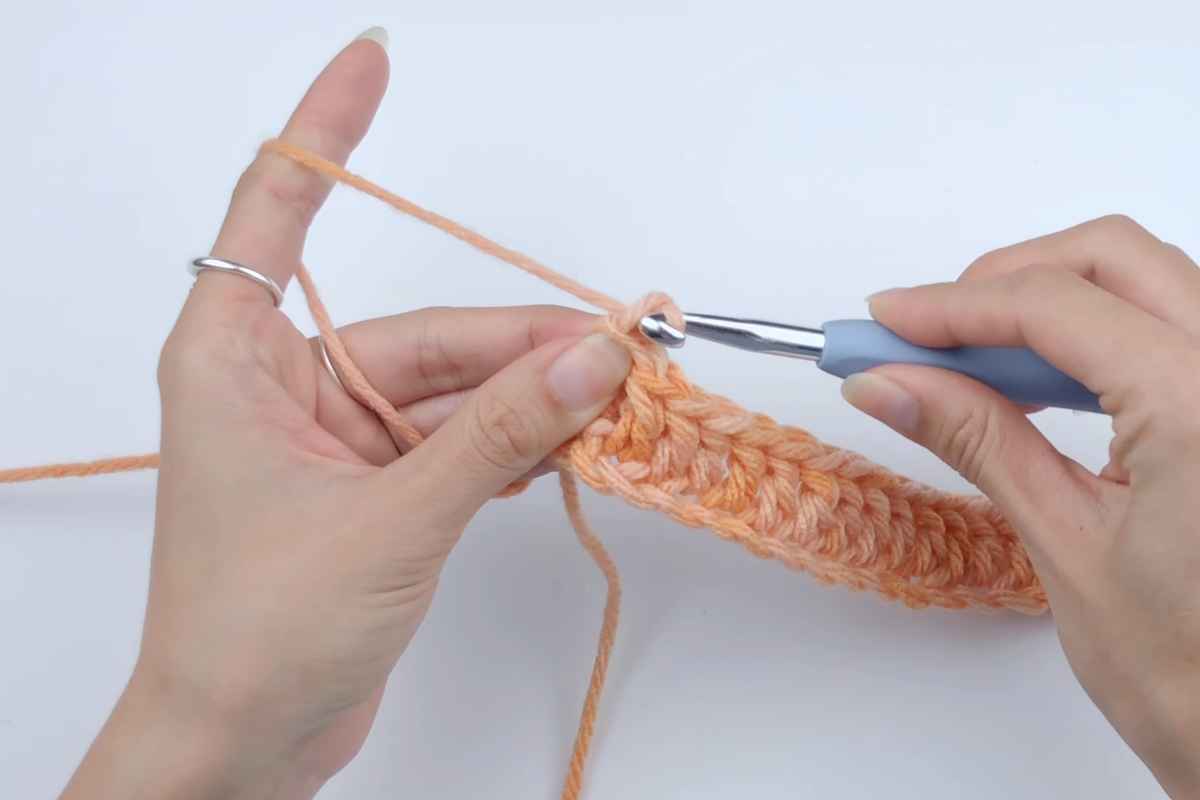
Row 1: Crochet the First Row of the Rice Base
- Turn your work around and single crochet (sc) into each chain stitch across the row. You should end up with 30 stitches in total.
- Chain 1 and turn your work around to prepare for the next row.
Row 2 and Beyond
- Repeat the single crochet stitch for each row, always chaining 1 and turning your work at the end of each row.
- Continue until your piece measures approximately 6 inches in length or as long as you would like your scarf to be. This will create a solid, sturdy base for the sushi scarf.
Adding the Seaweed Strip
Now that you have the rice base ready, it’s time to add the seaweed strip. This will give your scarf the signature sushi look and contrast nicely with the rice.
Starting the Seaweed
- With green yarn, attach it to the end of your rice base using a slip knot.
- Crochet a foundation chain of 30 stitches using the green yarn.
- Turn and single crochet into each chain across, just like you did for the rice base. Once you reach the end, chain 1 and turn your work.
Continue the Seaweed Strip
- Repeat the single crochet for each row until you reach 3 rows of green yarn.
- This will create a narrow seaweed strip along the length of the scarf. Once you've completed the seaweed section, fasten off the green yarn.
Making the Sushi Filling
Next, we will add the sushi filling, which could be represented by a variety of different yarn colors to represent different sushi types such as salmon, tuna, or vegetables. You can get creative here! For this tutorial, we’ll be making a salmon sushi filling.
Create the Sushi Filling
- Choose a yarn color for the filling. For salmon sushi, we suggest using an orange yarn.
- Attach the orange yarn at the beginning of the green seaweed strip using a slip knot.
- Crochet a chain of 10 stitches.
- Turn your work and single crochet across the chain, just like you did for the rice and seaweed sections.
Row 2 and Beyond
- Repeat the process for about 5 rows until you’ve created a rectangular piece of "sushi filling."
- After completing the rows, fasten off the yarn.

Adding the Wasabi and Garnishes
To complete the sushi theme, we’ll add wasabi and other garnishes to make the scarf even more fun.
Create the Wasabi
- For the wasabi, use a small amount of green yarn. You only need a small section of wasabi, so don’t worry about making it too large.
- Attach the green yarn to one end of the scarf and crochet a chain of 5 stitches.
- Turn your work and single crochet in each chain across.
Repeat the Process
- Continue making single crochet stitches for about 2 more rows, creating a small square of wasabi.
- Once you’ve finished, fasten off the yarn and weave in the ends using the yarn needle.
Assembling Your Sushi Scarf
Now that all your elements are created, it’s time to assemble your Sushi Scarf!
Align the Pieces
Lay your rice base flat on a surface. Place the green seaweed strip on top of the rice, then align the orange sushi filling on top of the seaweed. Finally, place the small green wasabi piece on the side.
Sew the Pieces Together
Using your yarn needle and the same yarn color, sew the rice, seaweed, sushi filling, and wasabi sections together. Be sure to leave a bit of space between the sections to make each one stand out. You can also add a few decorative stitches to make the sushi elements look more realistic.
Final Touches
Once everything is sewn together, take a moment to check the overall look of your scarf. Feel free to adjust the pieces, add more garnishes, or even create additional sushi fillings for more variety. Once satisfied, weave in any remaining yarn ends.

Sushi Style, Crocheted with Love!
Congratulations, you’ve now completed your very own Crochet Sushi Scarf! This project is not only fun and creative but also a great way to practice your crochet skills. Whether you’re making it for yourself or as a gift, this quirky sushi scarf is sure to catch everyone’s attention.
Crocheting is a wonderful way to express creativity and make unique, functional accessories. You can even experiment with different types of sushi fillings or colors to customize your scarf further. Happy crocheting, and enjoy wearing your sushi-inspired creation!
Images and patterns courtesy of ABoC Studio
Enjoy The Video Tutorial

Source: ABoC Studio
Did you find this post useful or inspiring? Save THIS PIN to your Crochet Board on Pinterest!
More crochet projects for you