
Crochet the Perfect Bunny Ear Balaclava for Cold Days

Crocheting a Bunny Ear Balaclava is a delightful project that combines warmth and a touch of whimsy. This cozy accessory not only keeps you warm during chilly days but also adds an adorable element to your wardrobe.
Whether you’re new to crochet or an experienced maker, this project will be fun and engaging. In this tutorial, we’ll guide you step by step to create your very own bunny ear balaclava.
Materials Needed
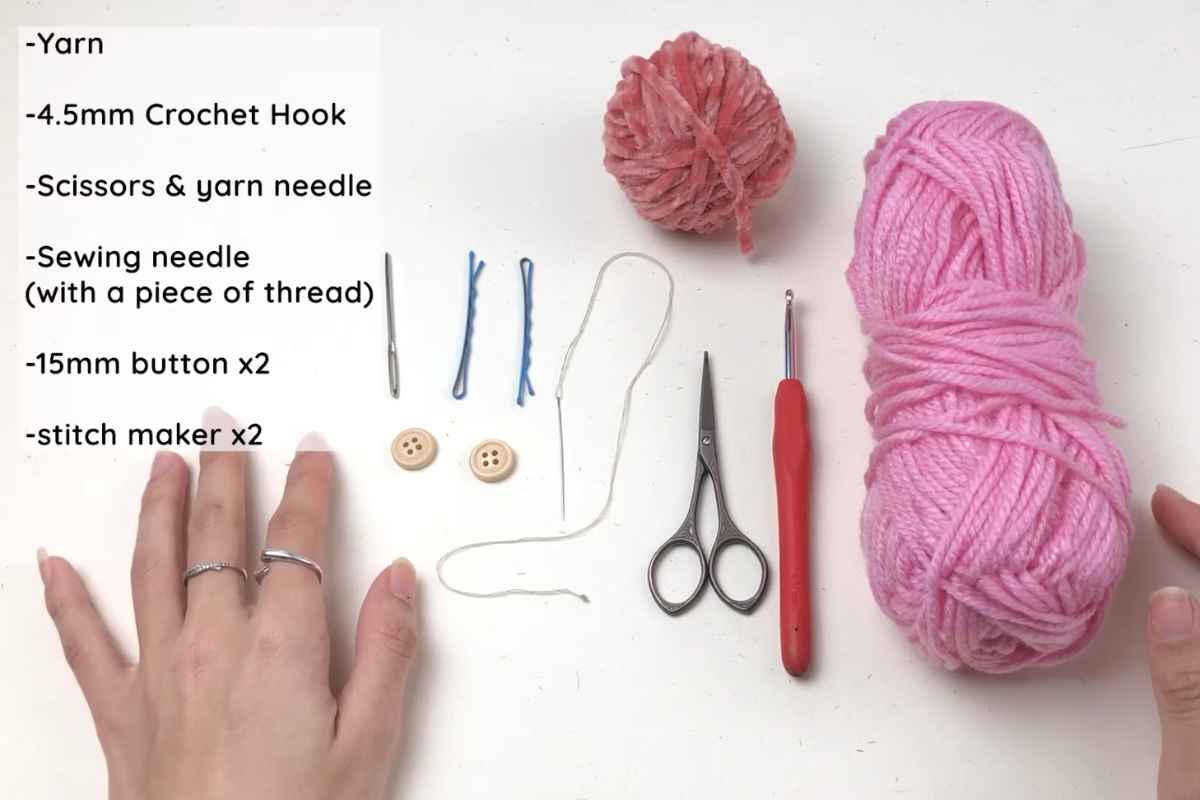
Before you start, make sure you have all the necessary materials:
- Yarn: Choose a soft, warm yarn. A medium weight yarn (like worsted weight) works best for this project. You can choose your favorite color, but neutral shades like beige, gray, or white will give a classic bunny look.
- Crochet Hook: Use a hook size appropriate for your yarn (usually around H/8 – 5mm for worsted weight yarn).
- Stitch Marker: To keep track of your rounds.
- Yarn Needle: For weaving in ends and sewing parts together.
- Scissors: To cut your yarn when finished.
- Optional: A pom-pom maker or faux fur pom-pom for the tail.
Once you have everything ready, let's dive into the creation of your bunny ear balaclava.
Refill Your Creative Cup
Feeling stuck or out of ideas? Let us bring the spark back to your hook. Our weekly emails deliver patterns, tips, and inspiration to keep your creativity blooming.
😍 Bring Your Crochet Mojo Back – Sign Up Now! Click on the image 👆🏼
Start with the Foundation
Creating the Balaclava Base
To begin, you’ll need to create the base of the balaclava, which will fit snugly over your head and cover your neck. This part is crocheted in the round, ensuring no seams are visible.
- Make a Magic Ring: Start by creating a magic ring, which is a great method to avoid a hole in the center of your work.
- Round 1: Chain 3 (this counts as the first double crochet), then make 11 more double crochets into the magic ring. Pull the ring tight to close.
- Rounds 2 to 6: Continue crocheting in the round by increasing evenly around. For each round, you’ll crochet two double crochets in each stitch to double the stitches from the previous round. This helps to shape the base of the balaclava.
- Round 7 and onward: Once you’ve increased to the size you want, switch to single crochet for the remaining rounds to form a tight, comfortable fit around your neck and face. The length should be enough to cover your neck but leave your face exposed.

Adding the Bunny Ears
Shaping the Bunny Ears
Now comes the fun part: adding the bunny ears. These are worked separately and then attached to the balaclava.
- Start with the Ear Base: Using your yarn, start by creating a chain of 10 stitches. This chain will serve as the base of each ear.
- Rounds 1 to 4: Work in rows of half double crochet (HDC). Turn your work at the end of each row and continue until the ear reaches your desired length.
- Shaping the Ear: To give the ear its characteristic shape, you will decrease the number of stitches in each row towards the top. This ensures that the ear tapers to a point at the top, just like a bunny’s ear.
- Repeat for the Second Ear: Once you’ve finished the first ear, repeat the same process to make the second ear.
Attaching the Bunny Ears
Once both ears are complete, it’s time to attach them to the top of the balaclava.
- Position the Ears: Place the ears where you want them on the balaclava. They should sit symmetrically at the top, but you can adjust the placement based on your preference.
- Sewing the Ears: Use a yarn needle and the same yarn to carefully sew the ears onto the balaclava. Be sure to secure the ears tightly so they stay in place.

Finishing Touches
Adding a Pom-Pom Tail (Optional)
For an extra cute factor, consider adding a fluffy pom-pom tail to the back of your balaclava. This gives the entire project an even more playful vibe.
- Create the Pom-Pom: Use a pom-pom maker or wrap your yarn around your fingers to create a fluffy pom-pom. Tie it off in the middle and trim the ends to make it even.
- Attach the Pom-Pom: Once your pom-pom is complete, sew it onto the back of the balaclava. It should sit just above the neck area, adding a fun detail.
Weaving in the Ends
The final step is to weave in any loose yarn ends. This ensures your work is neat and secure. Simply use your yarn needle to tuck any loose ends into the stitches so they don’t unravel.

Enjoy Your Creation
Now that you’ve completed your bunny ear balaclava, you can enjoy wearing it on chilly days, whether you're out running errands or relaxing at home.
Its combination of warmth and whimsy makes it an instant favorite for anyone who loves cozy accessories.
This crochet project is an excellent way to practice your skills while creating something both functional and fun. Whether you’re making it for yourself or as a gift for a friend, the bunny ear balaclava is sure to bring smiles and warmth wherever it goes.
Tips for Customizing Your Balaclava
While this tutorial uses a basic design, there are plenty of ways to personalize your bunny ear balaclava. Here are some tips to make it your own:
- Color Choices: Experiment with different yarn colors for a unique look. Soft pastels like pink, lavender, or baby blue can make the bunny ears pop, or you could create a more neutral tone for a versatile accessory.
- Ear Detailing: For added realism, you could use a second color for the inside of the bunny ears. Simply crochet a small rectangle, fold it in half, and attach it to the inner ear.
- Size Adjustments: Adjust the number of stitches and rows in the balaclava base to fit different head sizes, ensuring a comfortable fit for all.
A Cozy and Adorable Crochet Project
The bunny ear balaclava is a creative and rewarding project that adds charm and comfort to any winter wardrobe. It’s perfect for crocheters of all skill levels and offers endless opportunities for customization.
Whether you’re wearing it for fun or as a functional piece, this crochet balaclava will surely turn heads and keep you warm.
Get your hooks ready and start creating your very own bunny ear balaclava today!
Images and patterns courtesy of ABoC Studio
Enjoy The Video Tutorial
")
Source: ABoC Studio
Did you find this post useful or inspiring? Save THIS PIN to your Crochet Board on Pinterest!

More crochet projects for you