
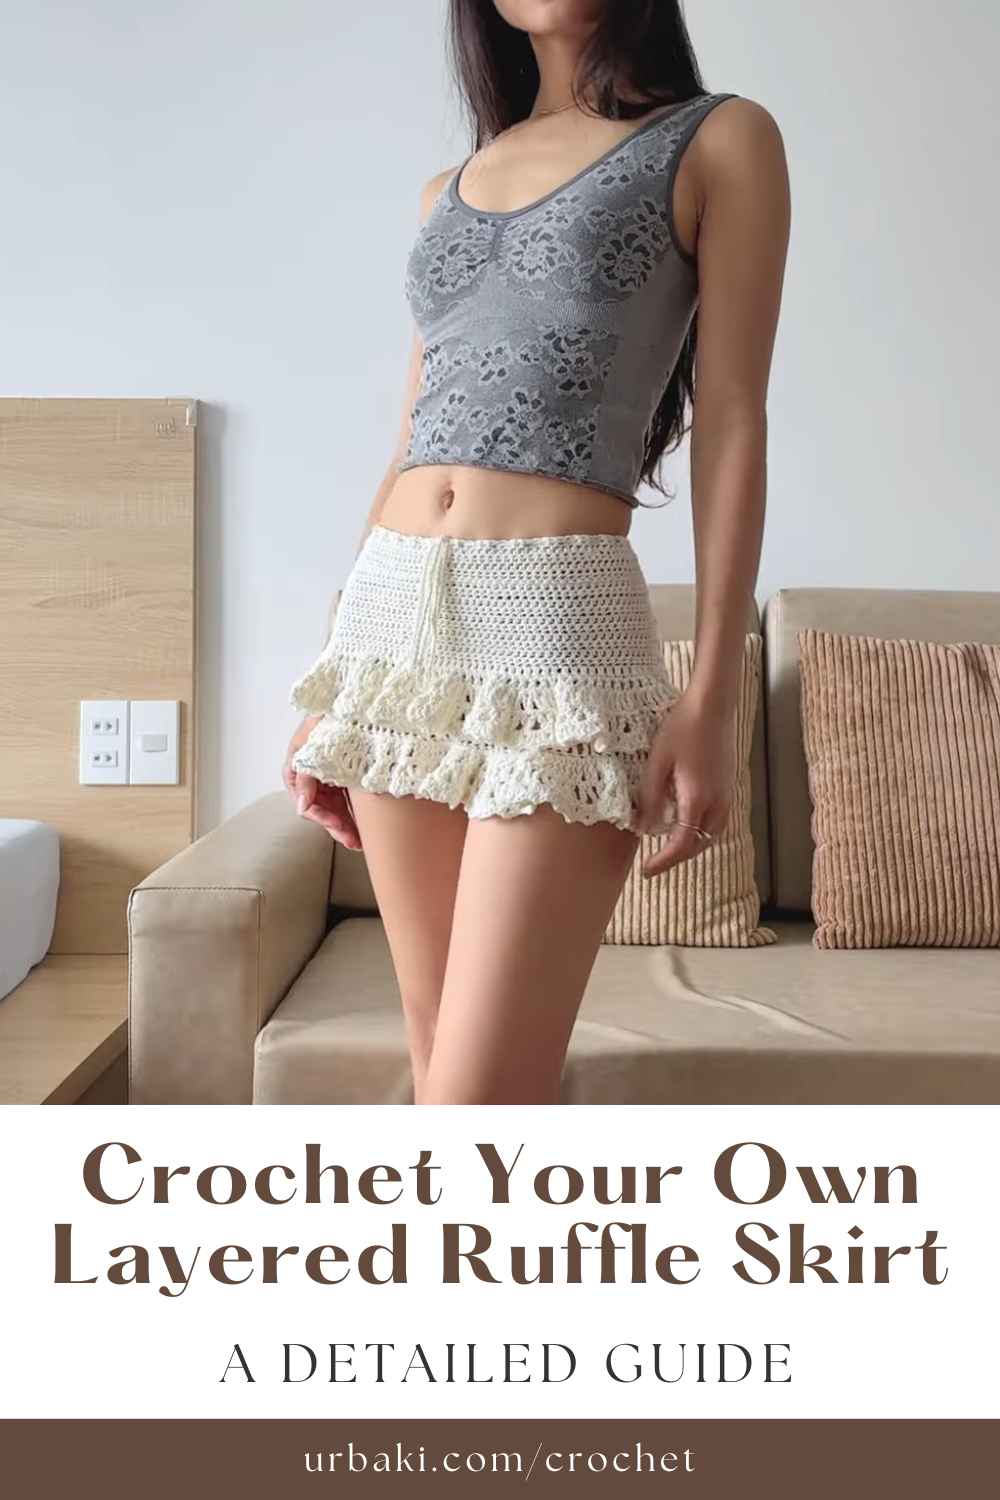
Crochet Your Own Layered Ruffle Skirt: A Detailed Guide

Crocheting a layered ruffle skirt is an exciting and rewarding project that allows you to create a custom piece of clothing tailored to your unique style. This step-by-step guide will help you make a beautiful crochet skirt with a fun, layered ruffle effect.
Perfect for any season, this skirt can be customized to fit your personal taste and measurements, ensuring a one-of-a-kind garment that fits like a glove.
Materials You Will Need
Before starting your crochet layered ruffle skirt, make sure you have the following materials on hand:
- Yarn: Choose a medium-weight yarn (such as worsted weight) that suits your preferred texture and color. Light, airy yarns work best for the ruffles to maintain their flowy look.
- Crochet Hook: Select a hook that corresponds with your yarn weight. A 5mm (H-8) crochet hook is ideal for worsted weight yarn.
- Measuring Tape: Accurate measurements are key to achieving the perfect fit, so ensure you have a good measuring tape on hand.
- Stitch Markers: These will help you keep track of your rounds and pattern, especially when working in the round.
- Scissors: For cutting the yarn at the end of your project.
- Yarn Needle: For weaving in ends when your project is complete.
The Complete Guide
Step 1: Taking Accurate Measurements
The first step in making your made-to-measure skirt is to take your measurements. This ensures the skirt fits comfortably and flatters your body shape. You'll need two main measurements:
Refill Your Creative Cup
Feeling stuck or out of ideas? Let us bring the spark back to your hook. Our weekly emails deliver patterns, tips, and inspiration to keep your creativity blooming.
😍 Bring Your Crochet Mojo Back – Sign Up Now! Click on the image 👆🏼
- Waist Measurement: Wrap the measuring tape around your natural waist, ensuring it's not too tight or too loose. This will determine the starting point for your waistband.
- Length Measurement: Decide how long you want your skirt to be. For a mini skirt, measure from the waist to the desired hemline. For a longer skirt, measure down to your knees, calves, or ankles.
Step 2: Crocheting the Waistband
To begin the skirt, we'll crochet the waistband, which will form the base of the layered ruffles. The waistband should be snug enough to stay up comfortably but not too tight.
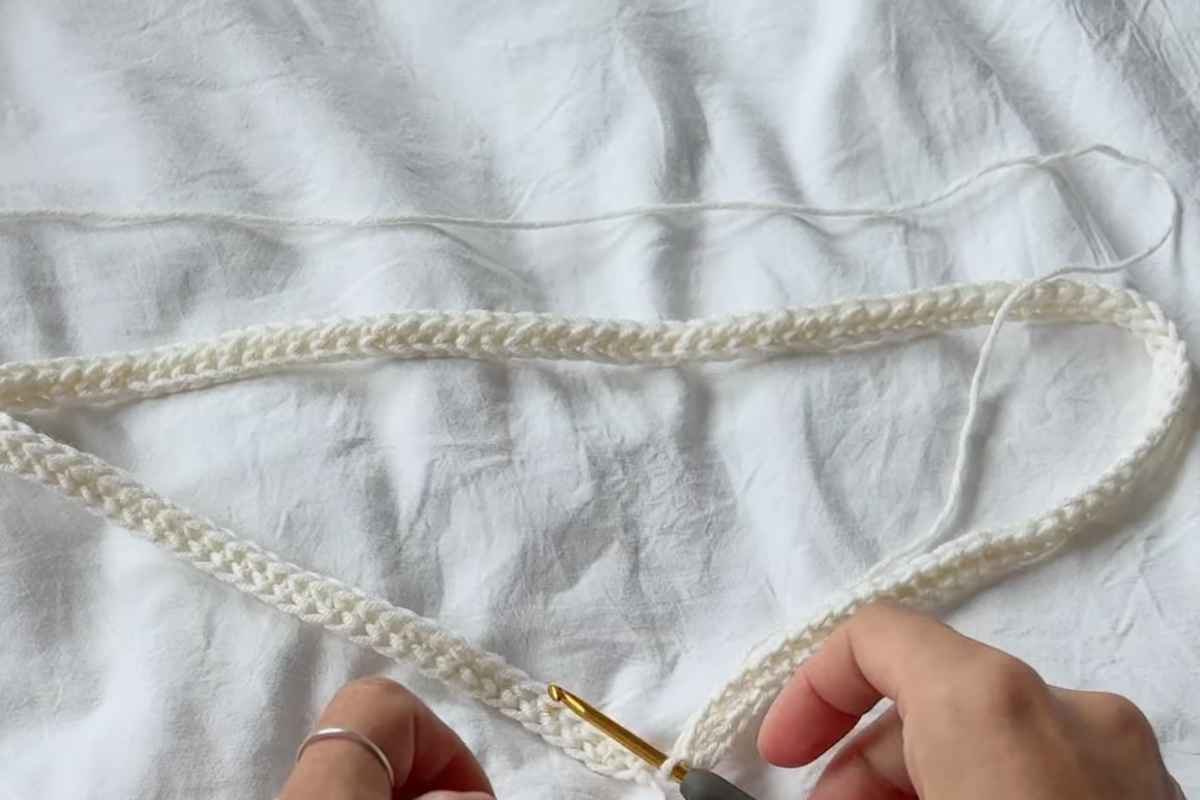
- Chain: Start by chaining the number of stitches that corresponds to your waist measurement. The chain should stretch easily to fit comfortably around your waist.
- Join the Chain: Once you've chained the necessary length, join the ends together using a slip stitch to form a ring. Be careful not to twist the chain as you join it.
- Work in Rounds: Work in single crochet (sc) around the chain for about 2–3 rounds, depending on how wide you want the waistband. This section should be firm enough to stay in place but still comfortable around your waist.
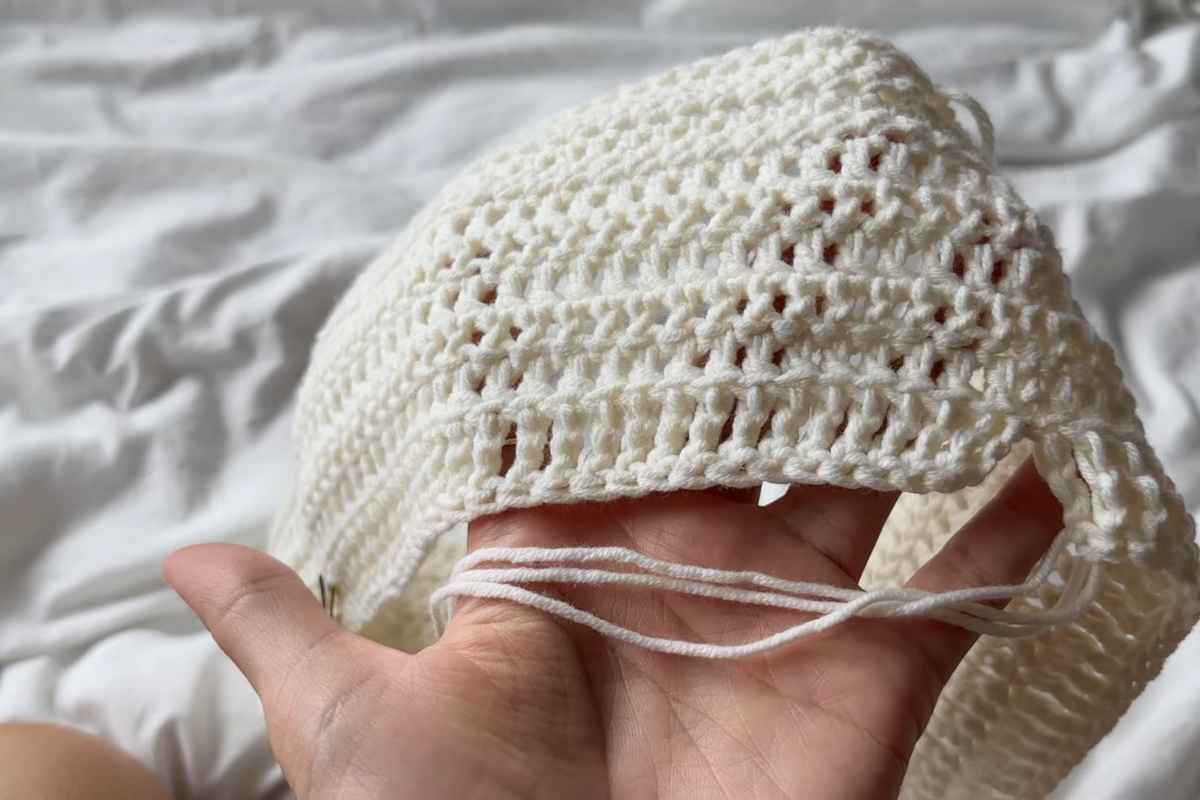
Step 3: Starting the Ruffle Layers
Now comes the fun part – creating the ruffles! To achieve a beautiful, layered effect, we will crochet each ruffle layer, gradually increasing the width of each layer.
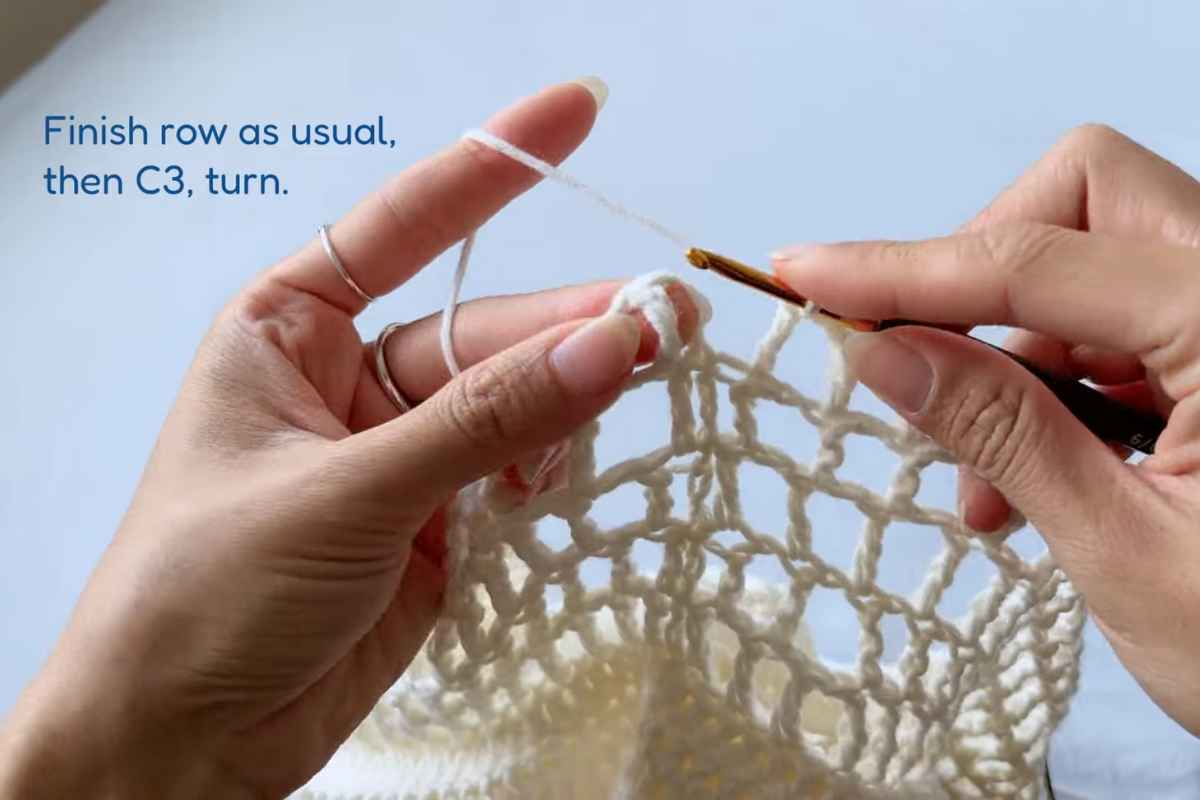
- First Ruffle Layer: After completing the waistband, move on to the first ruffle layer. To begin, work in double crochet (dc) stitches around the waistband. Increase every few stitches to create a more voluminous effect. A good rule of thumb is to increase every 3rd or 4th stitch, depending on how full you want the ruffle to be.
- Subsequent Ruffle Layers: Each additional layer of ruffles should be worked in the same manner, but with an increased stitch count. This will make each layer progressively wider and more dramatic. In each round, continue to increase your stitch count to create a fuller effect.
- Work into the Previous Layer: After completing a ruffle layer, move on to the next layer and work into the top stitches of the previous layer. This ensures that each ruffle is connected and creates a smooth transition from one layer to the next.
Step 4: Adjusting the Layers for a Perfect Fit
As you progress through the ruffle layers, try the skirt on periodically to ensure the fit is right for your body. The great thing about crocheting your own clothing is the ability to make adjustments as you go.
- Adding or Reducing Layers: If you'd like a more dramatic look, feel free to add extra ruffle layers. If you want a more subtle skirt, reduce the number of ruffles. You can also adjust the width of each layer by increasing or decreasing the number of stitches per round.
- Making the Waistband Adjustable: If you want the waistband to be adjustable, consider adding a drawstring or elastic to allow for a more flexible fit. Simply crochet the waistband as described and then thread an elastic cord or a drawstring through the top.
Step 5: Finishing the Skirt
Once you've completed all of the ruffle layers, it’s time to finish off your skirt.
- Neatening the Edges: Work a final round of single crochet (sc) around the bottom edge of the skirt to give it a clean, finished look. You can also use a decorative stitch such as a picot or shell stitch to add a little extra flair.
- Weaving in the Ends: Use your yarn needle to weave in any loose ends from your yarn. This step ensures that your skirt remains neat and secure.
- Final Try-On: Put on your new crochet ruffle skirt and make any final adjustments. You can tweak the fit, length, or volume of the ruffles to make it just right for you.
Customizing Your Crochet Layered Ruffle Skirt
One of the best parts of creating a crochet skirt is the ability to personalize it to your preferences. Here are some ways you can customize your skirt:
- Color Options: Use different colors for each ruffle layer to create a beautiful ombre effect, or keep the whole skirt in one color for a more uniform look.
- Add Embellishments: You can add buttons, beads, or crocheted flowers to give the skirt a more unique and detailed design. These can be sewn onto the waistband or scattered throughout the ruffles.
- Length Variations: Adjust the length of your skirt by adding or removing ruffle layers. You can also decide to make a mini skirt or a full-length version, depending on the occasion.
Styling Your Crochet Layered Ruffle Skirt
Once your skirt is complete, you’ll be excited to wear it! Here are a few ideas for styling your new crochet creation:
- Casual Look: Pair your crochet skirt with a simple t-shirt or tank top. Add a pair of sandals or flip-flops for a laid-back, summer vibe.
- Dressier Look: Dress up the skirt with a fitted blouse or a cute cropped sweater. Pair it with heels or ankle boots for a chic, evening look.
- Layer for the Cold: In cooler weather, layer the skirt with leggings or tights and add a cozy cardigan or jacket.
Personalize Your Style
Crocheting a layered ruffle skirt is a fantastic project that allows you to create a custom garment tailored to your body and style.
Whether you’re looking for a skirt for a special occasion or a fun everyday look, this made-to-measure tutorial provides all the steps you need to make a beautiful, one-of-a-kind piece of clothing.
With the ability to customize the length, color, and embellishments, you can create a skirt that’s uniquely yours. Happy crocheting!
Images and patterns courtesy of ABoC Studio
Enjoy The Video Tutorial

Source: ABoC Studio
Did you find this post useful or inspiring? Save THIS PIN to your Crochet Board on Pinterest!
More crochet projects for you