
French Knots in Amigurumi: Easy Steps for Stunning Results

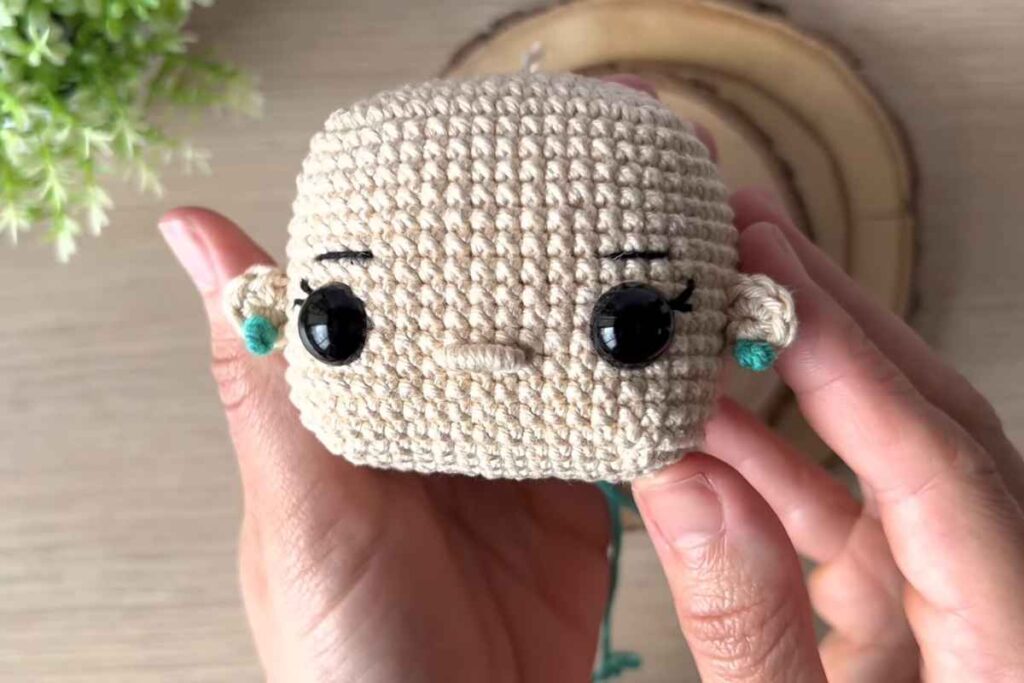
Amigurumi is a craft that brings joy and creativity into every stitch. Among the many techniques that amigurumi artists use to add intricate details to their creations, the French knot stands out as a versatile and simple method to create charming features.
Whether you're adding eyes, cheeks, or any other small detail, the French knot is a must-know skill. In this guide, we'll walk through the steps on how to make the French knot in amigurumi, explaining everything you need to know for a flawless finish.
What Is a French Knot in Amigurumi?
A French knot is a decorative stitch that creates small raised knots, often used for facial features or textures in amigurumi projects.
This technique is popular because it gives a three-dimensional effect and a smooth texture, perfect for creating small details like eyes, noses, or even the centers of flowers.
Refill Your Creative Cup
Feeling stuck or out of ideas? Let us bring the spark back to your hook. Our weekly emails deliver patterns, tips, and inspiration to keep your creativity blooming.
😍 Bring Your Crochet Mojo Back – Sign Up Now! Click on the image 👆🏼
Though it may seem tricky at first, the French knot is easy to learn once you get the hang of it. This stitch is done with just a few simple movements that create a looped knot on the fabric's surface, adding that extra touch to your amigurumi pieces.
Materials You'll Need
Before we dive into the steps, let's make sure you have the right materials for this technique. The great thing about French knots is that you only need a few tools:
- Yarn: You can use any yarn suitable for your amigurumi project. Choose a color that matches the detail you're adding (for example, black for eyes or pink for cheeks).
- Yarn Needle: A tapestry needle with a large eye will make it easier to thread the yarn through.
- Scissors: For trimming your yarn ends after completing the knot.
- Crochet Hook: To work on your amigurumi base (optional, if you haven’t completed the project yet).
Once you have everything ready, you’re set to start creating French knots in your amigurumi projects!
Step-by-Step Guide: How to Make the French Knot
Now that you’ve gathered your materials, let's dive into how to make the French knot in amigurumi. Follow these easy steps to achieve the perfect knot every time.
1. Position the Yarn
Start by threading your yarn through the tapestry needle. The amount of yarn you'll need will depend on how large you want the French knot to be. Generally, a small piece is enough for one knot.
Position the needle where you want the knot to appear on your amigurumi. This could be anywhere on your project — for example, at the center of a flower or on the face for the eyes.
2. Insert the Needle into the Fabric
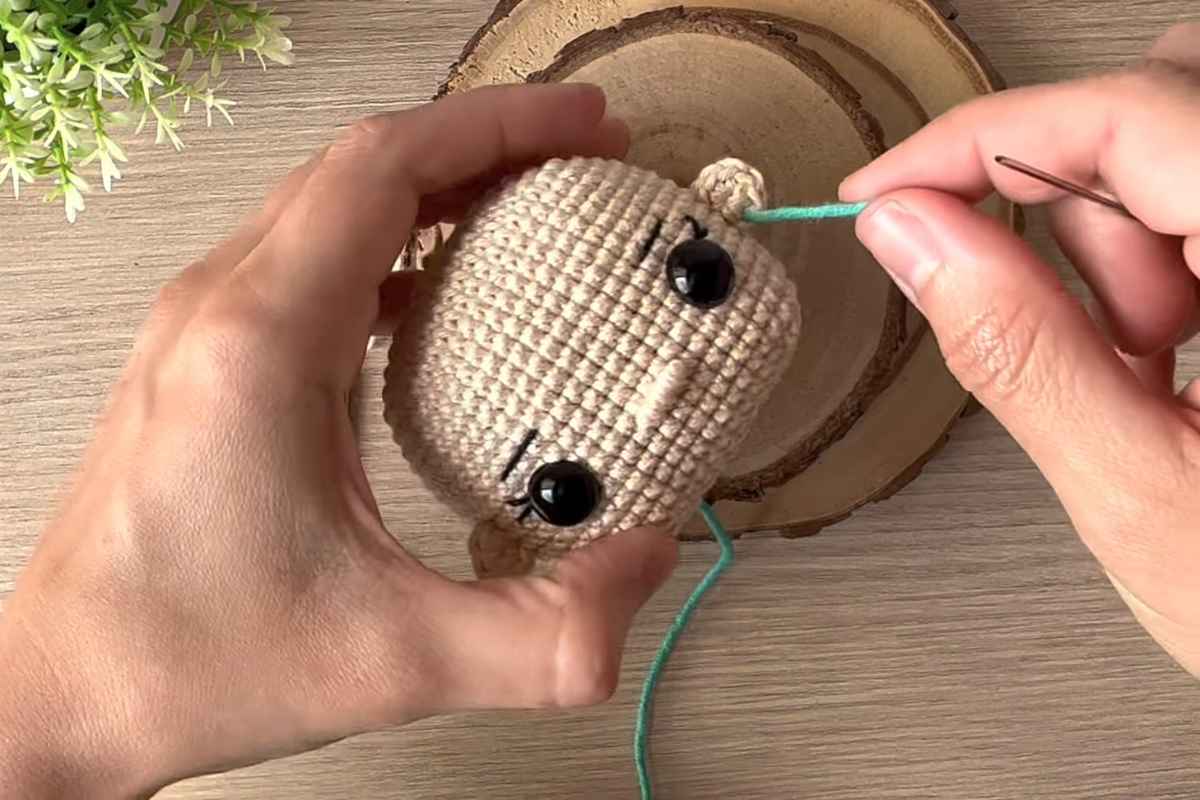
Insert the needle from the back of your amigurumi piece to the front, going in at the point where you want your knot. Make sure the needle is coming out at a slight angle to give the knot a clean and defined appearance.
3. Wrap the Yarn Around the Needle
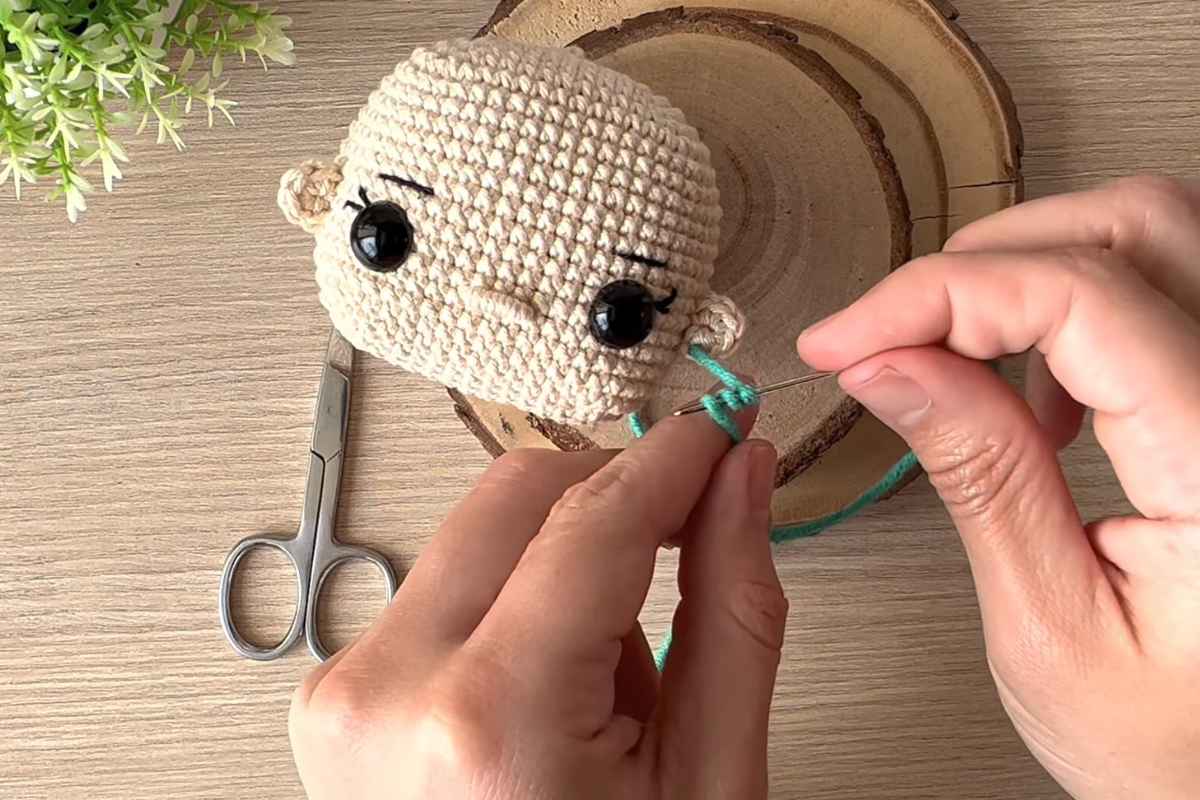
Once the needle is at the front, take the yarn and wrap it around the needle two to three times. For a larger knot, use more wraps, but for small details like eyes, one or two wraps are usually sufficient.
The number of wraps will affect the size and appearance of your knot, so feel free to experiment until you achieve your desired look.
4. Insert the Needle Back Into the Fabric
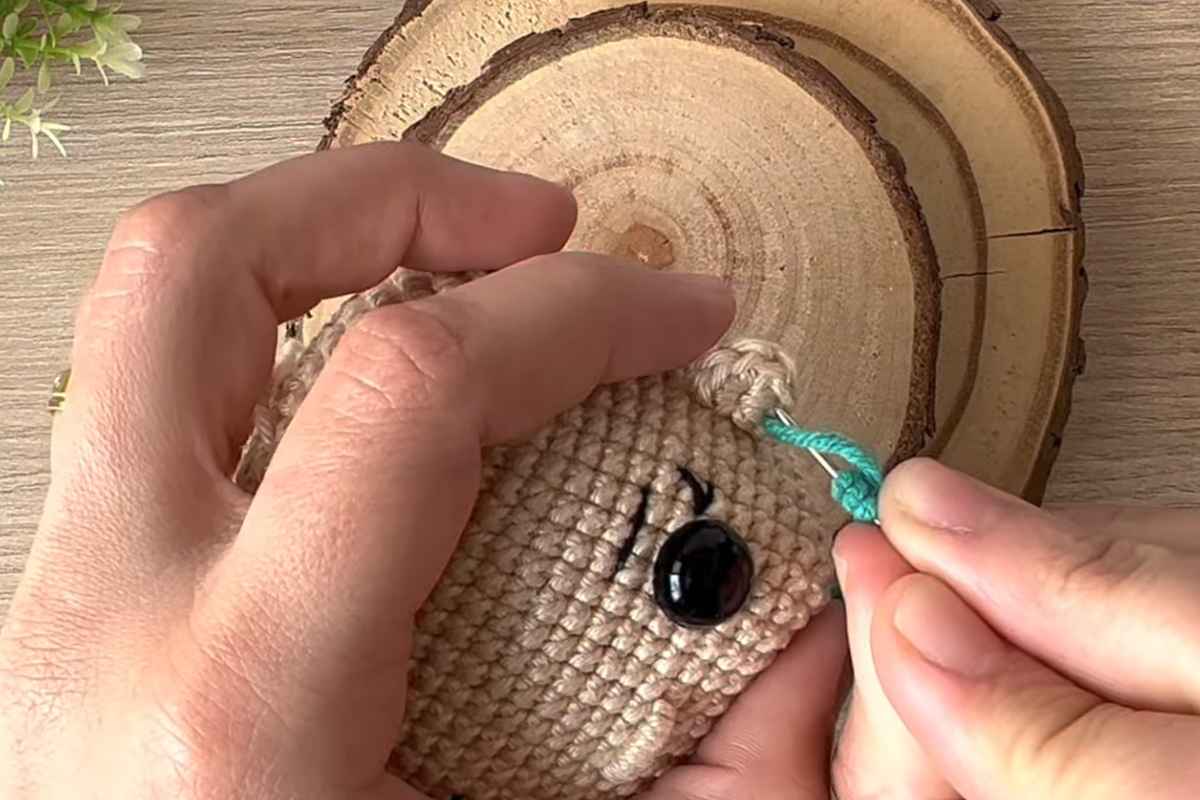
After you’ve wrapped the yarn around the needle, insert the needle back into the fabric. The needle should go into the fabric right next to where it came out.
Be sure to push the needle through the same hole, but make sure not to pull the yarn too tightly — this can distort the knot.
5. Pull the Yarn Through and Tighten the Knot
Once the needle is through, pull it gently to secure the knot. Tighten the knot by pulling the yarn on the back of your amigurumi piece.
This step will make the knot sit neatly on the surface, giving it a raised and defined appearance. Be cautious not to pull too tightly, or the knot might become too small or distorted.
6. Secure the Knot and Trim Excess Yarn
After you've pulled the yarn through, make sure the knot is secure. If necessary, you can weave in the yarn ends on the back of your amigurumi piece using the needle. Once the knot is firmly in place, trim any excess yarn, leaving just enough to secure it.
Tips for Perfect French Knots
While making French knots is simple, there are a few things to keep in mind to ensure that your knots turn out perfectly every time. Here are some tips to help you master the technique:
- Use the Right Tension: The key to a perfect French knot is using the right tension. If your yarn is too tight, the knot will be hard to make, and if it's too loose, the knot will look messy. Find a balance that works for you.
- Experiment with the Number of Wraps: If you're new to the technique, start with just one wrap. As you get more comfortable, try using two or three wraps to create a larger, more defined knot.
- Position the Knots Evenly: For a clean and professional look, make sure your knots are evenly spaced. This is especially important when making facial features like eyes or noses.
- Practice on Scrap Yarn: If you're still unsure about how to make French knots, practice on a scrap piece of yarn first. This will give you a chance to get used to the motion without worrying about ruining your project.
Common Mistakes to Avoid
Even though French knots are easy to make, it’s possible to run into a few common mistakes. Here are a few things to watch out for:
- Knots Too Tight or Loose: If your knots are too tight, they might look squished. If they’re too loose, they can look sloppy. The right amount of tension is key.
- Skipping the Wrapping Step: Make sure you wrap the yarn around the needle at least once before inserting the needle back into the fabric. Without this step, you won’t get the raised effect of the knot.
- Inconsistent Knot Sizes: If you're making multiple French knots on your project, try to keep the sizes consistent for a polished, professional look.
When to Use French Knots in Amigurumi
French knots are perfect for adding small details to your amigurumi creations. Here are a few ways to incorporate them into your projects:
- Eyes: French knots make great eyes for your amigurumi characters, especially for small creatures where you want the eyes to stand out.
- Noses and Cheeks: Use French knots to create little noses or rosy cheeks. These details will give your creations personality and charm.
- Embellishments: You can also use French knots to add texture to your amigurumi, such as creating flower centers or adding small dots of color to the body.
Enhanching Your Amigurumi
Learning how to make the French knot in amigurumi is a valuable skill that will enhance the overall appearance of your creations.
With practice, you’ll be able to add perfect knots for eyes, noses, and other small details, bringing your characters to life with personality. Remember to experiment with the number of wraps and tension to get the look that you desire.
French knots may seem like a simple stitch, but they make a huge impact on the final result of your amigurumi projects.
Whether you're creating a cute toy, a decorative piece, or a handmade gift, this small but mighty stitch will undoubtedly elevate your work. Happy crocheting!
Images and patterns courtesy of Crocheniacs | Amigurumi Teacher
Enjoy The Video Tutorial

Source: Crocheniacs | Amigurumi Teacher
More crochet projects for you