
How to Crochet a Stunning Corset Top with a Modern Twist
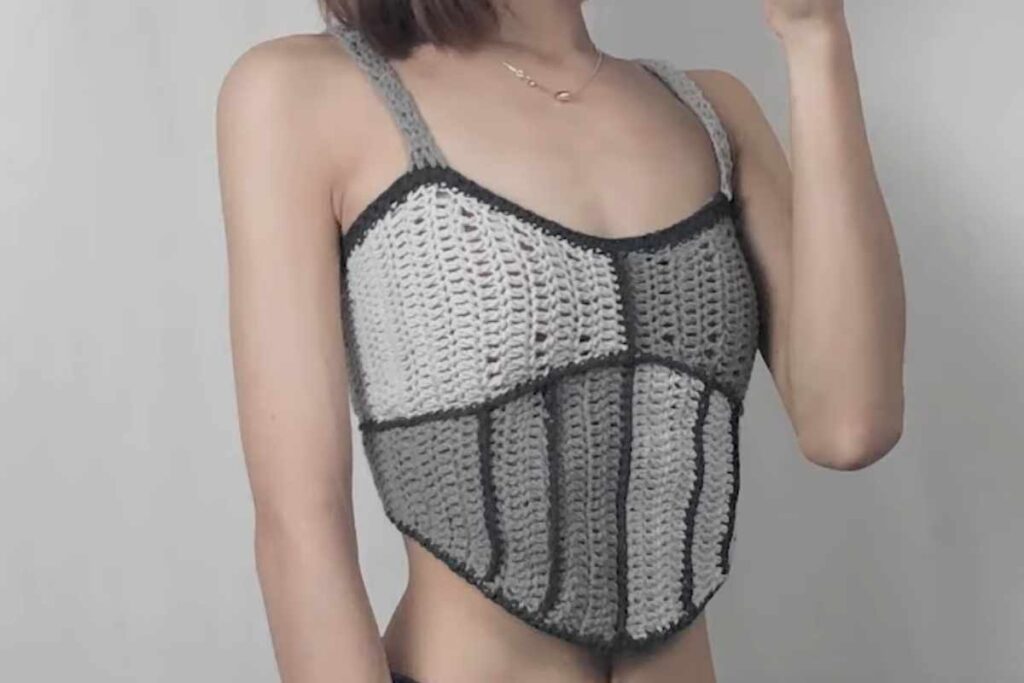
If you’ve been wanting a corset-style crochet top that looks structured but still feels wearable, this tutorial is a great one to save. The pattern is designed to work across all sizes, so you can focus on fit instead of forcing yourself into a “one-size” shape.
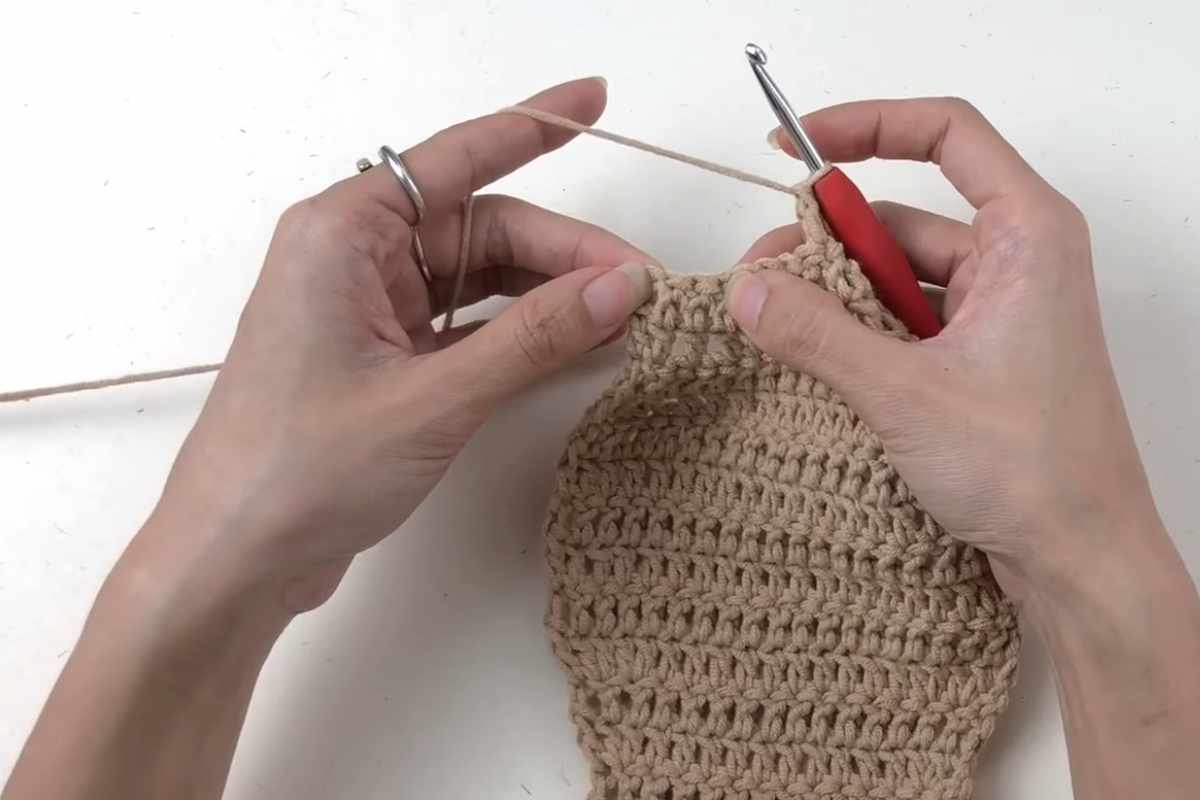
In the video, the creator shows the full process step-by-step, with the written pattern displayed along the way, so you can follow visually and stitch confidently.
How This Crochet Corset Top Gets a Custom, Flattering Fit
The best part of a crochet corset top is how adjustable it can be. Instead of guessing, you’ll see how to build the top in a way that makes it easier to match your own measurements—then fine-tune the fit as you go.
Refill Your Creative Cup
Feeling stuck or out of ideas? Let us bring the spark back to your hook. Our weekly emails deliver patterns, tips, and inspiration to keep your creativity blooming.
😍 Bring Your Crochet Mojo Back – Sign Up Now! Click on the image 👆🏼
Because corset tops are meant to feel more “snug,” it helps to pay attention to how the fabric behaves in your yarn choice. A yarn with a bit more structure can create a more defined silhouette, while a softer yarn can feel more flexible. Either way, the goal is a top that feels secure, not stiff.
Also, don’t underestimate finishing—small details like even edges, neatly woven ends, and a clean lace-up (or tie) can make a handmade corset top look instantly more polished.
Crochet Corset Top Video Tutorial With the Pattern Shown On-Screen
Follow along with the in-depth tutorial below. The pattern is shown throughout the video, which makes it easier to pause, check your place, and keep your stitch counts consistent.

Source: ABoC Studio
Materials + Finishing Tips for a Clean, Comfortable Wearable
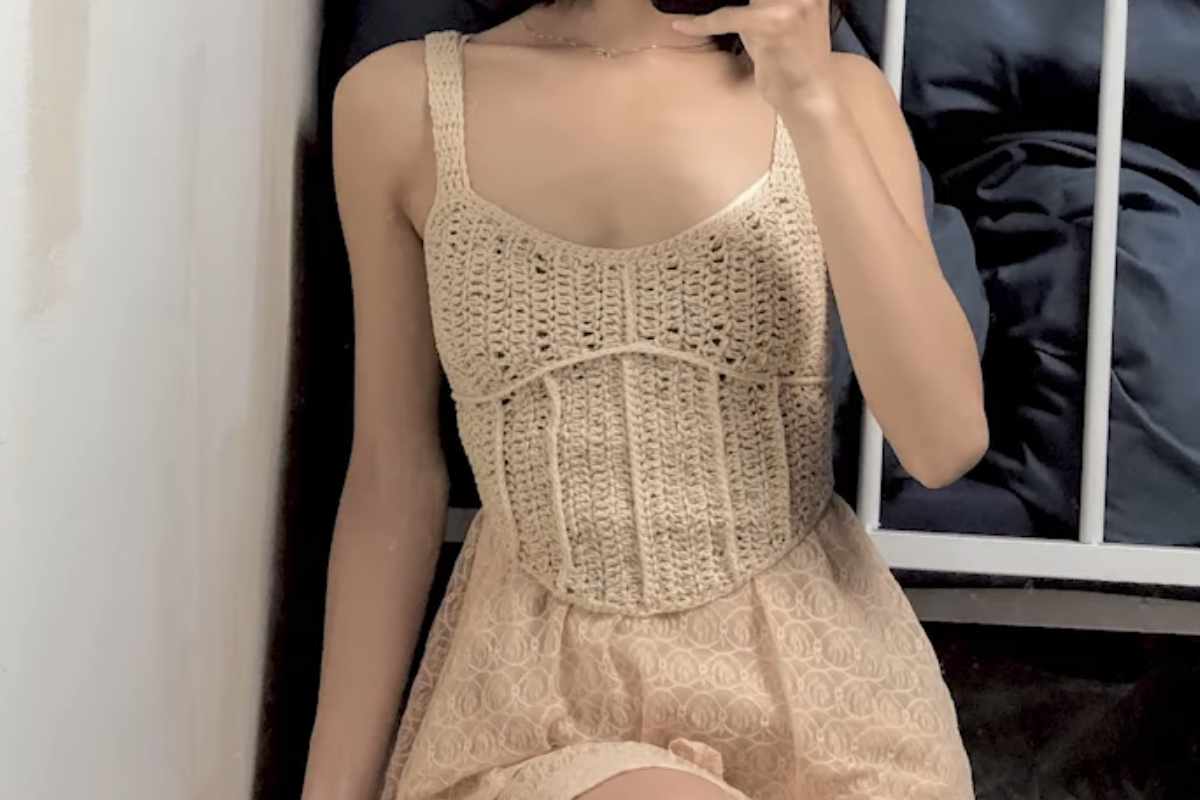
Images and patterns courtesy of ABoC Studio
You can usually make a crochet corset top with basic supplies, but these are the pieces that matter most:
- Yarn you love against your skin (comfort matters for wearables!)
- A crochet hook that matches your yarn label (or gives you a fabric you like)
- Measuring tape for sizing as you go
- Tapestry needle + scissors for finishing
- Optional: ribbon or crocheted cord for the lace-up look
For the best final result, take an extra minute to reinforce areas that get the most stress (like straps and lace-up ties), and make sure your ends are securely woven in—especially if you plan to wear this top often.
Thanks for crocheting with me today! If you make your own version, consider snapping a photo before you gift it or wear it out—crochet wearables deserve to be documented.
— Maggie
More crochet projects for you