
How to Crochet an Adorable Amigurumi Dragonfly

If you’ve been looking for a small, adorable amigurumi project, this crochet dragonfly is such a fun one to try. It’s the kind of quick make that’s perfect for using up leftover yarn, practicing shaping, and creating something giftable.
In the video tutorial below, you’ll see how the dragonfly comes together step by step, with helpful visuals for the details that can be tricky in amigurumi—like shaping the body and placing the parts neatly.
Crochet Dragonfly Amigurumi: What to Expect in This Project

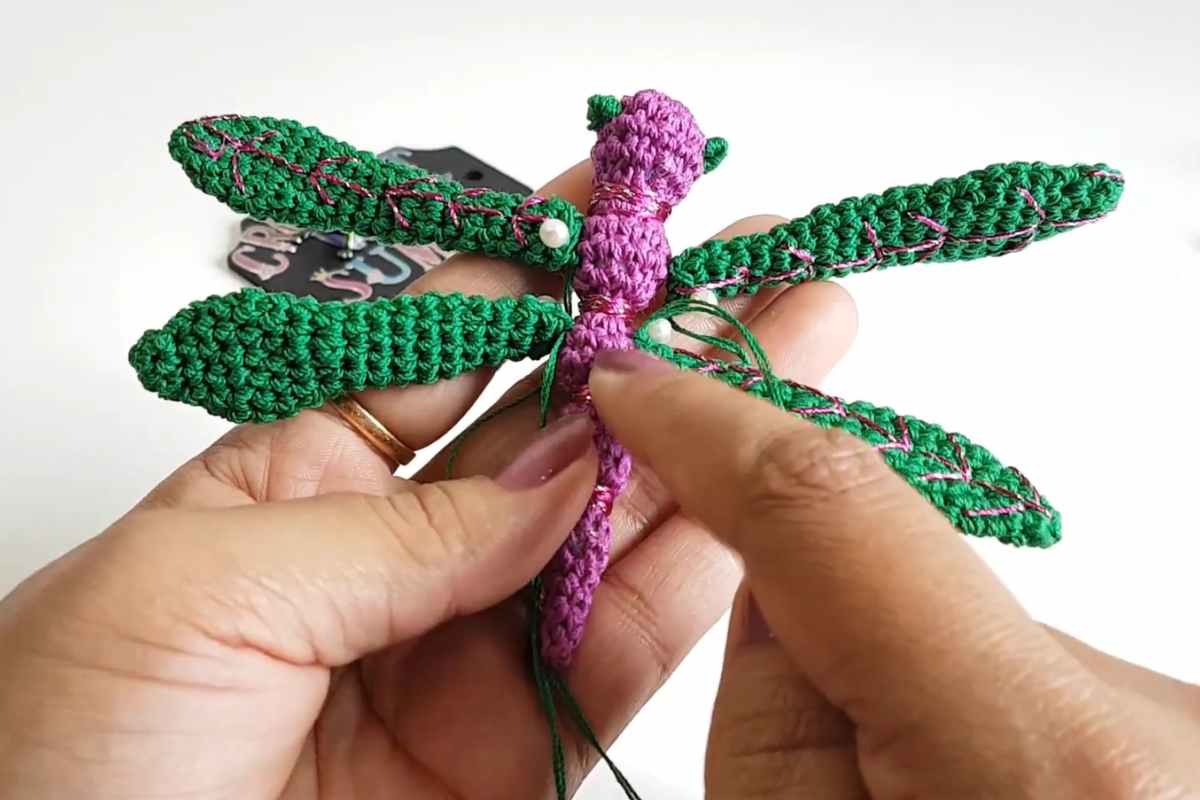
This amigurumi dragonfly is built in small sections, which makes it easier to follow along even if you’re still getting comfortable with 3D crochet. Watching the assembly process is especially helpful for getting a clean look—placement and symmetry can make a big difference in tiny projects like this.
As you crochet along, pay attention to how the pieces are formed and joined. If you ever feel stuck, it’s totally normal with amigurumi—small rounds can be easy to lose track of, so counting stitches (and using a stitch marker) is your best friend.
Refill Your Creative Cup
Feeling stuck or out of ideas? Let us bring the spark back to your hook. Our weekly emails deliver patterns, tips, and inspiration to keep your creativity blooming.
😍 Bring Your Crochet Mojo Back – Sign Up Now! Click on the image 👆🏼
Step-by-Step Crochet Amigurumi Dragonfly Video Tutorial

Source: Crochetwithsumi
Amigurumi Finishing Tips for a Neat Dragonfly
Images and patterns courtesy of Crochetwithsumi
Once your pieces are crocheted, the finishing is where this dragonfly really comes to life. Take a moment to line everything up before stitching down permanently—pinning parts in place first (or holding them temporarily) can help you avoid uneven wings or a twisted body.
Also, try to keep your sewing stitches snug but not too tight. You want everything secure, while still keeping the shape smooth and cute.
Thanks for crocheting along with us—hope this little dragonfly inspires more fun amigurumi makes!
— Maggie
More crochet projects for you