
Stylish Granny Square Halter Top You Can Make Yourself

If you’ve been saving halter tops on Pinterest and wondering if you can actually make one, this is your sign. This granny square halter top tutorial is beginner-friendly and designed so you can use any granny square style you love.
Because the look is built around the squares, it’s also a fun way to customize your top with color changes, different square designs, or even yarn you already have in your stash.
How to Make a Granny Square Halter Top Using Any Square

The core idea is simple: pick the granny square style you like, crochet the number of squares needed for the front, and then connect everything in a way that creates that classic halter shape. In the video, you’ll see how the placement and joining turn basic squares into a wearable top.
The Little Square That Started It All
Granny squares are where so many of us fell in love with crochet — and they're still one of the most fun, addictive things to make. This ebook gives you 25 quick and easy patterns explained step by step, plus 12 clever ways to join them into blankets, scarves, cushions and more. Perfect whether it's your first square or your five-hundredth.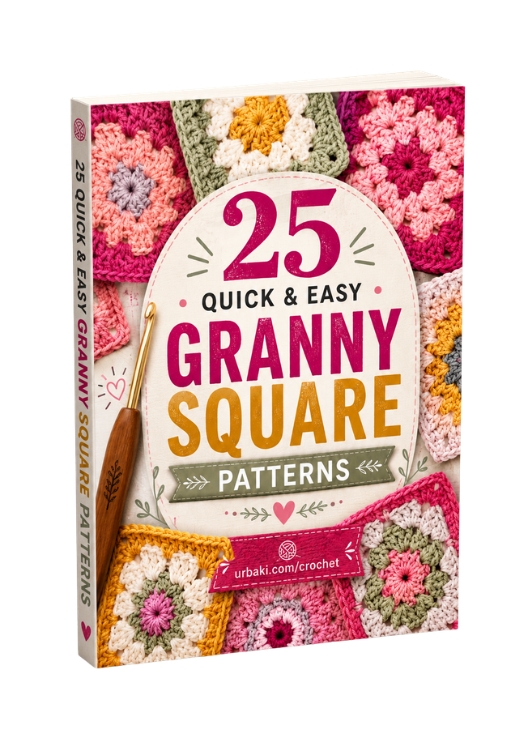
🧶 Pick Your First Square – Click on the Image 👆🏼
This approach is great if you don’t want to follow a super rigid garment pattern. You can focus on making neat, consistent squares, then adjust the final fit with straps and ties. A few things that can really help as you go:
- Keep your squares the same size by using the same hook and tension throughout.
- Choose a yarn that feels good against the skin (especially for a summer top).
- Block your squares if they’re curling—it makes joining cleaner and the top look more polished.
Crochet Granny Square Halter Top Tutorial (Step-by-Step Video)
This video walks you through the construction so you can see exactly how the squares are assembled, joined, and finished into a halter top shape.
Images and patterns courtesy of Lucille Pearl
Enjoy The Video Tutorial
 | beginner friendly, use any granny square")
Source: Lucille Pearl
Straps, Ties, and Fit Tips for a Comfortable Halter Top
One of the best parts of a halter is that the fit is often adjustable. As you follow along, pay attention to how the straps and ties affect support and comfort. Small tweaks can make a big difference:
- Strap length changes how high or low the neckline sits.
- Tie placement can help the top feel more secure without feeling tight.
- A simple, tidy edge finish can make the whole piece look store-bought.
If you’re making this for the first time, take it slowly at the joining and finishing stages—those are the steps that really elevate the final look.
Happy crocheting!
— Maggie
More crochet projects for you