
Knit Turban Headband: Stylish, Cozy & Quick
If you want a warm accessory you can finish in an evening, a knit turban headband is the perfect pick.
This guide previews a clear, friendly video and highlights fabric choices, sizing, and finishing so you get boutique results on your first try.
It’s ideal if you’re browsing winter ideas and comparing a knit winter headband pattern with other quick gifts.

Knit Turban Headband: What You’ll Learn

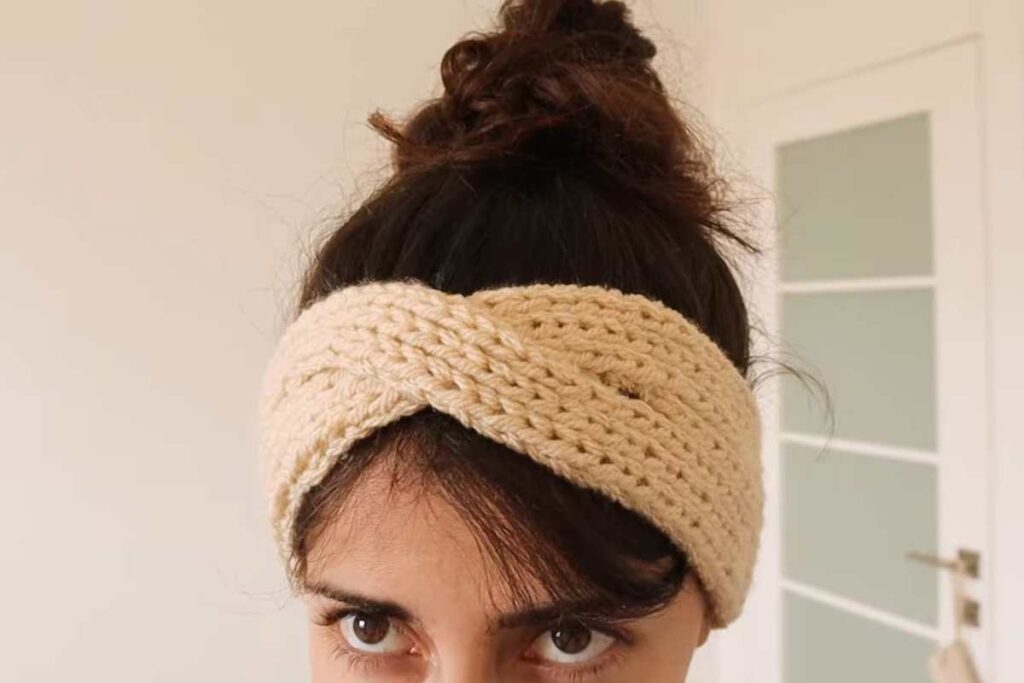
The video demonstrates a sleek, twisted front that looks like a sewn turban but is made entirely with your knitting needles.
You’ll see how to establish a rhythmic stitch pattern, measure for comfort, and create the signature twist without bulky seams. The result is a polished accessory that fits under coats and doesn’t crush your hairstyle.
Because the method is modular—cast on, knit the band, form the twist, bind off—it’s easy to pause and resume. The format feels like a concise Knit Headband Tutorial you can replay while you relax with a cup of tea.
Yarn, Needles & Gauge Tips
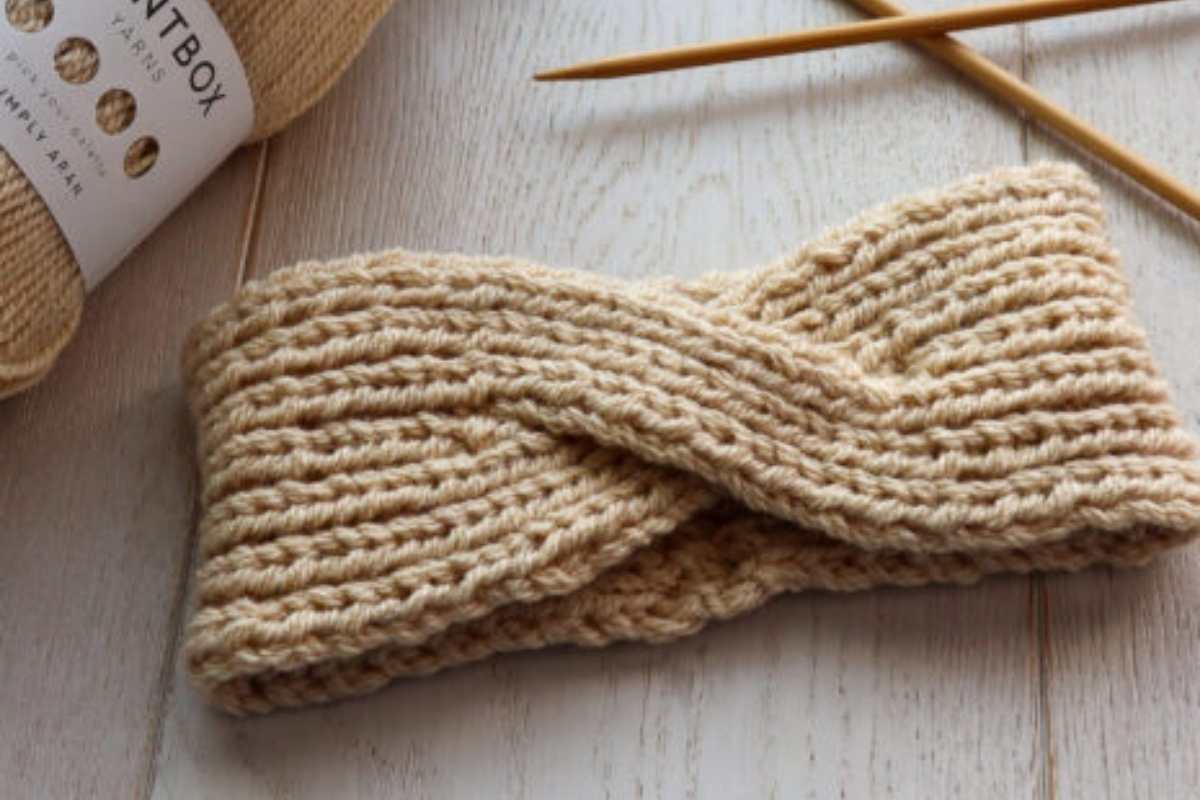
Choose a soft, elastic yarn that rebounds after stretching. Wool blends or acrylics with spring work well; they hold shape and keep ears warm in windy weather.
If you prefer drama and speed, try a Chunky Knit Headband version with larger needles for extra texture and a plush finish.
A snug, head-hugging gauge is key. If your swatch feels loose or gaps at the edges, drop a needle size.
If it feels stiff, go up a size until the fabric stretches comfortably without losing stitch definition. Aim for a band width that covers your ears but isn’t bulky at the nape.
Fit & Sizing Made Simple

Measure around the head where the band will sit (usually just over the ears). Subtract 2–3 cm (about 1”) for negative ease so it stays put.
As you work, try on the strip; it should feel secure without pressure marks. The twist adds thickness at the front, so keep the overall length true to measurement.
For gifts, knit a medium first, then note your row counts for quick duplicates. This repeatable approach is handy when you’re building a personal library from Headband Knitting Patterns Free collections and want predictable results.
Construction Roadmap

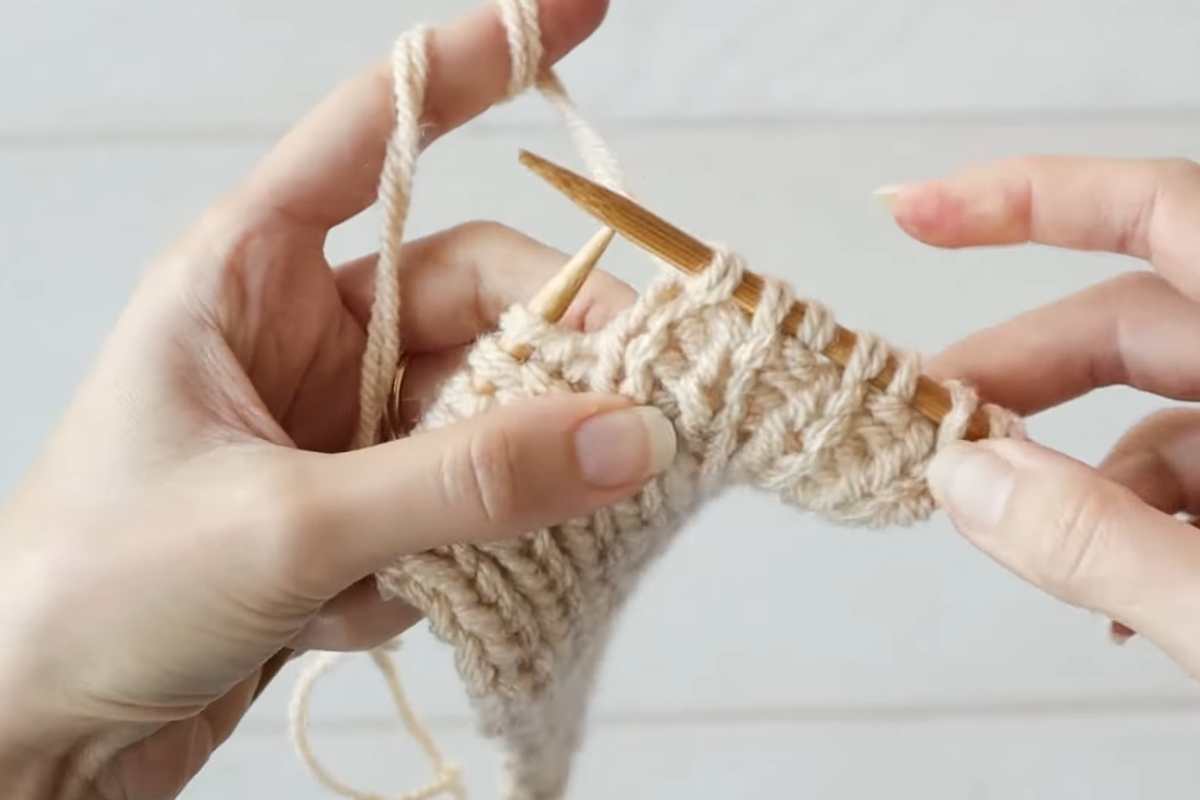
Cast On & Edge: Use a stretchy cast-on to avoid tight edges. Neat selvedges make the seam invisible when you assemble the twist.
Body: Work your chosen texture—rib for elastic fit, garter for squish, or a subtle slip-stitch for polish. If you’re testing choices from a knit pattern headband you already love, keep notes so you can repeat the best combo later.
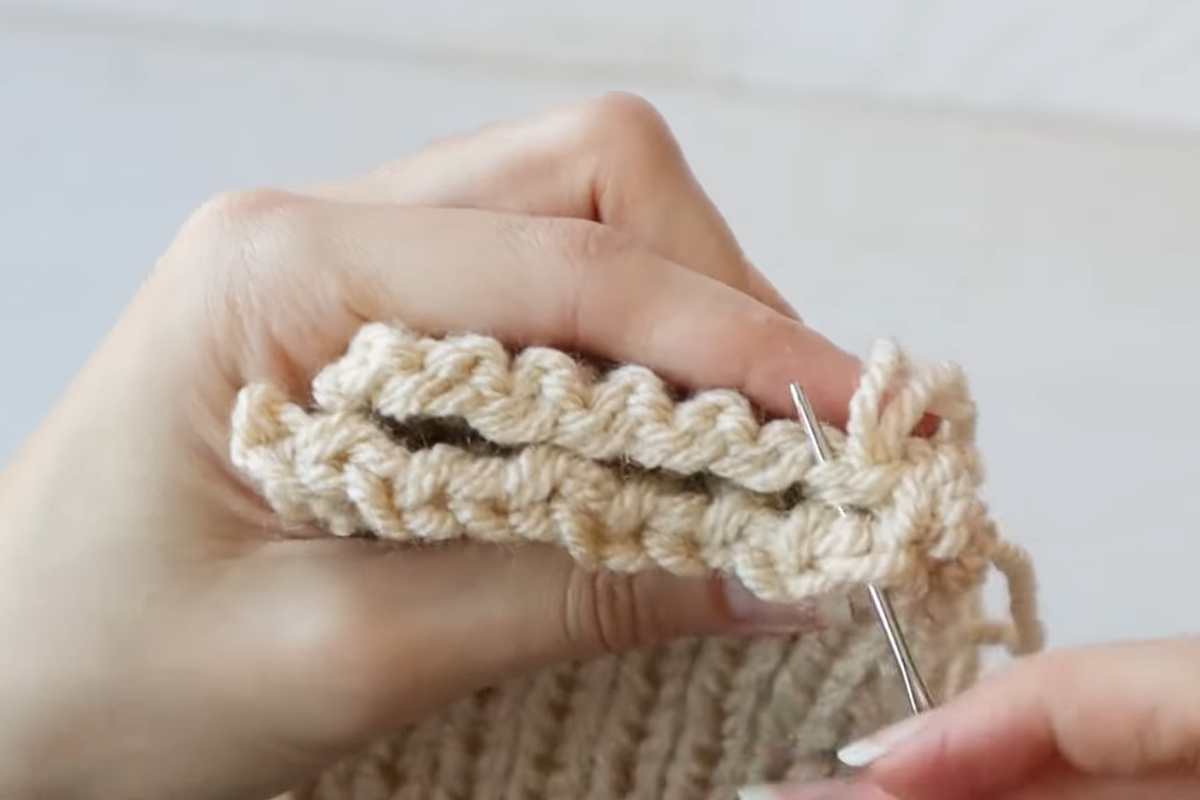
Twist & Finish: The hallmark turban effect comes from a clever fold before seaming. Align edges carefully, seam with a mattress stitch, then weave in ends. A light steam or block evens the fabric and sharpens the twist.
Style Variations
Minimalist: Use solid neutrals and a slim width for an everyday piece that pairs with officewear or athleisure.
Statement: Choose tonal marls or hand-dyed skeins; the twist becomes a focal point under a winter coat.
Sporty: Add a reflective thread on one edge for evening walks, or line the inside with a soft yarn for extra insulation.
FAQ

Is there a printable pattern? The video is your main guide, but you can complement it with a Free Headband Knitting Pattern if you like having row counts on paper.
How beginner-friendly is it? Very. Straightforward rectangles plus a twist assembly means it belongs in Headband Knitting Patterns Free Easy roundups.
What if I want more options? Explore a Free Knitting Pattern For Headbands collection to swap textures, then apply the same twist method.
Speed Knitting & Gifting
This project is perfect when you need a last-minute present. Build a small stack in classic shades, then add one bold color for fun.
If you’re curating a seasonal capsule of Knitting Pattern For Headband Free ideas, this twist style is the versatile cornerstone—dressy enough for evenings, practical for errands.
Before You Start
Skim the whole video once, note the cast-on count, the “try-on” checkpoint, and the exact folding step for the twist.
Gather a tapestry needle, clips for alignment, and your measuring tape. With those at hand, the make feels effortless from cast-on to seam.
Images and patterns courtesy of The Snugglery
Watch the Tutorial

Source: The Snugglery
Last update on 2025-12-24 / Affiliate links / Images from Amazon Product Advertising API


You may also like