
Knitting a Sweater Made Easy: A Simple Tutorial for Beginners

Knitting a sweater is a rewarding and practical project for any level of knitter. This tutorial will guide you through the process of making a basic sweater, covering the essential techniques like increases and decreases to shape the garment.
Whether this is your first sweater or you're looking to refine your skills, this guide will help you create a comfortable and stylish piece.
Choosing the Right Materials
Before starting, selecting the right materials is key to a successful project. Here’s what you’ll need:

- Yarn – Choose a medium-weight yarn for an easy-to-work texture and warmth.
- Knitting Needles – The size depends on the yarn, but a standard choice is US 8 (5mm).
- Stitch Markers – Useful for marking key points like increases and decreases.
- Tapestry Needle – For weaving in ends and seaming pieces together.
- Measuring Tape – Ensures the right fit and dimensions.

Understanding the Sweater Structure
A basic sweater consists of four main parts:
- Front Panel – Forms the front of the sweater.
- Back Panel – Similar in size to the front.
- Sleeves – Shaped using increases and decreases.
- Neckline and Finishing – Adds structure and a polished look.
Each piece is worked separately and then seamed together for a complete sweater.
Key Techniques for Knitting a Sweater
1. Casting On
The foundation of your sweater starts with a strong cast-on method. A long-tail cast-on is recommended for elasticity and durability.
2. Knitting the Main Body
Once the stitches are cast on, the sweater is built using simple stitch patterns. A basic stockinette stitch (knit one row, purl one row) creates a smooth and classic fabric. For added texture, a ribbed hem (knit one, purl one) prevents curling.
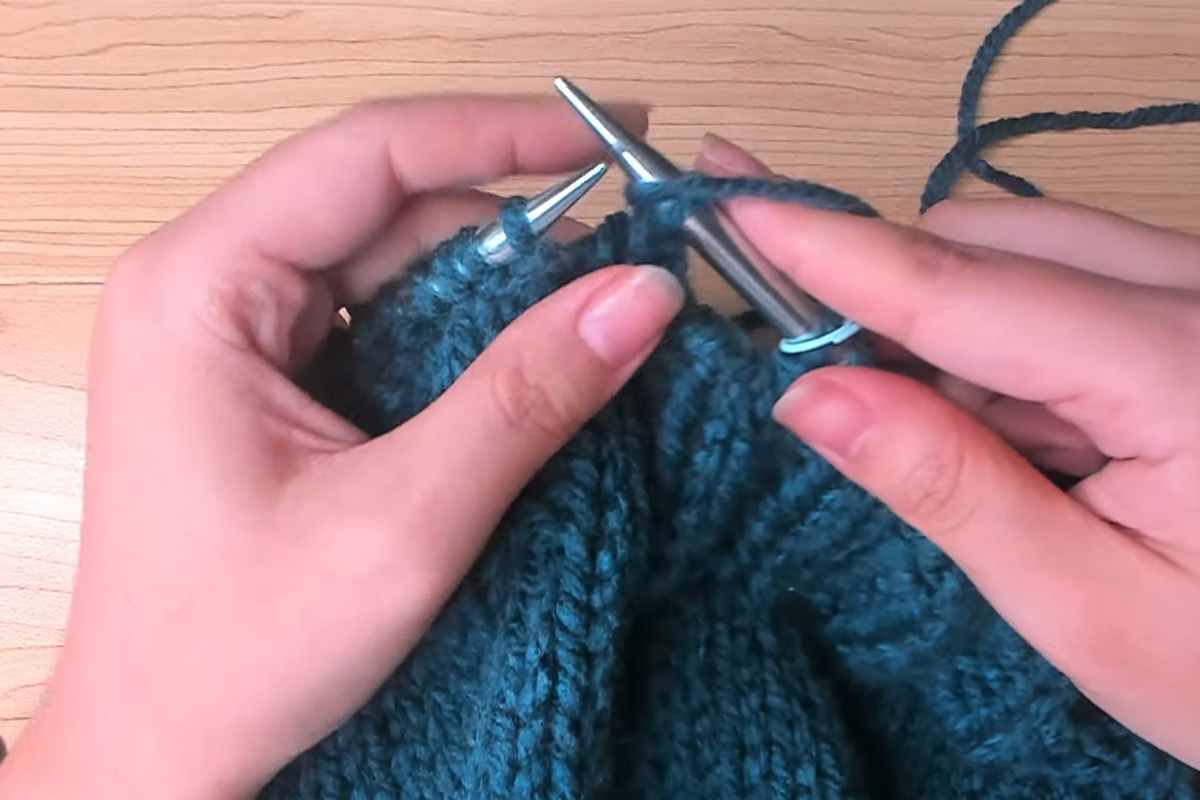
3. Increasing and Decreasing for Shape
- Increases are used to shape the sleeves and neckline. A knit-front-back (KFB) or make one (M1) technique works well.
- Decreases help taper the sleeves and shape the shoulders. The knit two together (K2Tog) method is commonly used.
4. Binding Off and Seaming
Once all pieces are complete, they are seamed together using a tapestry needle. The mattress stitch provides an invisible seam, creating a clean and professional look.
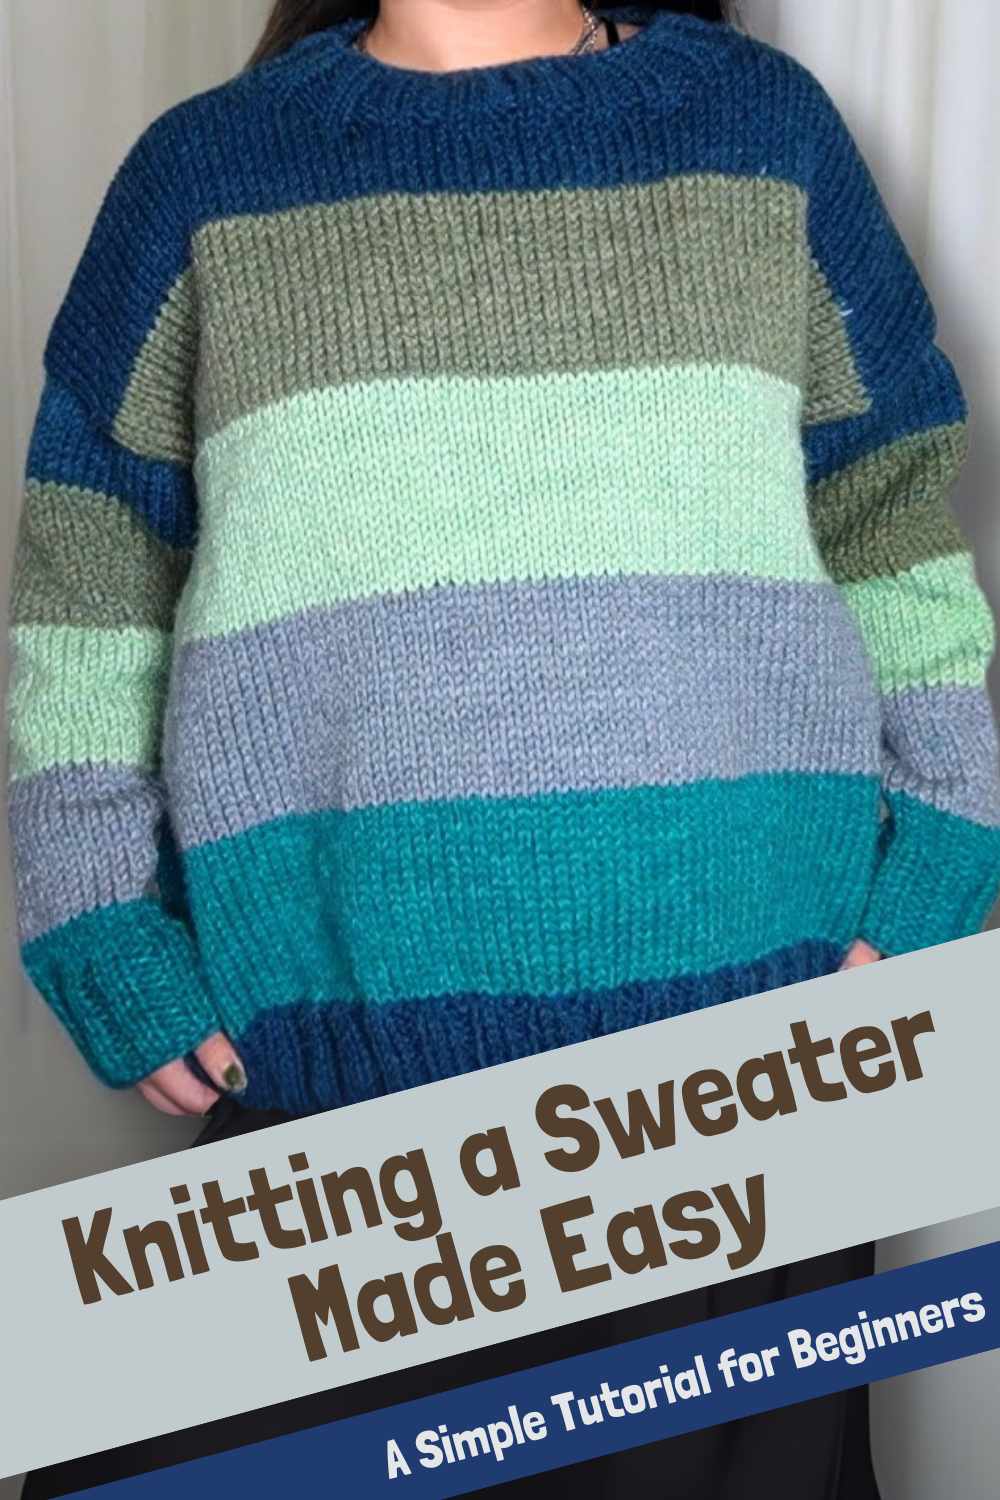
Customizing Your Sweater
Once you master the basics, you can personalize your sweater with:
- Different stitch patterns like cables or lace.
- Colorwork techniques such as stripes or fair isle.
- Neckline variations like crew neck, V-neck, or turtleneck.
- Adding pockets or embellishments for extra style.
Final Touches and Care
After finishing, blocking the sweater ensures a perfect shape. Simply wet the fabric, lay it flat, and pin it to the correct dimensions. Always follow yarn care instructions to maintain the sweater’s quality over time.
Conclusion
Knitting a sweater is a fun and fulfilling project that enhances both skill and creativity. By mastering increases, decreases, and seaming, you can create a cozy and stylish piece to wear or gift.
Enjoy the process, and don’t be afraid to experiment with different designs and textures!
Images and pattern courtesy of Cherilyn Q
Enjoy The Video Tutorial

Source: Cherilyn Q
Did you find this post useful or inspiring? Save THIS PIN to your Knitting Board on Pinterest! 😊
Last update on 2025-12-24 / Affiliate links / Images from Amazon Product Advertising API


You may also like