
Sweater Design Made Easy: Calculating Stitches for a U Neckline!
Designing a sweater gives you the freedom to customize every detail, and one of the most important features is the U neckline.
This classic shape can elevate the look of your sweater, offering a balanced and flattering style. Whether you’re designing from scratch or modifying an existing pattern, knowing how to calculate stitches for a U-neckline is key to achieving the perfect fit.
In this article, we’ll break down the process into simple steps, making it easy for knitters of all levels to design a beautifully proportioned U neckline.
What Is a U Neckline?
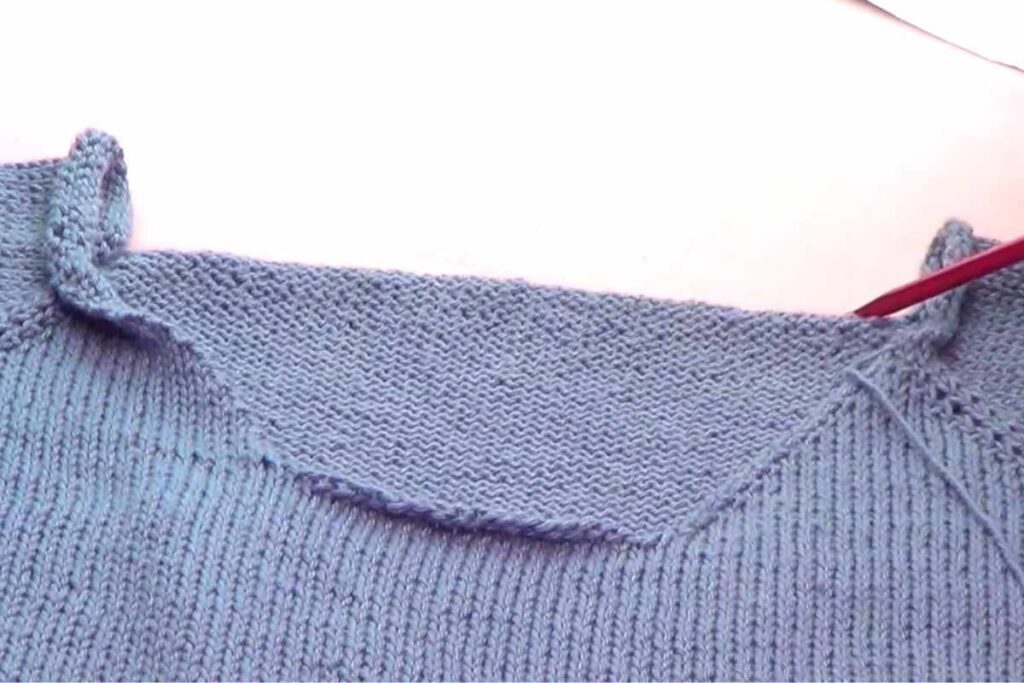
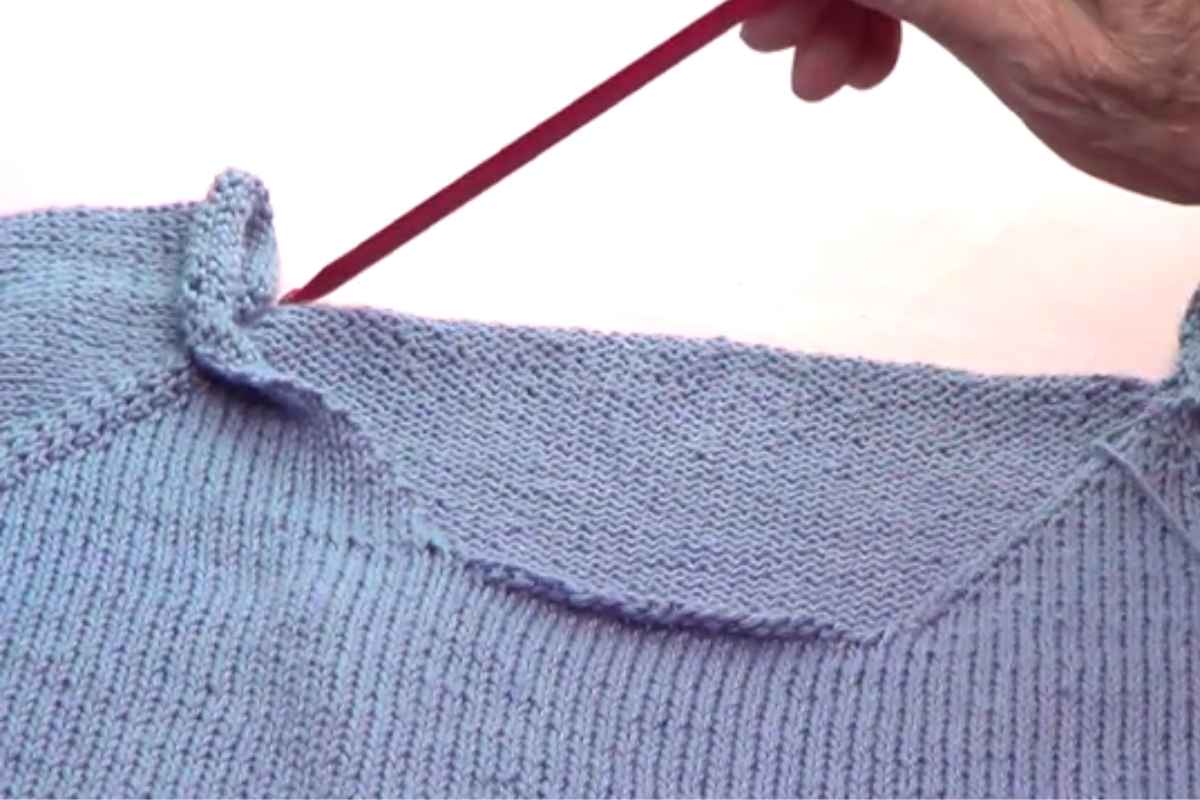
A U neckline is a rounded, scoop-like shape that dips at the front of the sweater. It’s elegant and versatile and works well with a variety of knitting styles and yarn types. The U shape is softer than a V-neckline and can be adjusted to your preferred depth.
Materials and Tools Needed
Before we get into the stitch calculations, make sure you have:
- Measuring tape: To take accurate body measurements.
- Yarn and needles: Use the yarn and needle size that fits your project.
- Gauge swatch: A swatch is essential for determining how many stitches and rows per inch your yarn and needles produce.
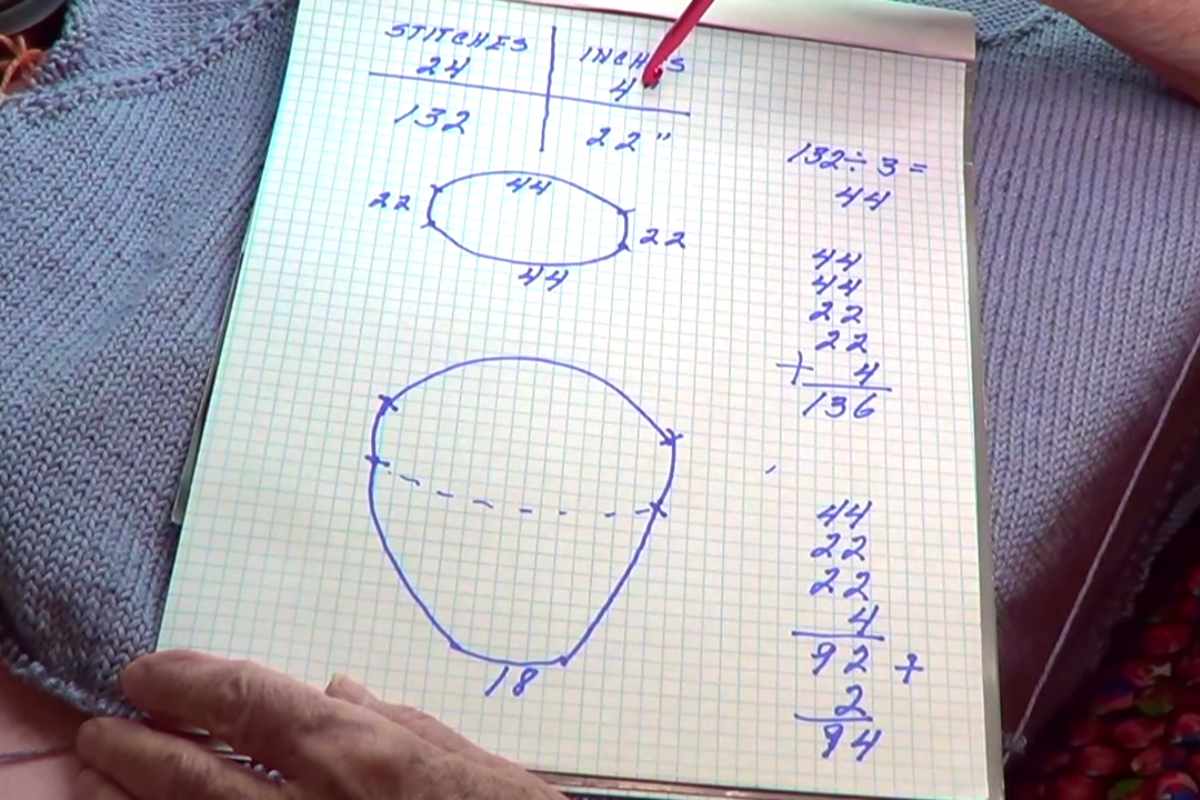
Key Considerations for Calculating Stitches
Before diving into the details of calculating stitches, it’s important to understand the factors that influence your sweater’s neckline. When designing a U neckline, there are several variables to keep in mind to ensure the best fit and appearance.
Gauge and Yarn Weight
Gauge is critical in sweater design, especially when shaping the neckline. Your stitch count will vary depending on your yarn weight and needle size.
For instance, a worsted-weight yarn will require fewer stitches per inch compared to a fingering-weight yarn.
Always make sure to swatch your chosen yarn and needles to measure your gauge before beginning the neckline calculations.
Neckline Width and Depth
The shape of your U neckline depends on two main dimensions: width (how wide the neckline stretches across the shoulders) and depth (how low it dips in the front).
The width determines the overall openness of the neckline, while the depth affects how much of the chest area is exposed. These dimensions are crucial in shaping the neckline, as they influence where and how you decrease stitches to form the curve.
- Width: A wider U neckline will sit closer to the shoulder edges, while a narrower one will rest more snugly around the base of the neck.
- Depth: A deeper neckline creates a more dramatic curve, while a shallower neckline offers a more subtle, modest dip.
Body Shape and Fit
Consider the overall fit of your sweater when designing the neckline. For a looser, more casual sweater, you might prefer a wider and deeper U-neckline.
On the other hand, a fitted or tailored sweater might benefit from a narrower, higher neckline for a more polished look.
The body shape of the person wearing the sweater is also important—broader shoulders may require a slightly wider neckline, while narrower shoulders might need a more contained shape.
Using Short Rows for Shaping
To achieve the perfect U neckline, many knitters use short rows as part of the shaping process. Short rows allow you to create a gradual curve, giving the neckline its signature U shape.
This technique involves knitting partial rows and turning your work before completing the row, which helps build height in specific sections while leaving others shorter. The result is a rounded neckline that sits naturally against the body.
Short rows are often paired with decreases to shape the sides of the neckline. The combination of short rows and well-placed decreases helps create a smooth, professional-looking curve.
Tips for a Perfect U Neckline
- Test with a swatch: Always knit a swatch to check your gauge. Even slight variations in gauge can affect the fit of your neckline.
- Use stitch markers: Place markers at key points, such as the center of the U and the shoulder seams, to keep track of your decreases.
- Block your work: Blocking helps smooth out any uneven stitches and ensures that your neckline sits perfectly.
Designing a sweater with a U-neckline is a fun and rewarding process. By following these simple steps and carefully calculating your stitches, you can create a beautifully fitted neckline that enhances the overall look of your sweater. Remember, it’s all about planning, and with the right measurements and gauge, you’ll have a perfectly shaped U-neckline in no time!
For the full formula breakdown and step-by-step calculations, be sure to watch our video tutorial below. Happy knitting!
Images and pattern courtesy of JoannesWeb
Enjoy The Video Tutorial

Source: JoannesWeb
Did you find this post useful or inspiring? Save THIS PIN to your Knitting Board on Pinterest! 😊

You may also like