
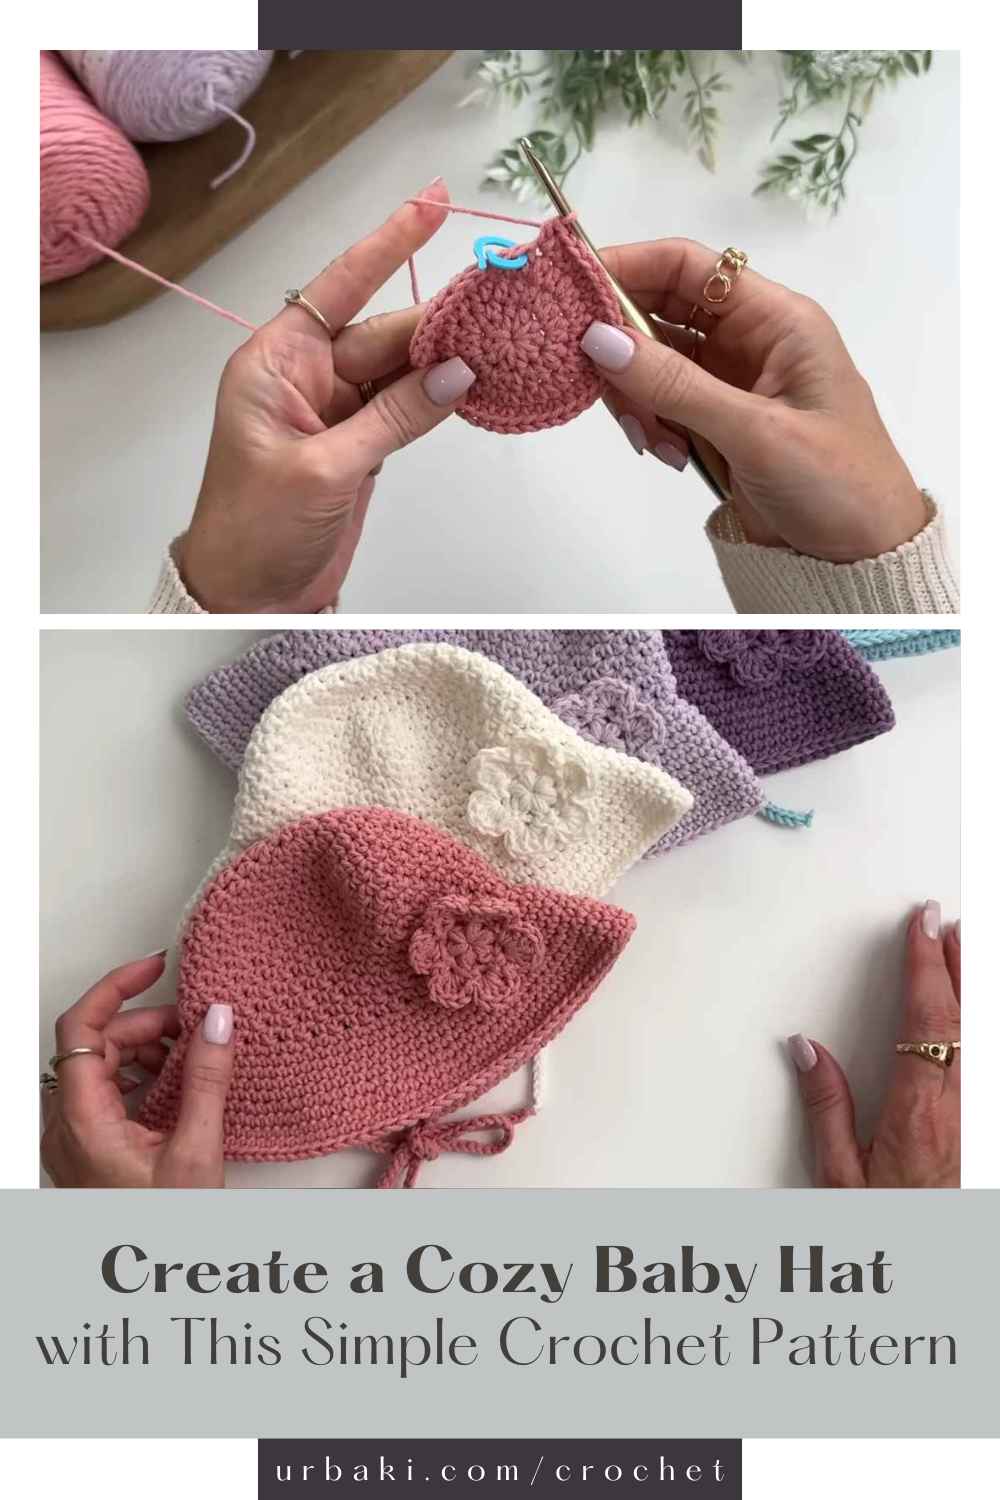
Create a Cozy Baby Hat with This Simple Crochet Pattern

Crocheting a baby hat is a fun and rewarding project that is perfect for beginners. It’s a wonderful way to make a thoughtful gift for a new baby, or to prepare for your little one’s arrival.
This easy crochet pattern for a baby hat is designed to be simple, with clear instructions and no complicated techniques. Whether you’re new to crochet or looking for a quick project, this pattern will guide you every step of the way!
Materials Needed
Before you start crocheting, gather all the materials you’ll need for this project. Here’s a list of the supplies:
Patterns You Won’t Find Anywhere Else
Get access to curated crochet projects and inspiration every single week. It’s like having a VIP pass to creativity, right in your inbox.😍 Unlock Your Weekly Inspiration – Join The Club! Click on the image 👆🏼
- Yarn: Choose a soft, baby-friendly yarn. A worsted weight yarn is perfect for this project. Make sure it’s gentle on the baby’s skin.
- Crochet Hook: A size G (4.0 mm) crochet hook works well for this pattern.
- Scissors: To cut your yarn at the end.
- Yarn Needle: For weaving in the ends when you finish the hat.
- Stitch Markers (optional): These can help you keep track of your rounds.
Choosing the Right Yarn
When making items for babies, it’s essential to use soft and non-irritating yarn. Look for yarn labeled as suitable for baby clothes, as these tend to be softer and hypoallergenic.
Acrylic yarns are a good choice, as they’re both soft and easy to care for. If you prefer a more natural option, cotton yarn can be a great choice too.

Basic Crochet Stitches Used
This baby hat pattern primarily uses the following basic crochet stitches:
- Chain (ch): The foundation for most crochet projects.
- Single Crochet (sc): A basic stitch that forms the body of the hat.
- Slip Stitch (sl st): Used for joining rounds without adding height.
If you are already familiar with these stitches, this project will be very straightforward. If not, don’t worry—there are plenty of tutorials available to guide you through each stitch.
Instructions: Easy Crochet Baby Hat
Let’s get started with the step-by-step instructions to create your adorable baby hat. Follow each round carefully, and make sure to keep your stitches even.
Round 1: Create a Magic Ring
To start, create a magic ring (or adjustable ring). This will form the center of the baby hat.
- Make a loop with your yarn and pull the working yarn through the loop to create a ring.
- Ch 2 (this counts as your first stitch in the round).
- Work 6 single crochet (sc) stitches into the magic ring. Pull the tail of the yarn to tighten the ring.
- Join the round with a slip stitch (sl st) into the top of the first single crochet stitch.
At the end of this round, you should have a small circle with 6 stitches.

Round 2: Increase Stitches
For the next round, we’ll start increasing to make the hat wider.
- Ch 1 (does not count as a stitch).
- Work 2 single crochet stitches into each stitch around. This will double the number of stitches in the round.
- Join the round with a slip stitch to the first stitch of the round.
You should now have 12 stitches in this round.
Round 3: More Increases
Continue increasing to make the hat a bit bigger.
- Ch 1 (does not count as a stitch).
- Work 1 single crochet stitch into the first stitch, then 2 single crochet stitches into the next stitch. Repeat this pattern around.
- Join with a slip stitch.
Now, you will have 18 stitches in total.
Round 4: Continuing the Increases
- Ch 1 (does not count as a stitch).
- Work 1 single crochet stitch in the first two stitches, then 2 single crochet stitches in the next stitch. Repeat this pattern around.
- Join with a slip stitch.
At the end of this round, you’ll have 24 stitches.
Round 5: Keep Going
- Ch 1 (does not count as a stitch).
- Work 1 single crochet stitch in the first three stitches, then 2 single crochet stitches in the next stitch. Repeat this pattern around.
- Join with a slip stitch.
You’ll now have 30 stitches.
Round 6: Body of the Hat
Now it’s time to work on the body of the hat.
- Ch 1 (does not count as a stitch).
- Work 1 single crochet stitch in each stitch around, without any increases.
- Join with a slip stitch.
Continue working in rounds, repeating round 6 until the hat reaches your desired height. For a typical baby hat, this is usually about 4-5 inches, but you can make it shorter or longer depending on preference.

Final Round: Shaping the Top of the Hat
To finish off the hat, we’ll start to close the top.
- Ch 1 (does not count as a stitch).
- Work 1 single crochet stitch in each of the first four stitches, then decrease (work 2 single crochets together) in the next stitch. Repeat this pattern around.
- Join with a slip stitch.
You should have about 24 stitches remaining.
Finishing the Hat
Now it’s time to finish the hat.
- Cut the yarn, leaving a 6-inch tail.
- Use a yarn needle to weave the tail through the remaining stitches.
- Pull the yarn tight to close the top of the hat.
- Weave in any loose ends.
And there you have it—a simple, sweet, and soft crochet baby hat!
Adding a Decorative Touch (Optional)
To personalize the hat, you can add a decorative touch such as a pom-pom or a cute crocheted flower. You can easily make a pom-pom by wrapping yarn around your fingers and tying it together, then sewing it onto the top of the hat.
A flower can be made using small crochet stitches and sewn onto the front.

Simple & Sweet Accesorie
This easy crochet baby hat is a simple, enjoyable project that’s perfect for beginners or anyone looking to make a thoughtful, handmade gift. By following this pattern, you can create a soft, cozy hat that will keep a little one warm and stylish.
The pattern’s flexibility allows you to adjust the size or add your own embellishments, making it a versatile project for any occasion.
Happy crocheting!
Images and patterns courtesy of MJ's Off The Hook Designs
Enjoy The Video Tutorial
Source: MJ's Off The Hook Designs
Did you find this post useful or inspiring? Save THIS PIN to your Crochet Board on Pinterest!

More crochet projects for you