
Crochet Bee Keychain: How To Crochet A Bee

If you’ve been looking for a fast, giftable make, this crochet bee keychain video is pure honey. The tutorial breaks down shaping, stripes, and assembly so you can finish a cheerful mini bee in under an afternoon.
It’s a pocket-size project perfect for stash yarns, beginners, and anyone who wants a sweet win between larger WIPs.
What You’ll Learn In The Video
The instructor demonstrates head and body shaping, clean color changes for the yellow-and-black stripes, and how to add tiny wings and antennae that stay put on a key ring.
Refill Your Creative Cup
Feeling stuck or out of ideas? Let us bring the spark back to your hook. Our weekly emails deliver patterns, tips, and inspiration to keep your creativity blooming.
😍 Bring Your Crochet Mojo Back – Sign Up Now! Click on the image 👆🏼
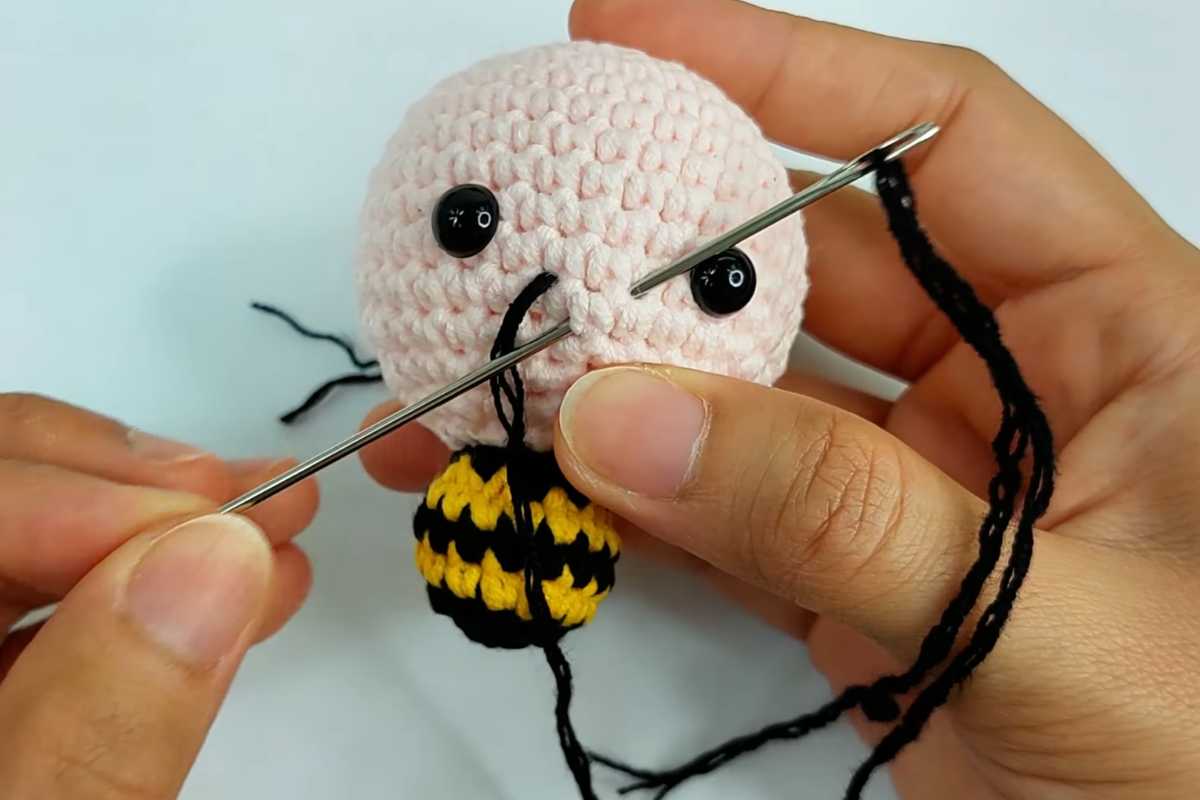
You’ll see where to place safety eyes (or embroider them), how to stuff for a smooth sphere, and how to close the top invisibly for a boutique finish.
Because the pacing is clear and friendly, it doubles as a bee keychain crochet masterclass: you’ll pick up neat increases, invisible decreases, and a tidy seam for joining parts. The result is a durable charm that can withstand bag life.
Who Is This Project For?

If you’ve never made an amigurumi before, consider this a welcoming Bee Amigurumi Free Pattern–style walkthrough delivered via video.
The simple round shapes, small parts, and minimal sewing build confidence without overwhelming you with steps.
More experienced crocheters will love how quickly the bee comes together for markets, school fairs, or last-minute gifts. This is peak Small Keychain Crochet: fast, cute, and practical.
Yarn, Hook & Notions

DK or worsted cotton/acrylic blends work best for a sturdy finish that won’t pill on keys. Choose high-contrast yellow and black for stripes; white or pastel blue makes adorable wings.
A 2.5–3.5 mm hook typically gives a dense fabric that holds stuffing nicely—adjust to your tension.
Grab fiberfill, a yarn needle, stitch markers, safety eyes (6–8 mm), and a split key ring or lobster clasp. A dot of fabric glue can secure knots and embroidery once everything is in place.
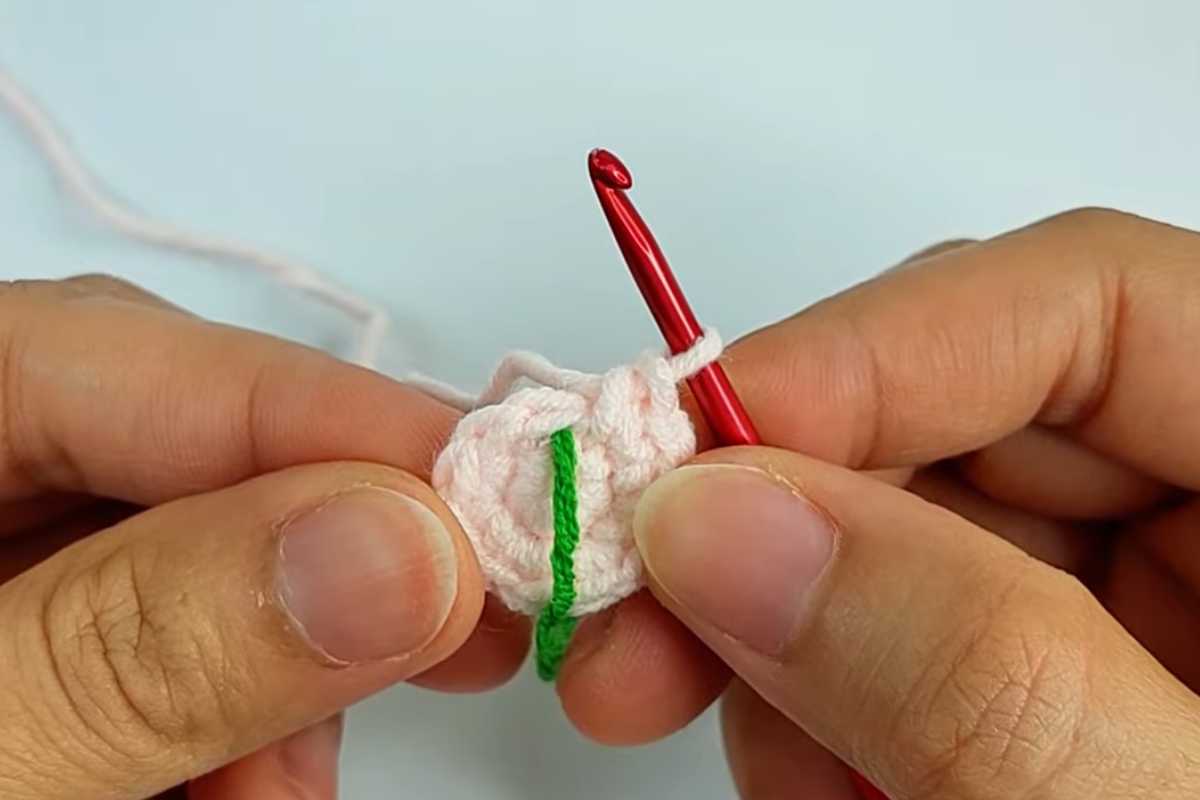
Construction At A Glance

Rather than duplicating every stitch count, here’s the map so you can follow along on screen: start with a magic ring for the head, work even rounds, then increase for a smooth sphere.
Transition into body rounds and add stripe colors as the tutorial shows. Finish with a few decrease rounds to close cleanly.
Wings are flat ovals or tiny teardrops; antennae are quick chains with a little nub. Sew features securely, then attach a jump ring through the top center so the bee hangs upright.
The designer’s on-camera tips make the whole process feel like a crochet bee keychain pattern free class you can replay anytime.
Customization Ideas

Swap pastels for “candy bees,” add blush with a touch of fabric paint, or embroider sleepy eyes for a kawaii vibe. Try sparkle yarn for wings or add a mini heart charm to the clasp.
For bag charms, size up the hook and yarn; for zipper pulls, size down to thread-weight details.
Want words on the stripe? Surface-stitch a tiny initial to personalize gifts. Because the body is smooth, it’s perfect for experimenting with embroidery without snagging.
Tips For A Polished Finish
Keep your increases stacked and your decreases invisible to avoid bumps. Stuff firmly but not stiffly—overstuffing can distort stripes.
If using safety eyes, insert them before closing the head; if embroidering, mark placements with pins while the piece is lightly stuffed.
When attaching the hardware, thread the ring through a sturdy stitch (not just through stuffing). A few whip stitches around the ring base will stop wobbling and extend durability, especially for daily key use.
Why This Video Works

It’s concise, beginner-friendly, and covers every “gotcha” that can frustrate first-timers.
You’ll finish with a cheerful mascot and the confidence to adapt any bee keychain crochet pattern you find later. Consider it your gateway to amigurumi.
Images and patterns courtesy of Tata Crochet Patterns
Watch The Full Tutorial
")
Source: Tata Crochet Patterns
More crochet projects for you