
Crochet Legs Amigurumi: Articulated Legs Tutorial
Crochet Legs Amigurumi can transform a cute plush into a lifelike character.
In this curated guide we introduce a fast, beginner-friendly method to add jointed, movable legs to your toys—perfect if you’ve ever searched for “How To Crochet Legs” or wanted a reliable Crochet Leg Tutorial without getting lost in complex steps.
What You’ll Learn in This Amigurumi Tutorial
This Amigurumi Tutorial demonstrates how to place secure joints at the hip so legs can swing forward for sitting and backward for standing poses.
Refill Your Creative Cup
Feeling stuck or out of ideas? Let us bring the spark back to your hook. Our weekly emails deliver patterns, tips, and inspiration to keep your creativity blooming.
😍 Bring Your Crochet Mojo Back – Sign Up Now! Click on the image 👆🏼
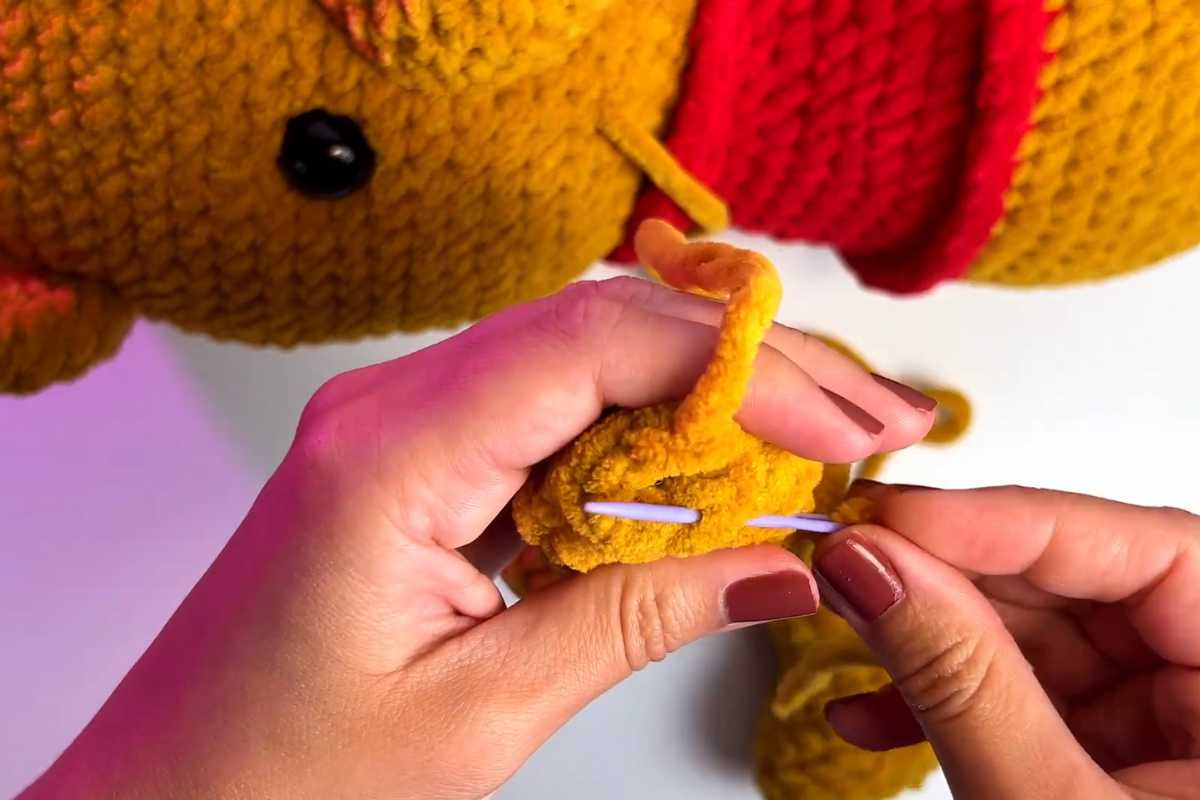
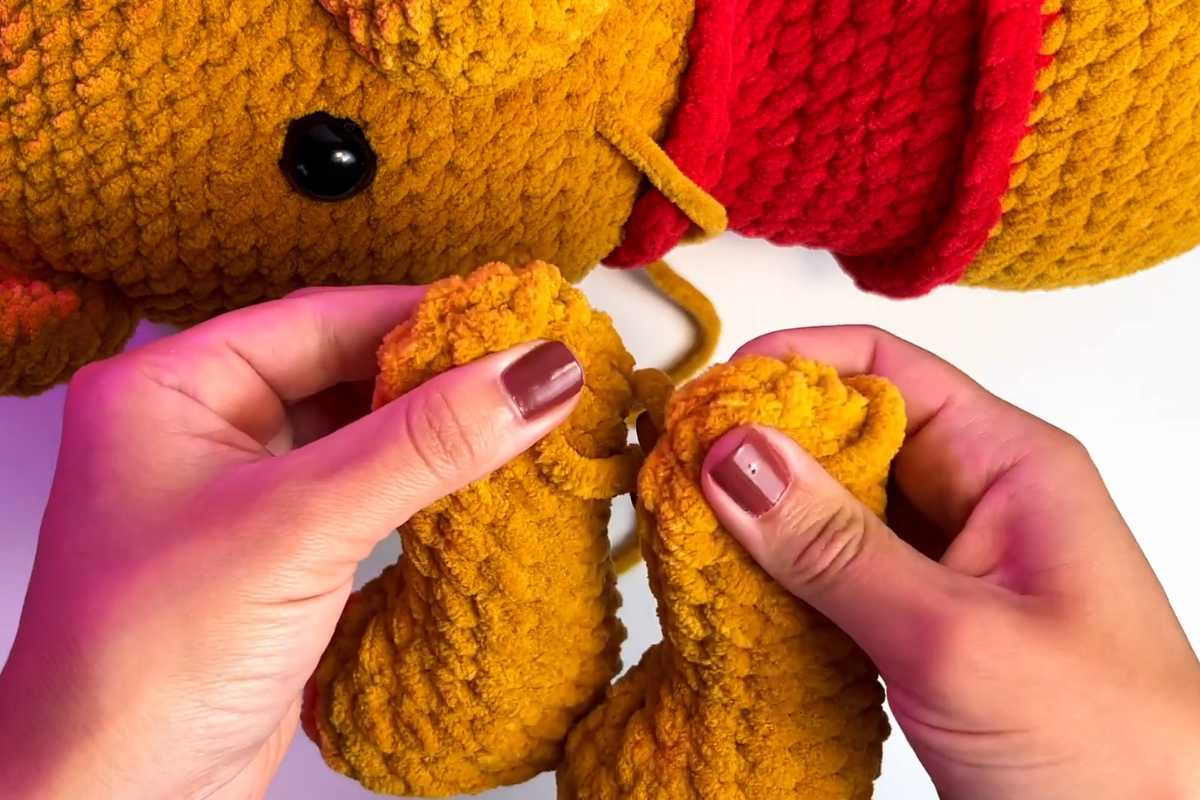
You’ll see where to position the entry points, how to pass through the body cleanly, and how to tighten for a snug, creak-free movement.
The process is quick—about 15 minutes once your pieces are crocheted—making it ideal for finishing gifts fast. The technique works on bears, bunnies, dolls, and more, and it pairs well with classic beginner bodies and limbs.
Why Articulated Legs Make a Difference
Movable joints bring personality to your amigurumi. A seated pose on a nursery shelf, a walking stance for photos, or a gentle swing for play—all become possible with one simple upgrade. It also helps toys balance better because you can adjust angles after assembly.
If you’re customizing a Winnie-the-Pooh-style bear, jointed hips make it easier to seat the character on props without distorting the body shape.
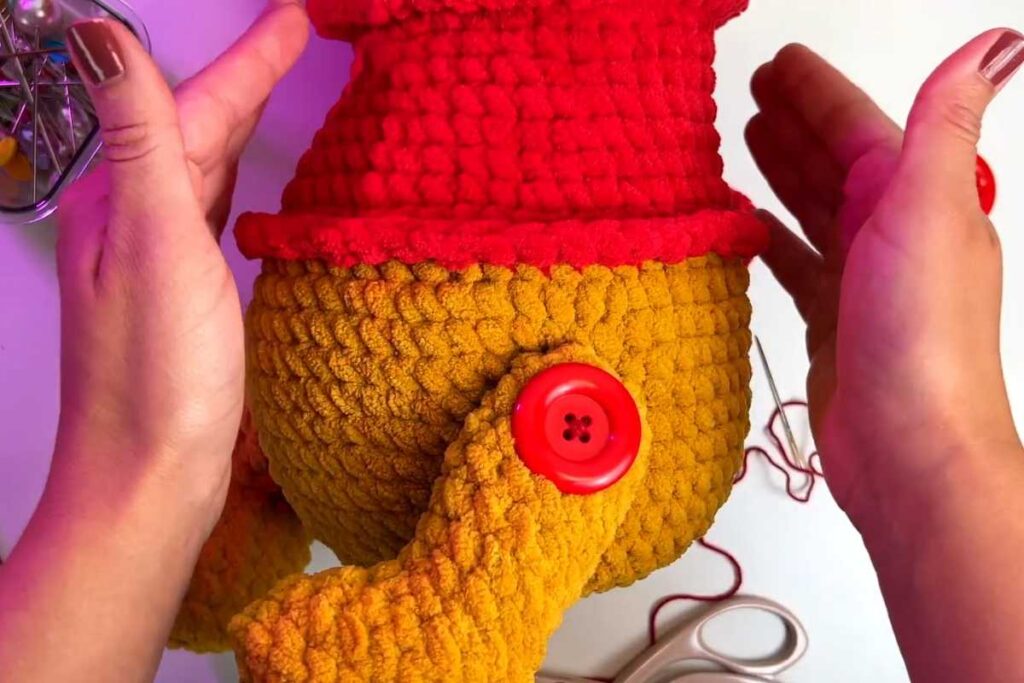
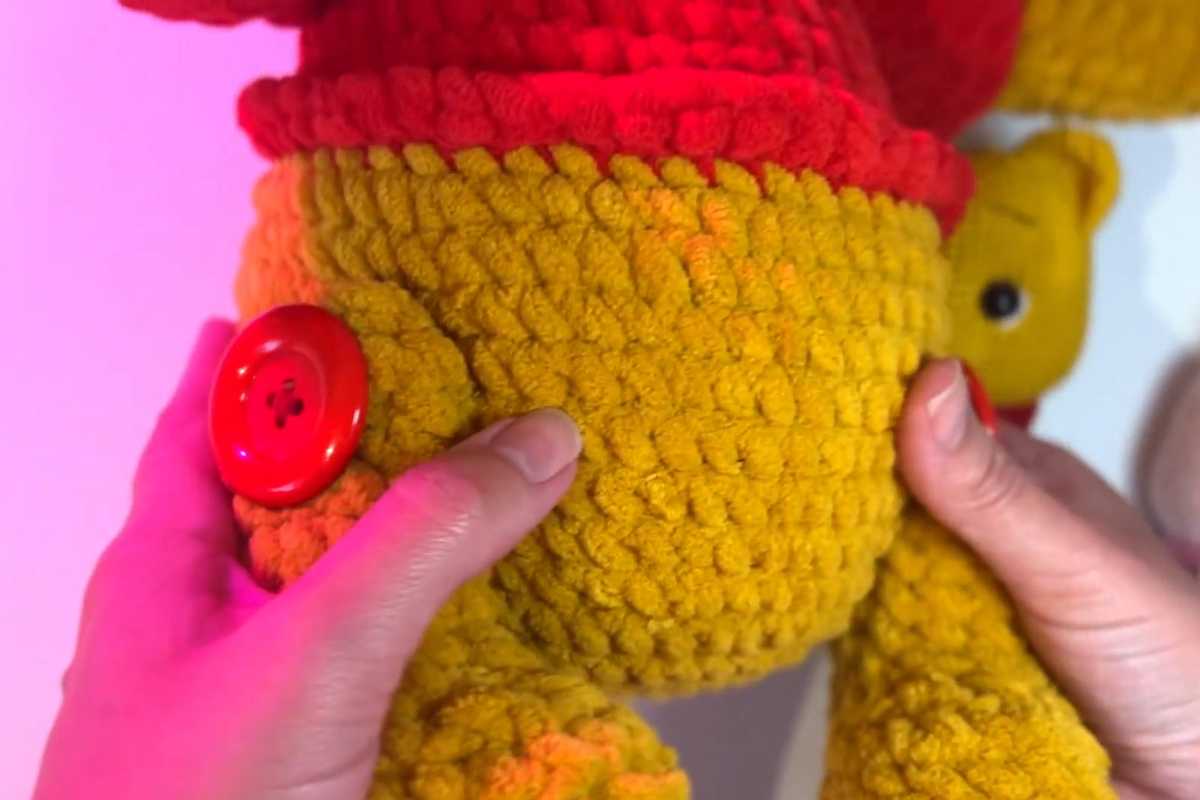
Materials, Safety & Fit
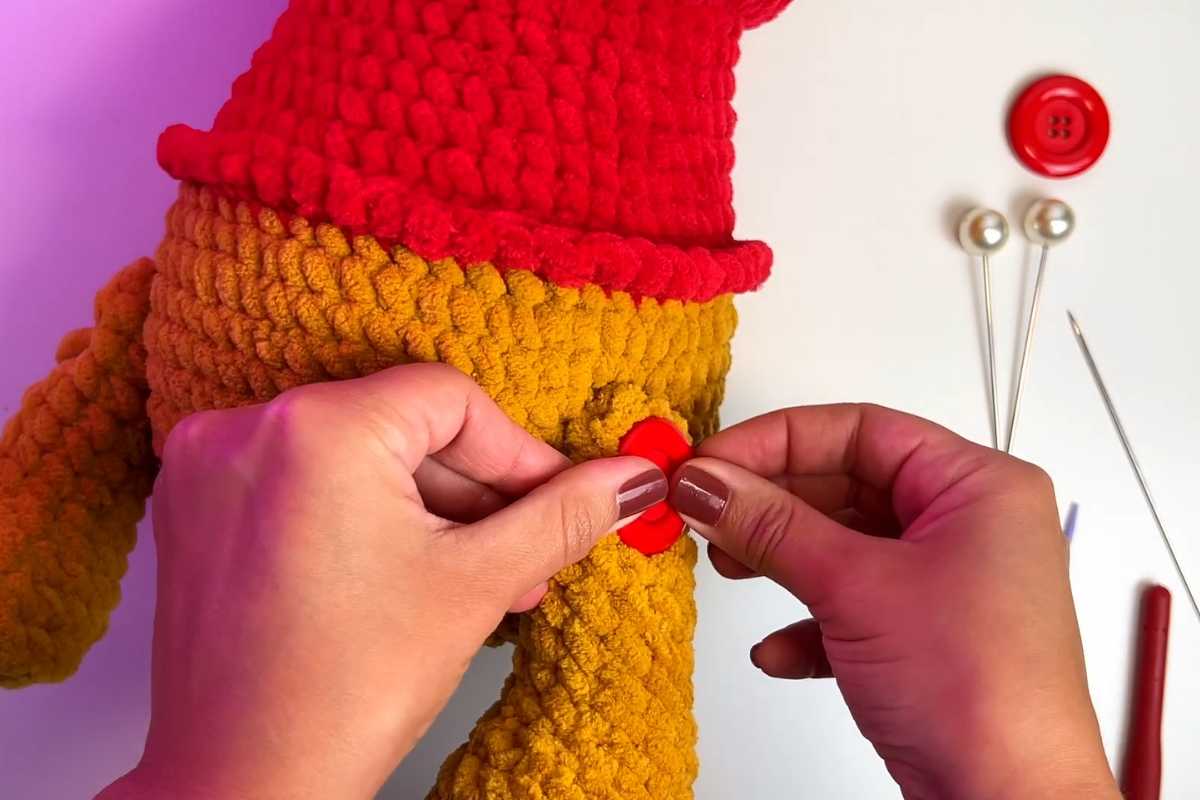
Use strong yarn that matches your toy, a sharp yarn needle, and flat buttons or safety joint pieces sized to the leg diameter. Buttons should be completely hidden inside or covered by yarn for a polished finish.
For gifts to babies or toddlers, avoid small removable parts. Stitch through multiple layers, double-knot, and bury tails securely. When in doubt, replace buttons with embroidered “caps” to keep everything soft and child-friendly.
Placement & Proportion
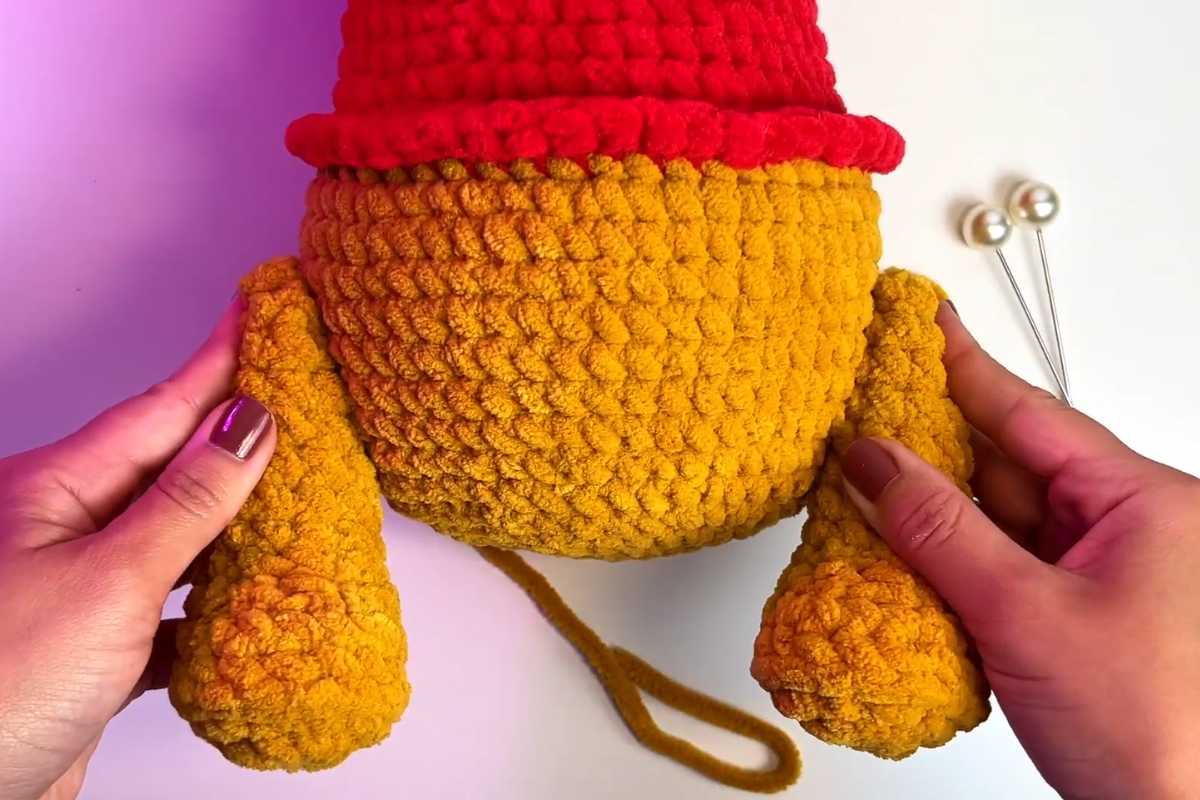
Mark hip points on both sides at the same round. The center of each leg should line up with the body’s midline so the toy sits evenly. If the legs splay, you likely placed entry points too low; move them up one round and retighten.
For chunkier figures, widen the spacing by a stitch or two so legs clear the belly. Slim dolls often need the joints slightly closer to the front to achieve a natural seat.
Amigurumi Tips for Smooth Assembly
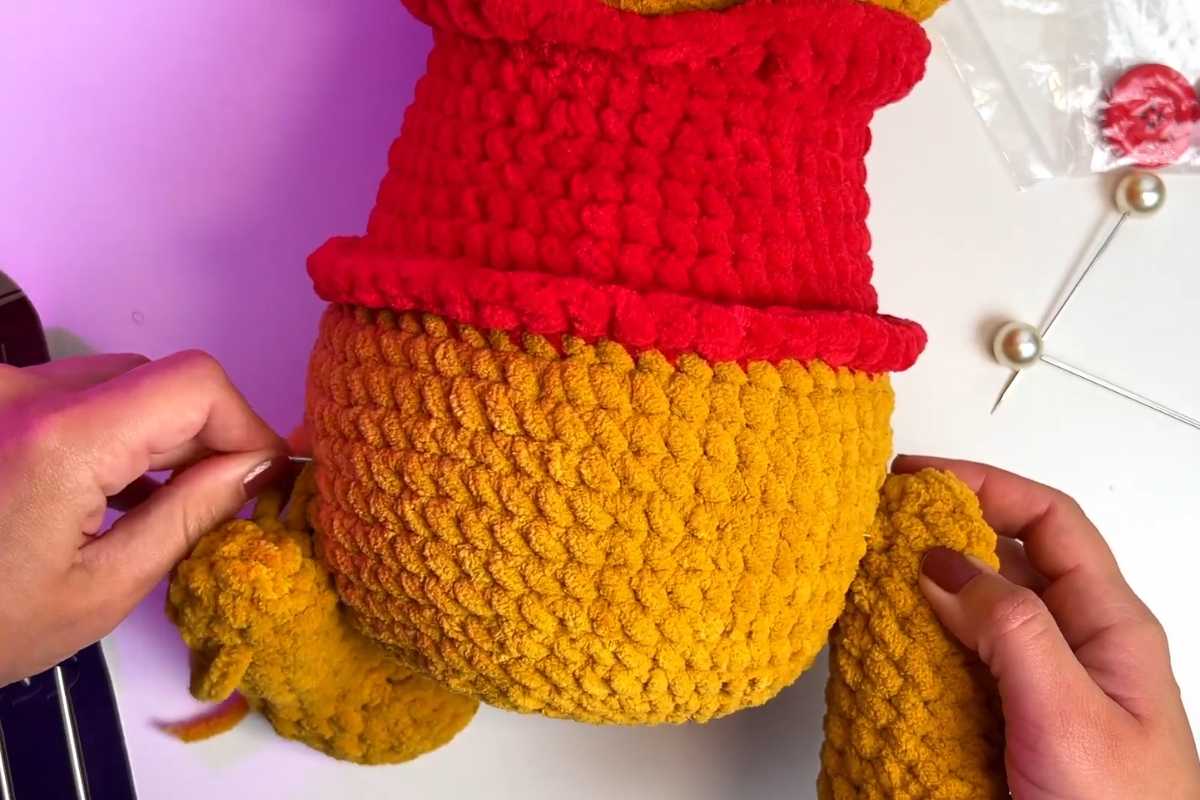
Amigurumi Tips: pre-shape the leg tops by steam-blocking lightly (if your fiber allows), keep tension even as you cinch, and test the swing before securing the final knot. These crochet amigurumi tips prevent twisting and creasing at the hip.
Color-match your joining yarn to the body for invisible seams, and rotate the legs a few times after tightening to make sure the movement feels balanced.
Troubleshooting the Joint
If the legs wobble, your join path may be too long—rethread closer to the hip center or add a second pass. If the joint squeaks, loosen slightly and re-seat the button so it sits flat.
Uneven height? Count body rounds from the neck down on both sides and remark before reattaching. Small adjustments make a big visual difference.
Explore More Patterns & Formats
Prefer to follow text alongside video? Take quick notes as you watch and sketch the entry/exit points. After mastering this method, apply it to animals and dolls from your favorite designers to build a personalized library of posable toys.
For additional inspiration, browse other hip and shoulder joining methods and compare results to find the look and feel you like best.
Images and patterns courtesy of Crocheniacs | Amigurumi Teacher
Crochet Legs Amigurumi: Watch the Video
This feature spotlights the original video lesson by its creator. The specific counts, path, and exact placements are the author’s work; here we offer a high-level overview to help you decide if it fits your project.
Watch the full tutorial and support the creator here:

Source: Crocheniacs | Amigurumi Teacher
More crochet projects for you