
Easy Crochet Butterfly Keychain: Step-by-Step Mini Project

Want a sweet, portable project you can finish in a single sitting? This crochet butterfly charm is a beginner-friendly make that looks impressive on key rings, zipper pulls, backpacks, and gift wrap.
In this easy DIY tutorial, you’ll learn the stitches, shaping, and simple construction that turn four quick circles into a delicate butterfly—with a neat body and perky antennae. Use scraps of yarn, play with color, and enjoy the instant gratification of a miniature make.
What You’ll Need
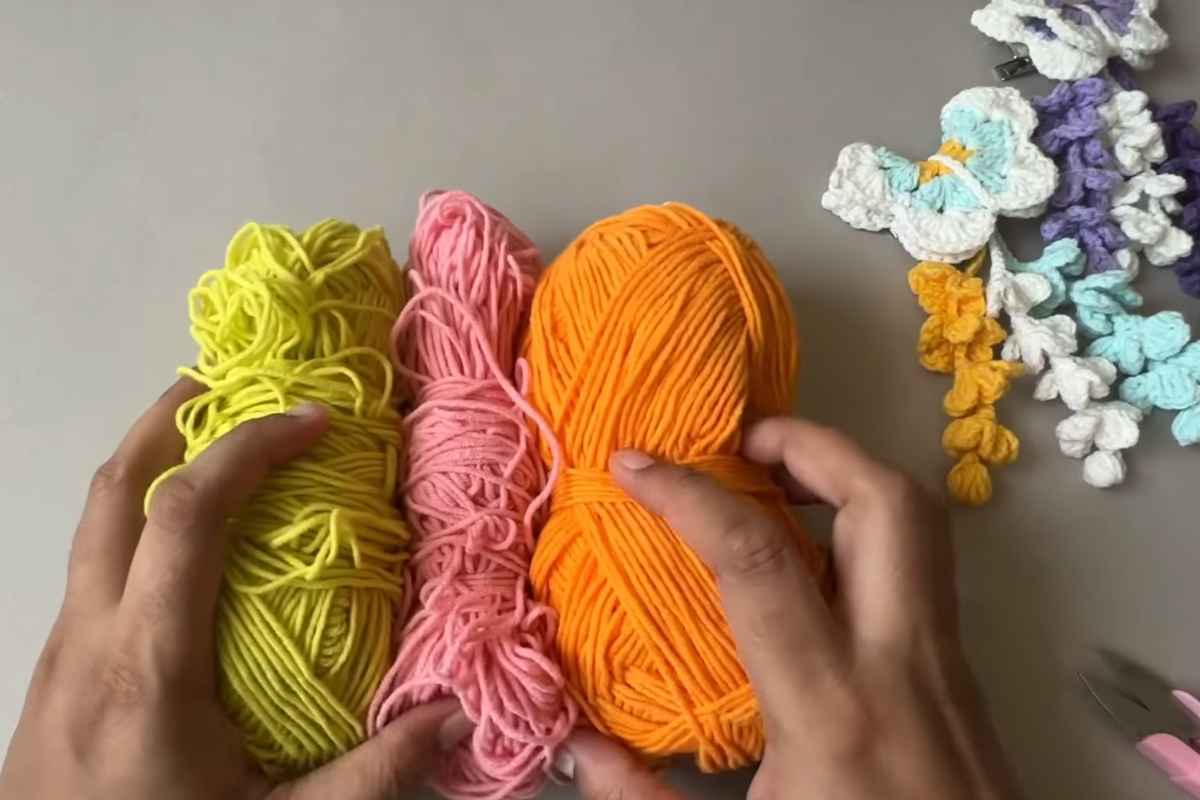
- DK or worsted-weight cotton or acrylic yarn in two wing colors plus a neutral for the body
- Hook to suit your yarn (3.5–4.0 mm for DK, 4.0–5.0 mm for worsted)
- Yarn needle and scissors
- Optional: small jump ring, lobster clasp, or keyring
- Optional: fabric glue or a dab of clear craft glue to set ends
Tip: This is a great stash-buster—mix and match leftover yarn to create a kaleidoscope of butterflies.
Refill Your Creative Cup
Feeling stuck or out of ideas? Let us bring the spark back to your hook. Our weekly emails deliver patterns, tips, and inspiration to keep your creativity blooming.
😍 Bring Your Crochet Mojo Back – Sign Up Now! Click on the image 👆🏼
Abbreviations
- ch = chain
- sl st = slip stitch
- sc = single crochet
- hdc = half double crochet
- dc = double crochet
- tr = treble crochet
- st(s) = stitch(es)
- MR = magic ring
If you prefer UK terms, swap sc→dc, hdc→htr, dc→tr, tr→dtr.
Size & Gauge
Exact gauge isn’t critical. With worsted yarn and a 4.0–4.5 mm hook, each finished butterfly is about 2.25–2.75 in (5.5–7 cm) wide. Use a smaller hook or sport-weight yarn for daintier charms; go larger for bag tags.
Pattern Overview
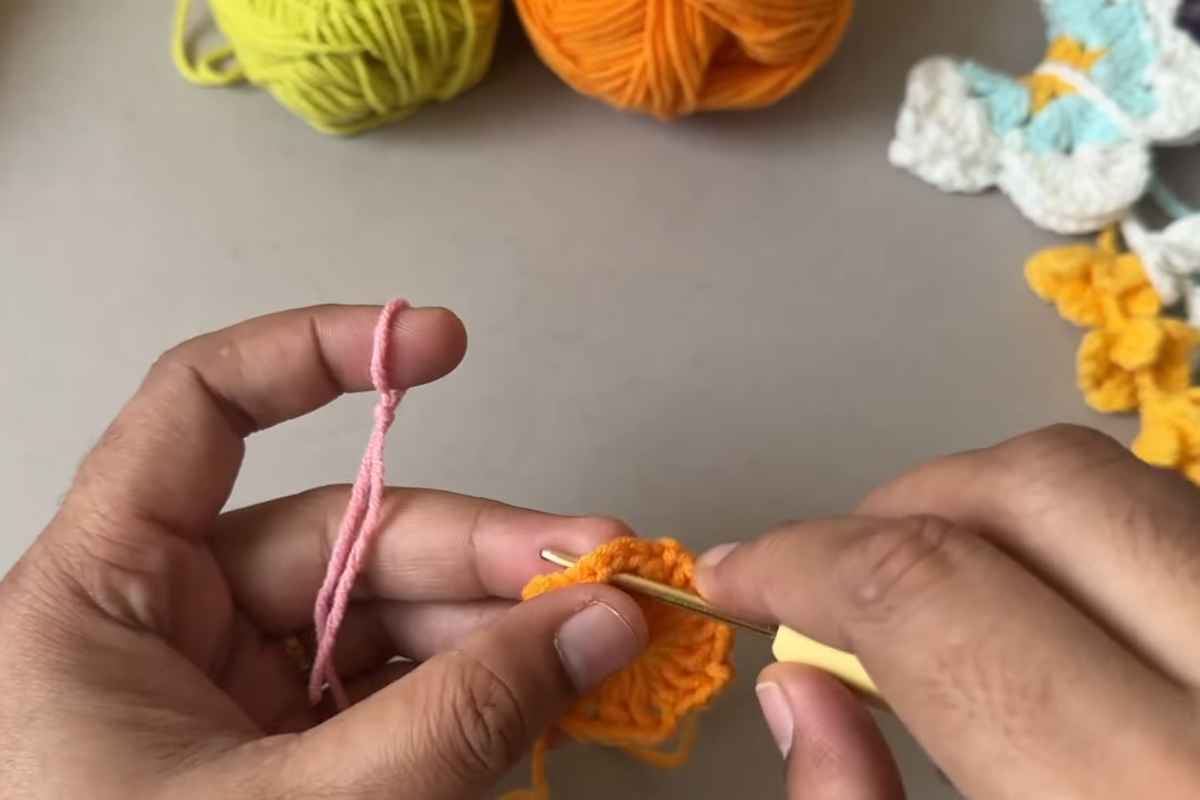
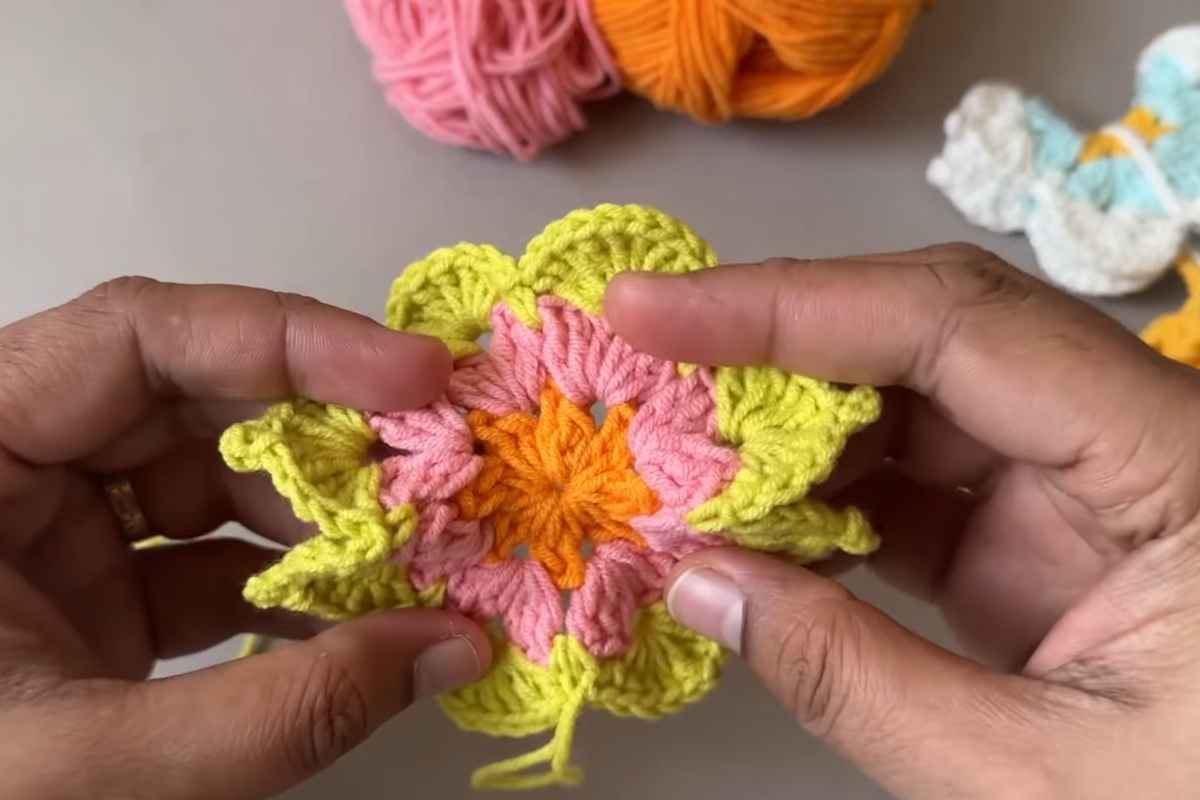
Upper Wings (Make 2)
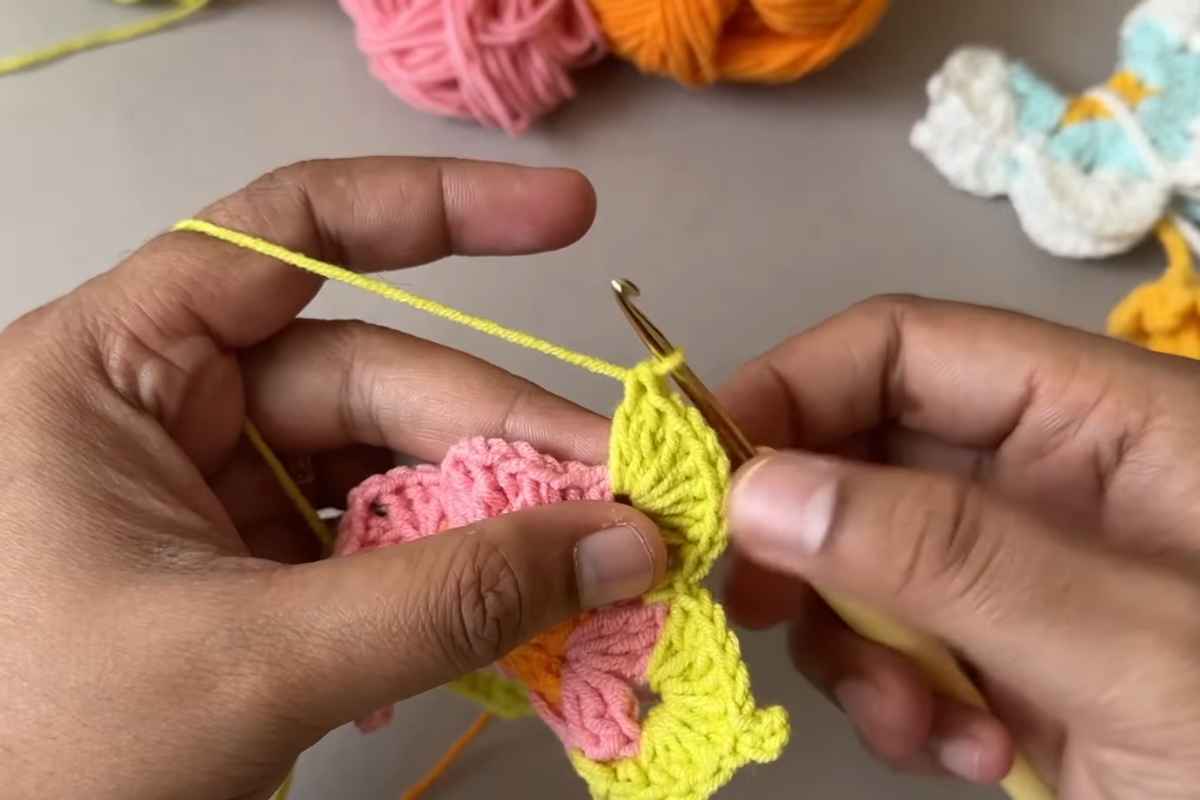
- Round 1 (Color A): MR, ch 2 (does not count as a st), 12 dc in ring, pull closed, sl st to first dc. (12)
- Round 2: Ch 2, 2 dc in each st around, sl st to first dc. (24)
- Round 3 (shaping): Ch 1, (sc, hdc) in next st, 2 dc in next st, (dc, tr) in next st, (tr, dc) in next st, 2 dc in next st, (hdc, sc) in next st, repeat 4 times around the circle to create gentle scallops. Sl st to first sc, fasten off, weave ends.
You’ll have a subtly scalloped circle that reads as a plush, rounded upper wing.
Lower Wings (Make 2)
- Round 1 (Color B): MR, ch 1, 10 hdc in ring, pull closed, sl st to first hdc. (10)
- Round 2: Ch 1, 2 hdc in each st around, sl st to first hdc. (20)
- Round 3 (optional accent): Ch 1, (sc in next st, 2 sc in next st) around, sl st, fasten off. (30)
The lower wings are slightly smaller and flatter so the butterfly reads naturally when assembled.
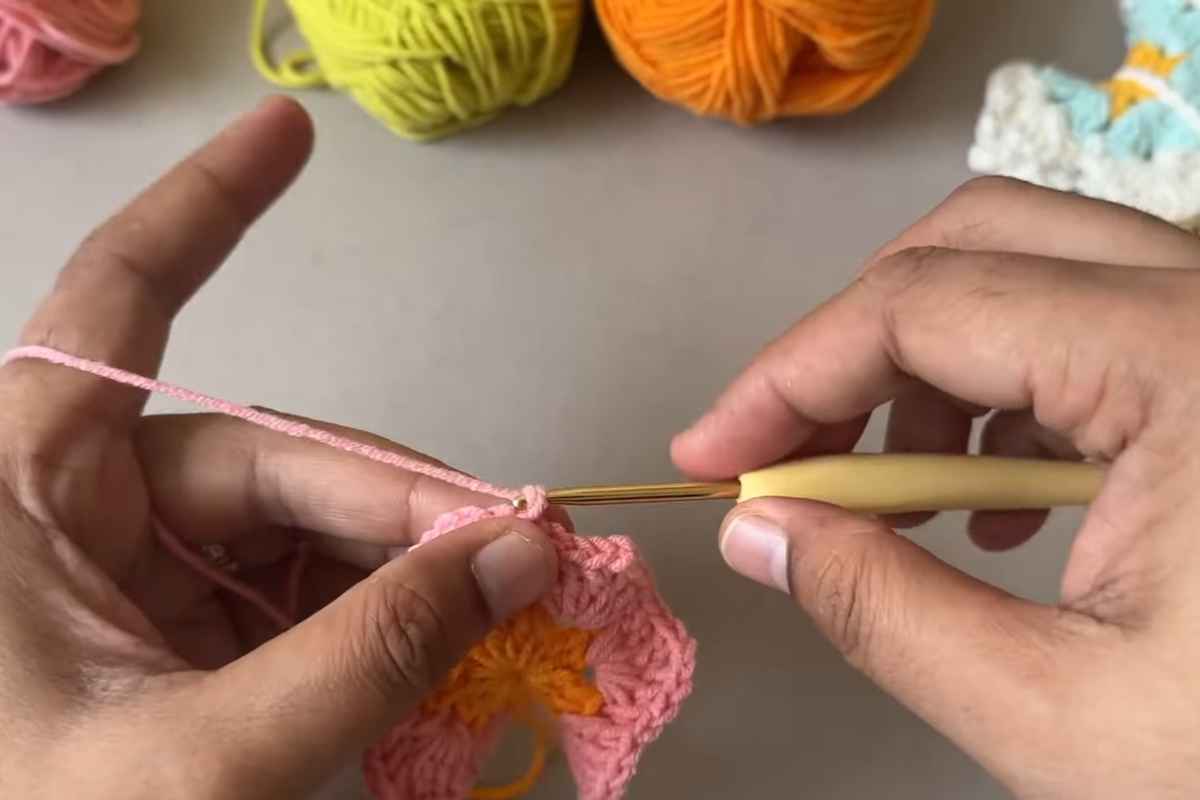
Assembly
Layout
Arrange pieces right-side up: two upper wings at the top (touching edges), two lower wings beneath them, forming a rounded diamond. The inner edges should barely overlap to create a slim center channel for the body.
Join the Wings
- Thread yarn needle with a strand of Color A or B (or a neutral).
- With small, neat whip stitches, tack the four circles together along the inner edges only—just enough to hold shape while you add the body. Keep stitches invisible from the front.
Body & Antennae
- Body wrap: Attach body color (neutral) at the top center where upper wings meet. Chain 8–12 (length depends on your butterfly height), then lay the chain down the center seam.
- Slip the hook under a few stitches near the bottom center, sl st to anchor the chain. This creates a slender, slightly raised body line.
- Antennae: At the head (top), ch 6, sl st into the second ch from the hook, sl st back down remaining chains to the “head.” Repeat for the second antenna. Fasten off and weave ends.
Make it crisp: A light steam (hover only) or a quick finger-press sets the body and wings in place for a clean silhouette.
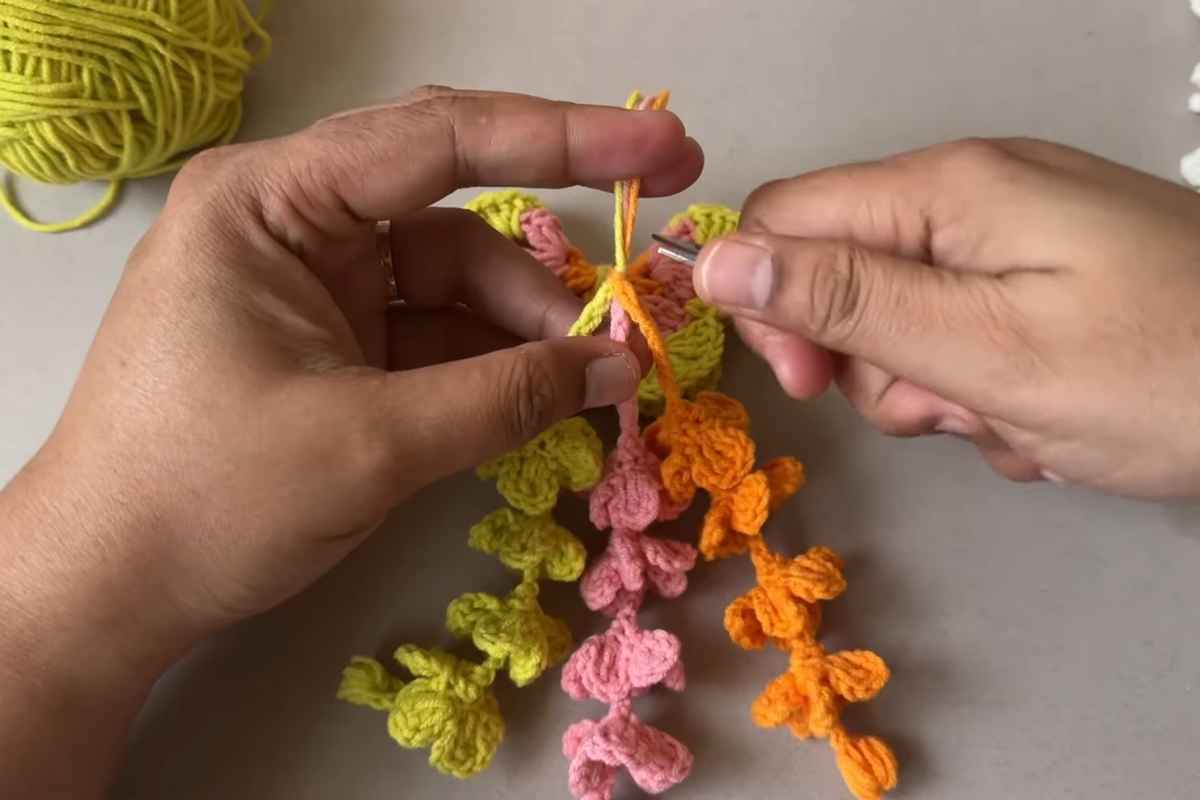
Optional Edging (For Pop and Definition)
To frame the wings and sharpen the outline:
- Join body color at any point on an upper wing.
- Work sl st, sc, sl st rhythm around the wing edge for a subtle bead-like cord.
- Repeat for all four wings, easing around scallops.
- Fasten off and weave ends neatly to the back.
A fine contrast edging turns a cute butterfly into a polished, gift-ready charm.
Color Play Ideas
- Classic Two-Tone: Upper wings Color A, lower wings Color B, body in cream or charcoal.
- Gradient Wings: Pick three adjacent shades (e.g., blush → coral → fuchsia). Work Round 1 in the lightest color and Round 2–3 in progressively deeper shades for a soft ombré.
- Speckled Fun: Use a variegated yarn for upper wings and a solid for lower wings. The mottled color reads like natural wing patterning.

- Metallic Edge: Add a thin metallic thread held with the body yarn for a shimmery outline.
Make It a Charm (Hardware Attachment)
- Weave in all ends firmly.
- With the body yarn, stitch a small loop behind the head (ch 6, join to base, fasten off).
- Slip a jump ring through the loop and add a lobster clasp or key ring.
- For zipper pulls, skip hardware and stitch the loop directly to the zipper tab using strong sewing thread.
Pro tip: Dab a tiny bit of clear craft glue on knots at the back for extra security, especially for pieces that will jingle on keys or backpacks.
Troubleshooting & Finishing Tips
My circles ruffle or cup
- Ruffling = too many stitches; go down a hook size or skip the optional Round 3 on lower wings.

- Cupping = too few stitches; add one extra increase round or block lightly.
The butterfly looks uneven
- Make sure your upper wings match in stitch count and tension.
- Align all inner edges before you tack them; even a 2–3 mm misalignment changes the silhouette.
Antennae won’t sit flat
- Slip stitch back down the chains to give them a bit of weight.
- Steam lightly and pinch to set the bend.
Edges look fuzzy
- Consider cotton yarn for cleaner stitch definition.
- Work a tight sc edging—it hides fuzz and frames the wings.
Care & Washing
Most acrylic and cotton butterflies are machine-washable, but to preserve shape, hand wash in cool water, roll in a towel to remove excess moisture, then lay flat to dry. Avoid high heat; it can flatten texture and soften acrylic fibers.
Creative Ways to Use Your Butterfly
- Keychains & Backpack Charms: A pop of color that’s durable and giftable.
- Party Favors: Tie to treat bags or napkin rings for spring birthdays or baby showers.
- Hair Clips & Headbands: Hot-glue to a clip or sew onto a soft band for a whimsical accessory.
- Greeting Cards: Stitch or glue a butterfly to cardstock for a keepsake 3D card.
- Home Décor: Cluster several on a twig mobile or string into a garland.
Make It Yours: Quick Customizations
- Mini Lace Look: Switch to sport-weight cotton and a 2.75–3.25 mm hook; add picot points (ch 3, sl st in first ch) around the upper wing scallops.
- Bold Outline: Work a final round of reverse single crochet (crab stitch) around all wings for a corded border.
- Textured Body: Instead of a chain, work surface slip stitches up and down the center twice for a raised ridge.
- Beaded Sparkle: Thread a few seed beads onto the body yarn before you begin; slide two into each antenna tip.
Let Your Butterflies Take Flight
This crochet butterfly charm is the perfect quick win: minimal yarn, soothing stitches, and maximum color play. Once you make one, you’ll fly through a whole garden of them—each with its own personality.
Keep a handful on hand for last-minute gifts, bag charms, or party favors, and enjoy how such a simple, beginner-friendly project can add a bright burst of handmade joy to everyday life.
Images and patterns courtesy of Jesna Althaf
Enjoy The Video Tutorial

Source: Jesna Althaf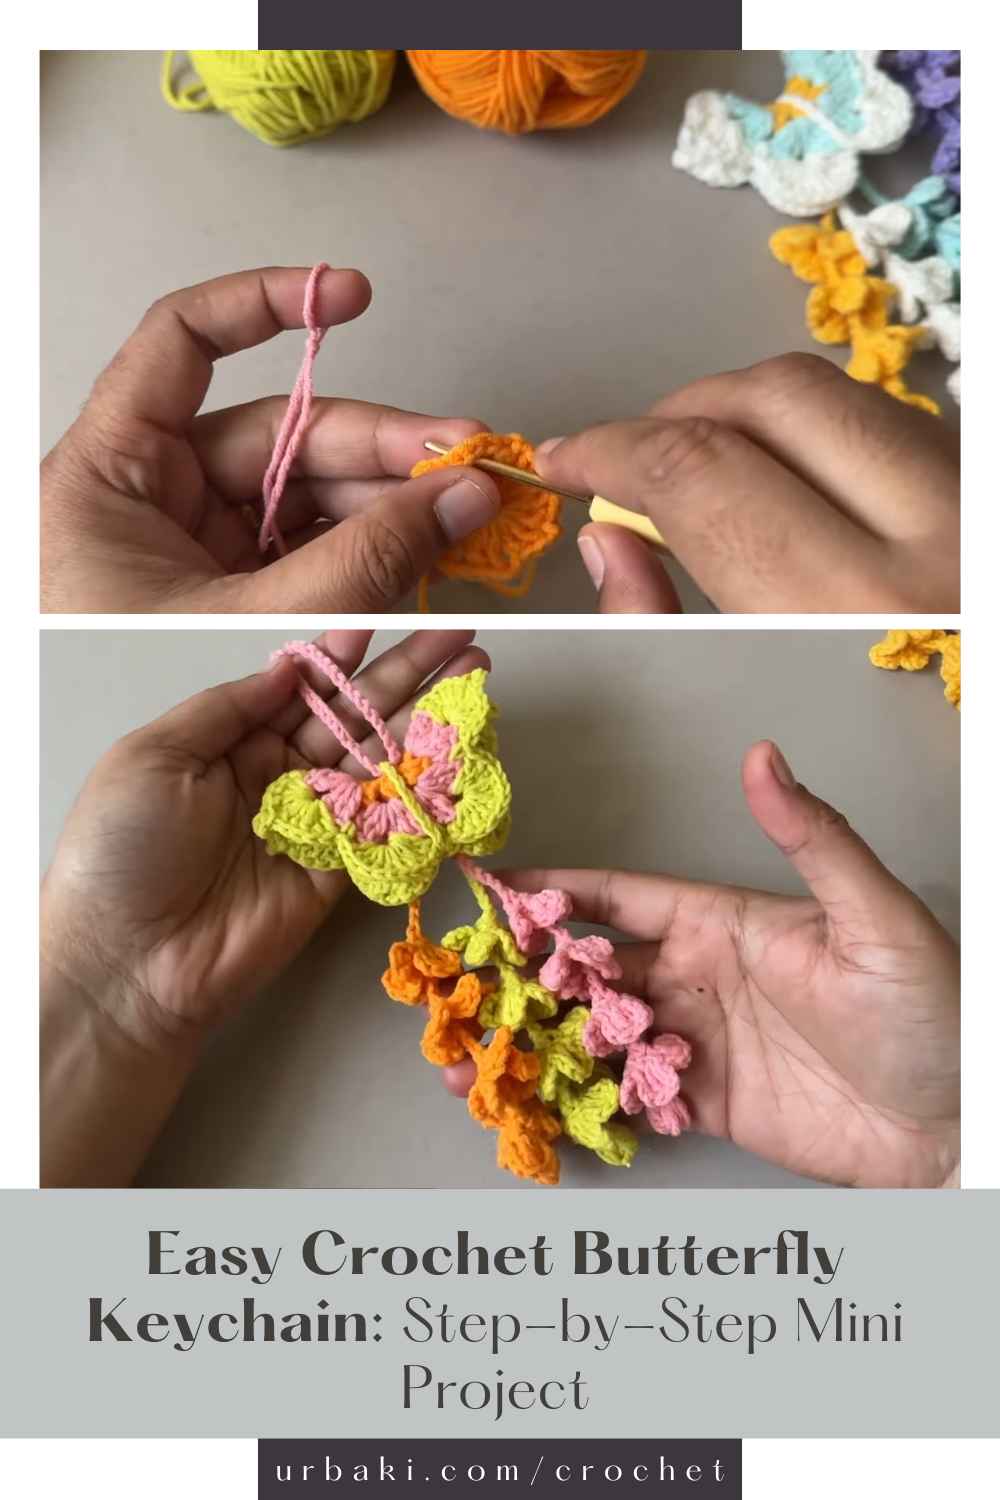
More crochet projects for you