
Flower Bouquet Crochet Tutorial: Tulip
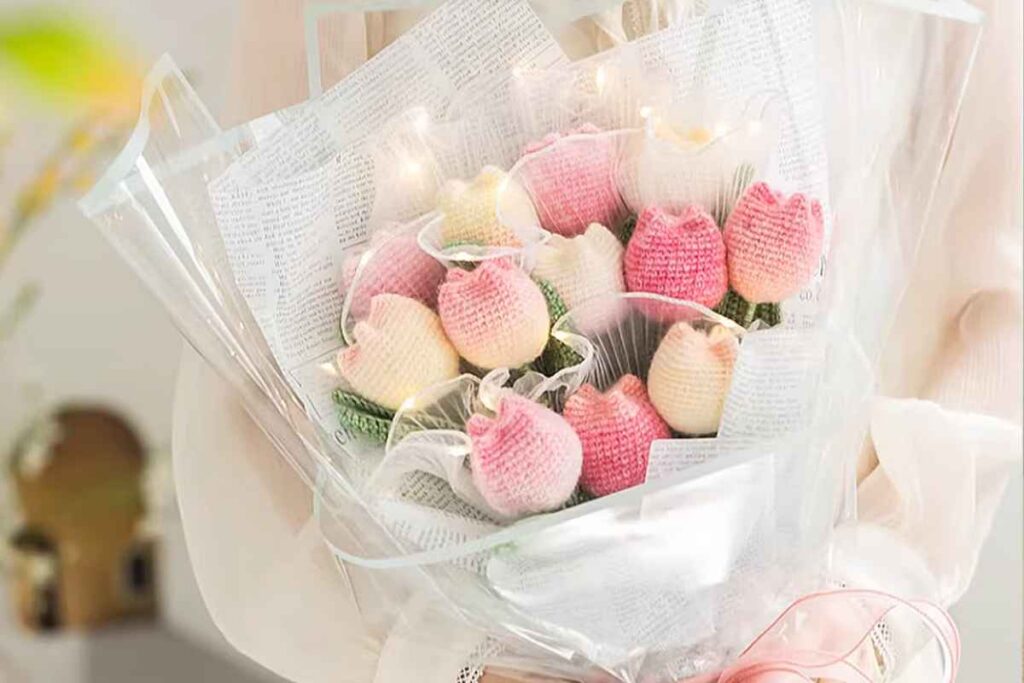
Crocheting a beautiful flower bouquet is a rewarding and relaxing activity, especially when you create vibrant and delicate blooms like tulips. These charming flowers can brighten up any space, making them a perfect addition to your home decor or a thoughtful handmade gift.
In this tutorial, we'll explore how you can crochet a stunning tulip flower as part of a crochet bouquet, highlighting the beauty of this lovely bloom. Whether you're an experienced crocheter or a beginner, you'll find that this project is both fun and satisfying.
Crafting the Tulip Flower
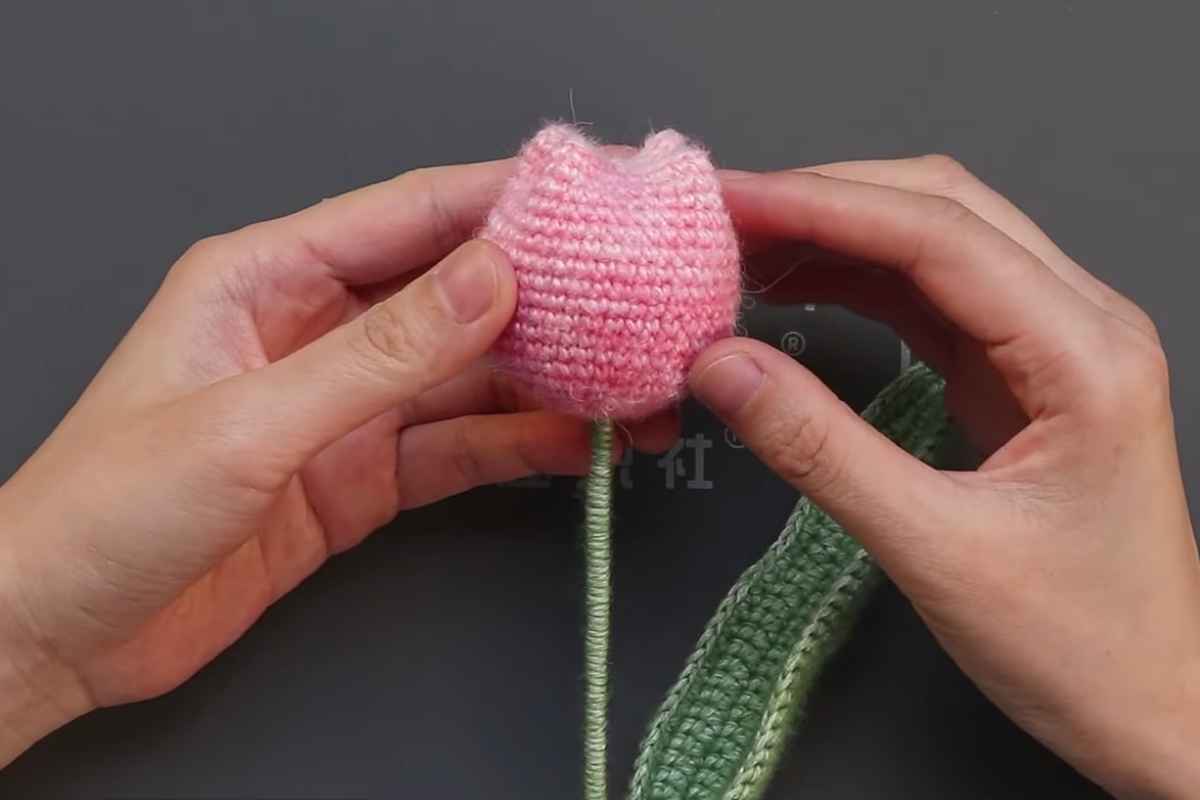
The tulip flower is composed of three main sections: the petals, the stem, and the leaves. Each of these components can be crocheted separately and then assembled into a cohesive, realistic flower. You’ll want to make the petals first, ensuring that they have a smooth, flowing look, and then move on to the stem and leaves to complete the flower.
Refill Your Creative Cup
Feeling stuck or out of ideas? Let us bring the spark back to your hook. Our weekly emails deliver patterns, tips, and inspiration to keep your creativity blooming.
😍 Bring Your Crochet Mojo Back – Sign Up Now! Click on the image 👆🏼
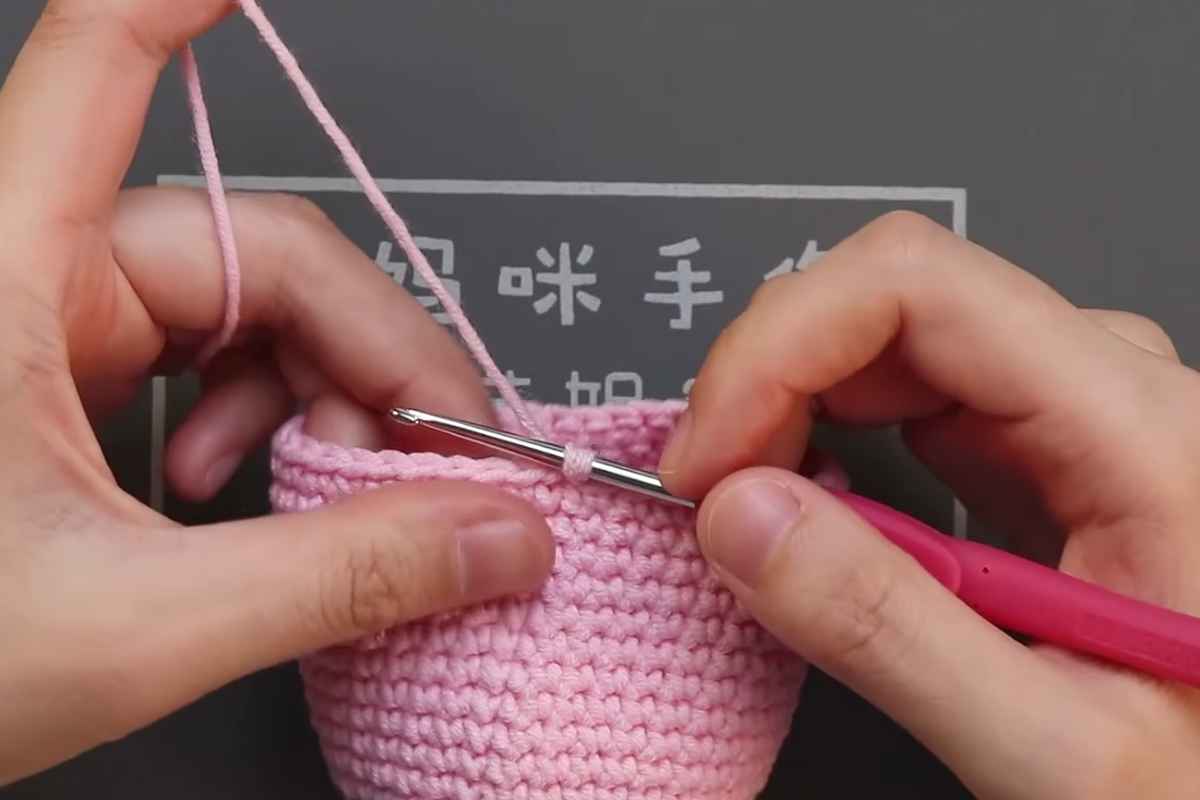
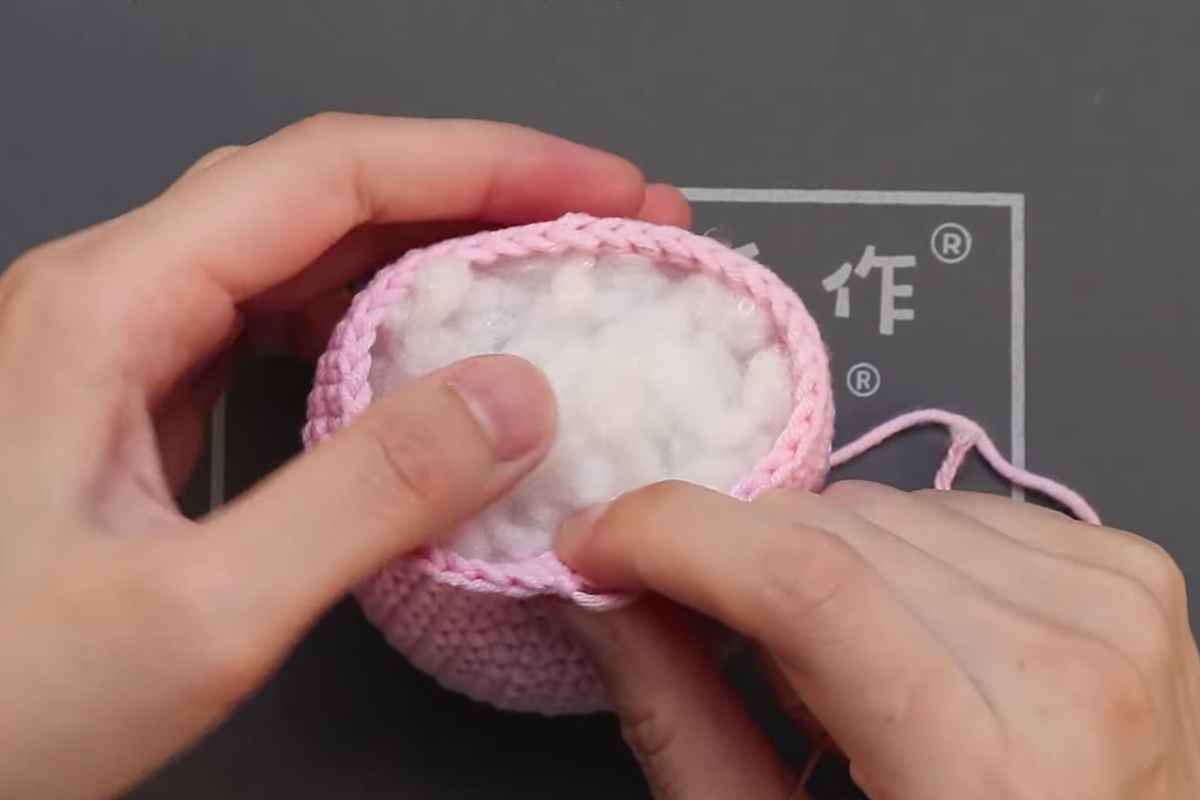
Petals: The Heart of the Tulip
The most striking part of any tulip is its elegant petals, and in crochet, the petals can be crafted to have a soft, curved shape. By starting with a simple chain and gradually increasing stitches, you can create a shape that mimics the natural curvature of tulip petals. These petals can be worked individually, which gives you the flexibility to adjust the size and number to suit your desired final look.
Once all the petals are completed, they are stitched together at the base, creating a natural bloom shape. The petals can be worked in vibrant shades of red, pink, yellow, or even pastel tones. Don’t be afraid to experiment with gradient colors, which can add depth and a more lifelike look to your tulips.
The Stem: A Solid Foundation
The stem of your tulip provides a strong base for the flower, allowing it to stand tall and proudly display its petals. The stem is typically created by crocheting a long, simple chain stitch or working in rounds to form a tubular shape. Florist wire can be added inside the stem to give it extra strength, ensuring that your tulip stays upright when displayed in a vase or as part of a larger bouquet.
While the stem is usually green, you can also add touches of color to give it a unique look. A two-tone stem can add an artistic flair to your project, or you could try creating a stem that transitions from green to yellow for a different effect.
Leaves: Adding Extra Charm
No tulip is complete without its leaves, which help frame the flower and complete the overall look. The leaves can be worked in a simple leaf shape using chain stitches, single crochet, and increases. By experimenting with different stitch techniques, you can achieve leaves that range from smooth and delicate to textured and detailed.
The leaves should be attached securely to the base of the stem, surrounding the tulip’s bloom and adding a touch of contrast. Like the stem, the leaves are typically crocheted in shades of green, but feel free to use variegated yarn for a more dynamic effect.
Assembling Your Tulip Bouquet
Once all the parts of the tulip are completed, it’s time to assemble them into a bouquet. Carefully arrange the petals, stem, and leaves together, and stitch them securely. If you’re creating multiple tulips for a bouquet, you can position the flowers in a cluster, with each bloom slightly tilted in different directions for a natural, flowing look.
The beauty of crocheted tulips lies in their versatility. You can create bouquets of varying sizes, with tulips in different colors or even mixed with other crocheted flowers like daisies or roses. The combination of different flowers will enhance the charm of your bouquet, making it a beautiful piece to decorate your home or give as a thoughtful gift.
Displaying Your Crocheted Tulip Bouquet
Crocheted tulips make wonderful decorations for any occasion. Whether you want to place them in a vase as part of a spring centerpiece or give them as a gift, these flowers will surely add a personal touch to your home. If you prefer a more permanent arrangement, you can even create a floral wreath or garland by attaching multiple tulips to a circular base.
Because crocheted flowers are durable and long-lasting, your tulip bouquet will continue to brighten your home for many years to come. Whether displayed indoors or given to someone special, these tulips will undoubtedly be cherished.
Crocheting tulips for a bouquet is an enjoyable and creative project that allows you to experiment with various techniques and yarns.
By crafting your colorful flowers, you not only create a beautiful piece of decor but also experience the joy of making something with your own hands. So, grab your crochet hook, choose your favorite yarn, and start creating your very own crochet tulip bouquet today!
Images and patterns courtesy of Susydiy
Enjoy The Video Tutorial

Source: Susan's Family 蘇蘇姐家
More crochet projects for you