
How to Crochet a No-Sew Llama: Easy Amigurumi Tutorial
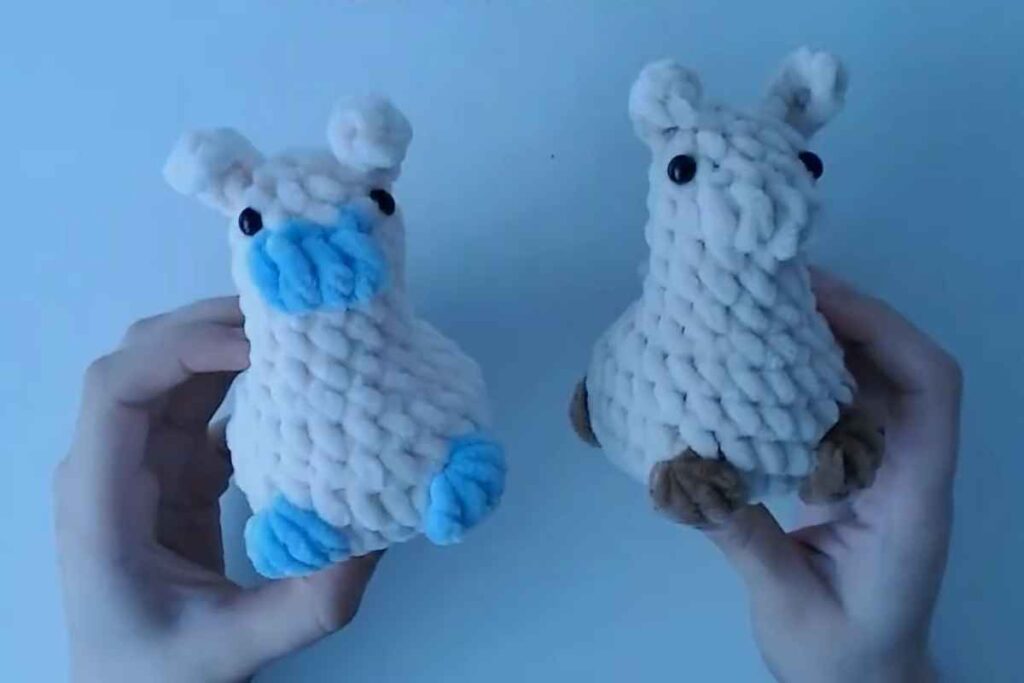
Amigurumi is a popular and rewarding crochet technique that allows you to create adorable little creatures. One of the most charming and easy-to-make projects is a no-sew llama.
Whether you’re a seasoned crocheter or just getting started, this tutorial will guide you through each step to create your very own no-sew llama amigurumi. Let’s dive in!
Materials You’ll Need
Before starting, gather your materials. Here’s what you’ll need to make this no-sew llama:
- Yarn: Choose yarn in the colors you prefer. For the llama, you will need a base color (white or cream), a contrasting color for the saddle (like pink or blue), and a bit of black for the eyes and nose.
- Crochet Hook: A 3.5mm hook should work perfectly for the yarn size.
- Fiberfill Stuffing: To give your llama shape and softness.
- Yarn Needle: This is optional for some finishing touches, but we’ll focus on the no-sew technique in this tutorial.
- Scissors: For cutting the yarn at the end.
- Stitch Markers: These are helpful for keeping track of rounds.
Now that you have everything, let’s begin!
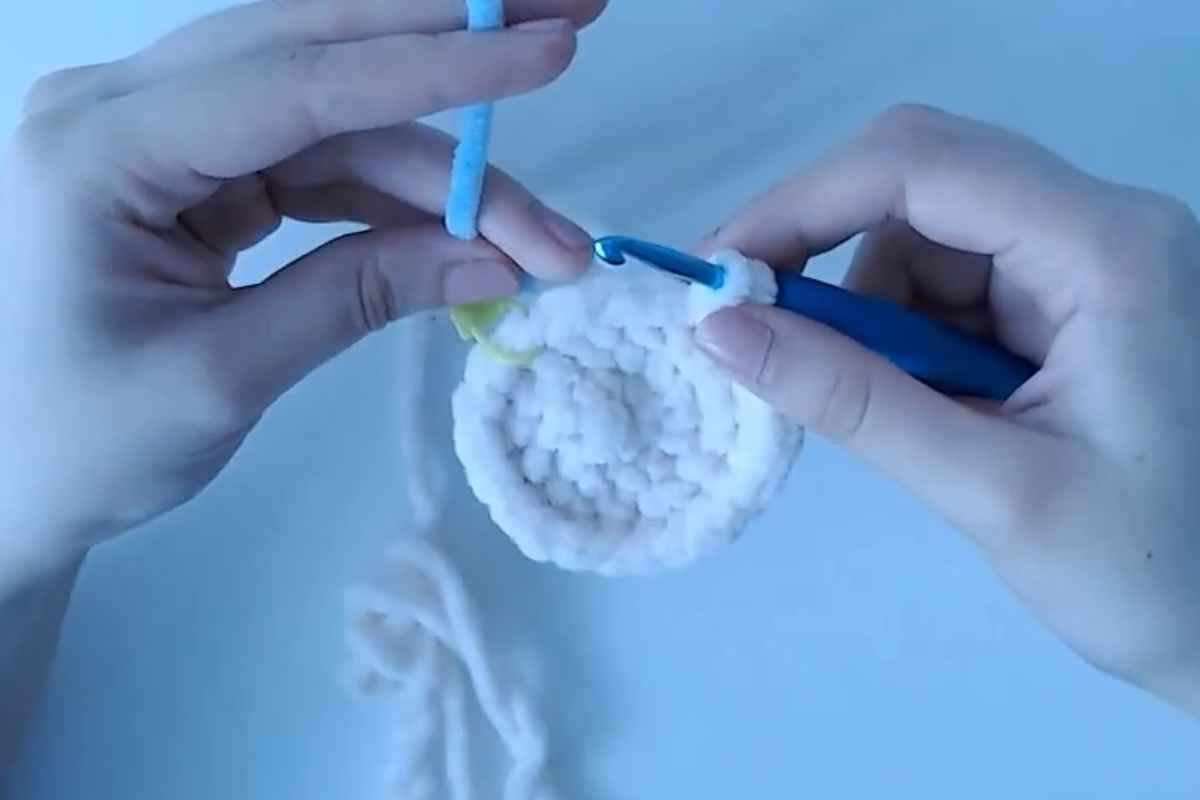
Creating the Llama’s Body
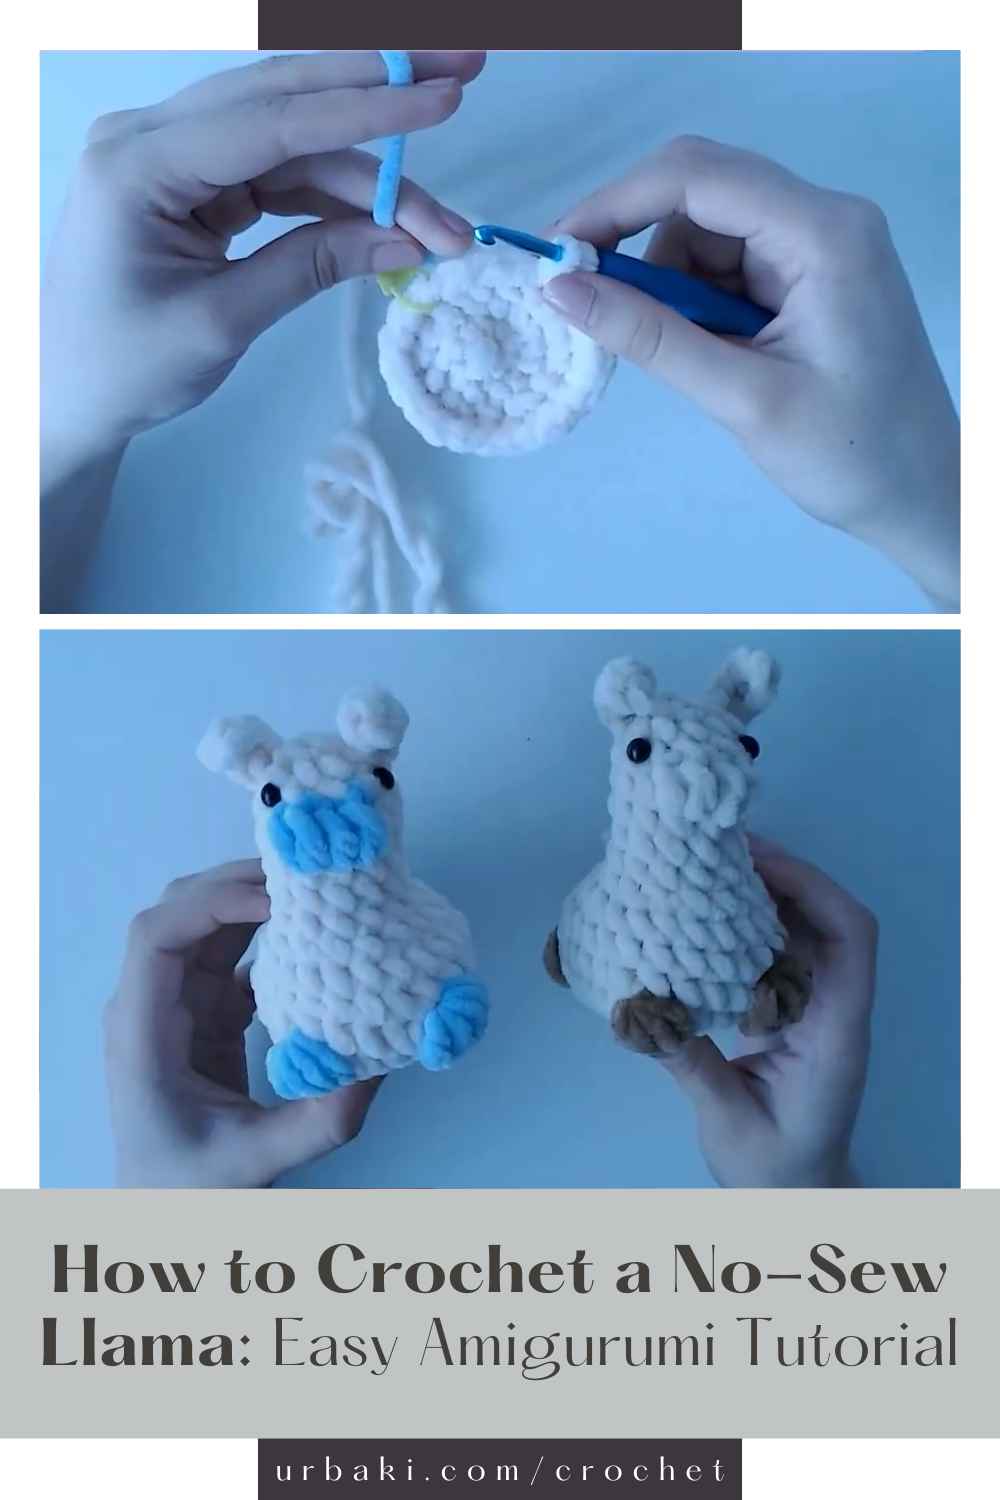
The body is the foundation of your llama, and with this no-sew technique, we’ll make it all in one piece. Starting from the bottom, we will crochet the body in the round, increasing as we go to build the shape.
Step 1: Start with a Magic Ring
- Make a magic ring and crochet 6 single crochets (sc) into the ring. Pull the ring tight to close.
- In the next round, increase every stitch (you’ll have 12 stitches now).
- Continue increasing each round (increase 6 stitches per round) until the body is the size you want for the llama's torso. Remember, it’s essential to keep the shape round.
Step 2: Continue with Even Rows
- After reaching the desired body size, crochet even rounds without any increases. Keep working in the round until the body is tall enough to reach the bottom of the llama’s neck.
Step 3: Start the Neck
- Once you’re happy with the height, begin to gradually decrease stitches to shape the neck. After a few decreasing rounds, you will have a narrowed section for the neck.
- Once you reach the top of the neck, fasten off the yarn, leaving a long tail to close the top of the body.
Making the Llama’s Head
The head is another crucial part of this project, and like the body, we’ll work it in one continuous piece.
Step 1: Begin with a Magic Ring
- Start the head the same way as the body, with a magic ring and 6 single crochets.
- Increase each round until the head is large enough to match the size of the body.
Step 2: Shape the Head
- After reaching the desired size, crochet several even rounds to form the head. The head should have a nice, rounded shape, similar to the body.
- Use a stitch marker to keep track of your rounds.
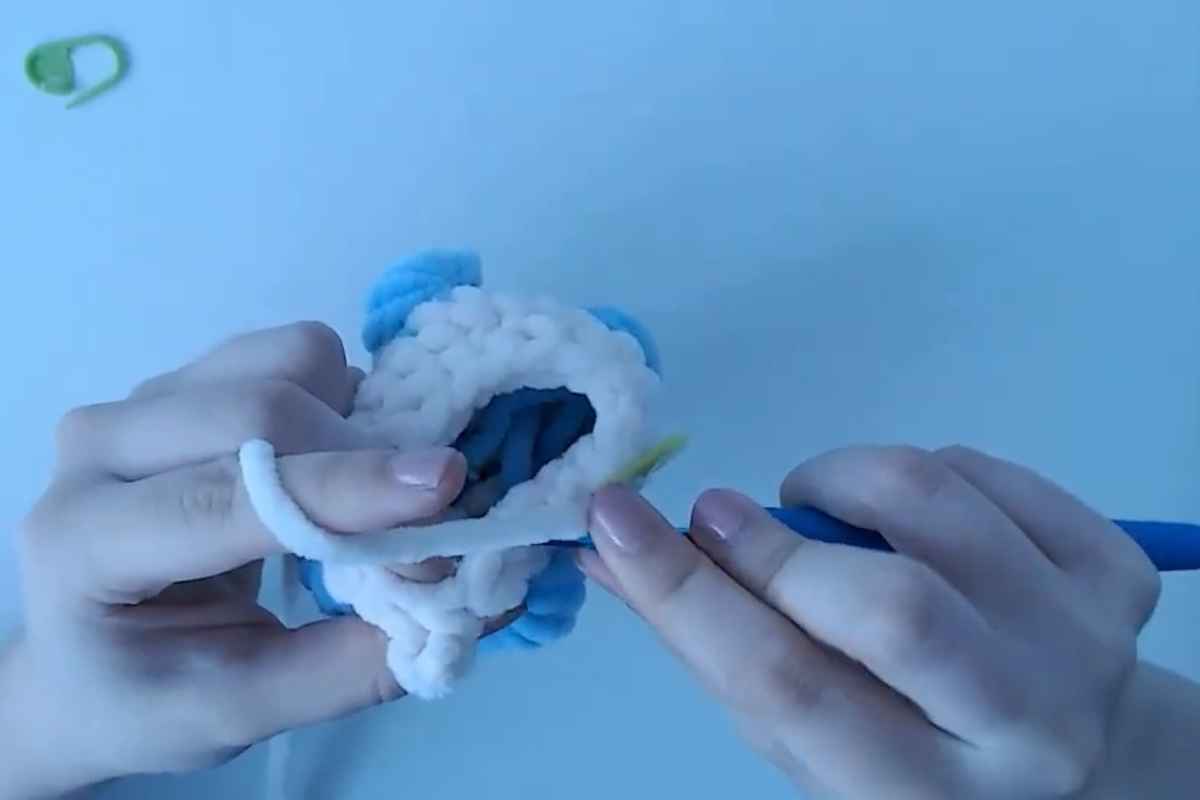
Step 3: Attach the Head to the Body
Since we’re making this a no-sew project, attaching the head to the body will be done by joining the pieces directly. Once you’ve completed the head, leave a long tail for attaching.
To attach the head to the body, thread the tail through the stitches at the top of the body and head, crocheting through both pieces until they are securely joined. You can also crochet around the base of the head and body to blend the two pieces seamlessly.
Making the Legs
The legs are crocheted individually and then attached to the body. Here’s how to make them:
Step 1: Start with a Magic Ring
- Create a magic ring and crochet 6 single crochets into it.
- Work in the round, increasing for a few rows to form the foot. After that, continue with even rows until the leg reaches the desired length.
Step 2: Attach the Legs
- Attach each leg to the bottom of the body by crocheting through the body and leg, ensuring they are securely joined. There’s no need for sewing here!
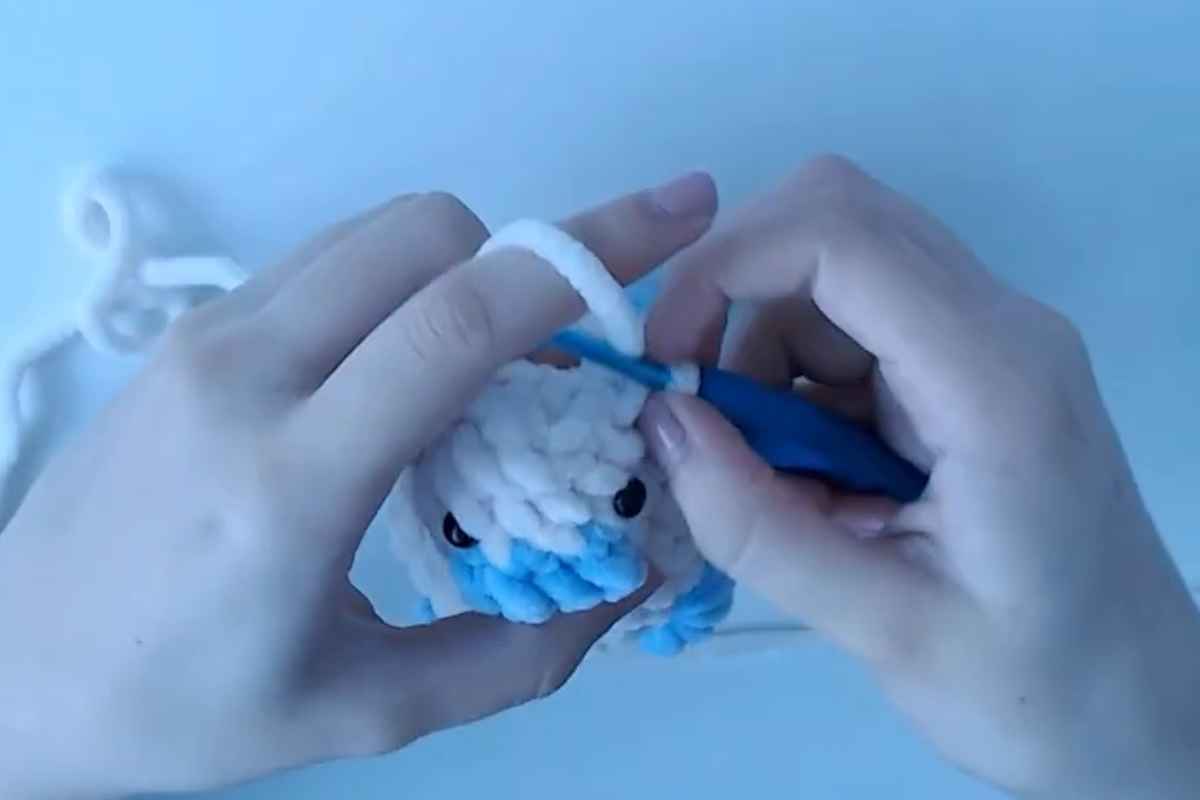
Creating the Llama's Facial Features
For this no-sew llama, we will crochet the facial features directly onto the head, avoiding any need for sewing.
Step 1: Eyes and Nose
- Use a small amount of black yarn to create the eyes. For each eye, crochet 2 single crochets into a magic ring. Then, stitch the eye directly onto the llama’s face where you’d like it.
- For the nose, crochet a small oval shape and stitch it in place just below the eyes, using black yarn.
Step 2: Mouth
- You can crochet a small line for the mouth beneath the nose, giving your llama a cute expression. Use a simple chain stitch or a few single crochets for this.
Adding the Saddle
To make your llama extra special, add a colorful saddle to its back.
Step 1: Crochet the Saddle
- Create a small rectangle by crocheting a few rows of single crochets. Use contrasting colors to make the saddle stand out.
Step 2: Attach the Saddle
- Simply place the saddle on the back of the llama and crochet it directly onto the body. No sewing needed—just crochet through the saddle and the body to keep it in place.
Adding the Tail
For the tail, simply crochet a small chain of about 10-15 stitches, then fasten it off. Attach the tail to the back of the llama using the same technique as the saddle, crocheting it directly onto the body.
Final Touches
Once everything is crocheted and attached, it’s time to stuff your llama with fiberfill to give it shape and structure. Make sure to stuff it evenly, ensuring the body, head, and legs all have a soft yet firm structure.
A Simple Amigurumi Project
This no-sew llama amigurumi is a fun and rewarding crochet project that’s perfect for beginners and experienced crocheters alike. By following the steps in this tutorial, you’ve created a cute, charming llama without the need for sewing pieces together!
Not only does it make for a great addition to your collection of crocheted items, but it also makes a lovely gift or decorative piece for any home. So grab your yarn and hook, and get started today!
Images and patterns courtesy of My_universe64
Enjoy The Video Tutorial

Source: My_universe64
Did you find this post useful or inspiring? Save THIS PIN to your Crochet Board on Pinterest!
More crochet projects for you