
Minimal Crochet Flower Clip for Everyday

Looking for a quick, charming accessory that brightens your look in minutes? This Flower Morning Hairclip is lightweight, beginner-friendly, and easy to customize with colors you already love.
Below you’ll find a clear, step-by-step guide to crochet a layered flower, add a small leaf, and secure it neatly to an alligator clip or barrette so it stays put from coffee to sunset.
What You’ll Need
- Yarn: Light or medium weight cotton or acrylic (Category 2–3 for a delicate flower, Category 4 for fuller petals). Choose two shades—one for the center and one for the petals.
- Hook: 3.0–3.5 millimeters for lighter yarns, 3.5–4.0 millimeters for worsted.
- Clip: 45–50 millimeter alligator clip or a small snap barrette.
- Notions: Yarn needle, scissors, a 2–3 centimeter felt circle, fabric or hot glue, and an optional small bead, pearl, or button for the center.
- Optional: Light starch or fabric stiffener to help the petals hold their shape.
Tip: Cotton yarn gives crisp petals; acrylic gives soft, springy petals. Either works—pick the texture you like.
Sizing and Gauge (Quick Notes)
Gauge isn’t critical, but it affects size and structure. If your flower looks floppy, go down a hook size or add a touch of stiffener. If it feels too dense, go up a hook size or drop one round of petals.
- With double-knitting weight yarn and a 3.5 millimeter hook: flower about 5–6 centimeters wide
- With worsted weight yarn and a 4.0 millimeter hook: flower about 7–8 centimeters wide
U.S. crochet terms are used throughout.
Crochet the Flower (Two Layers)
We’ll make a tidy center, a base of small petals, then a second round for fuller petals. The result is a morning-fresh, layered bloom.
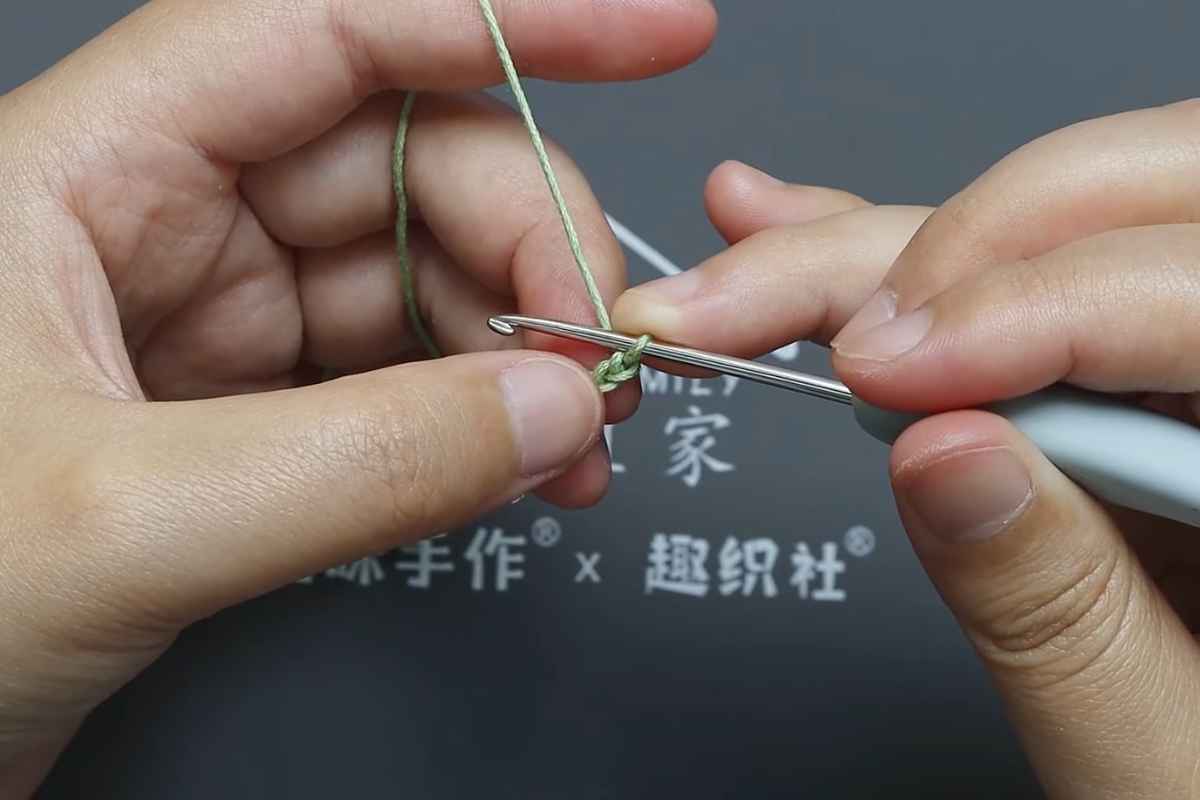
Round 1: Neat Center
- With the center color, make a magic ring, chain 1 (does not count as a stitch).
- Work 10 single crochet into the magic ring, pull the ring snug.
- Join with a slip stitch to the first single crochet. Fasten off the center color.
For a tighter center, work 8 single crochet instead of 10. A tighter ring makes the flower look more polished.
Round 2: Petal Bases (Back Ridge)
Switch to the petal color. We’ll create small chain arches that become petals.
- Join yarn to any stitch.
- Repeat from asterisk five times around: chain 3, skip 1 stitch, slip stitch in the next stitch. You will have 5 arches total.
- If your center has 10 single crochet, this repeat fits perfectly: each arch spans two stitches.
Petal Layer A (work into each chain-3 arch):
In the first arch: single crochet, half double crochet, 2 double crochet, half double crochet, single crochet. Repeat the same sequence in each arch. Slip stitch at the base to finish the round.
These first petals are small and tidy, giving the flower its structured silhouette.
Round 3: Second Layer (Behind the First)
We’ll anchor the second layer behind Round 2 so the flower gains volume.
- Turn the flower slightly and locate the unused posts at the back of Round 1 (the outer “shoulders” of those center single crochet).
- Working behind the first petal layer, slip stitch to join the petal color in any back gap.
- Repeat all the way around to create 5 back arches: chain 4, slip stitch behind the next space.
Petal Layer B (into each chain-4 arch):
In the first back arch: single crochet, half double crochet, 2 double crochet, treble crochet, 2 double crochet, half double crochet, single crochet. Repeat for each arch. Slip stitch to finish.
This longer sequence adds gentle height and a soft, dawn-like curve to each petal—perfect for a morning bloom.
Optional Round 4: Slight Ruffle
If you want a fuller flower for thicker hair, add a light ruffle:
- Join yarn to the front loops of the Round 2 petals and work single crochet, half double crochet, double crochet in each petal’s center stitch, keeping tension relaxed. This creates a whisper-thin ridge without adding bulk.
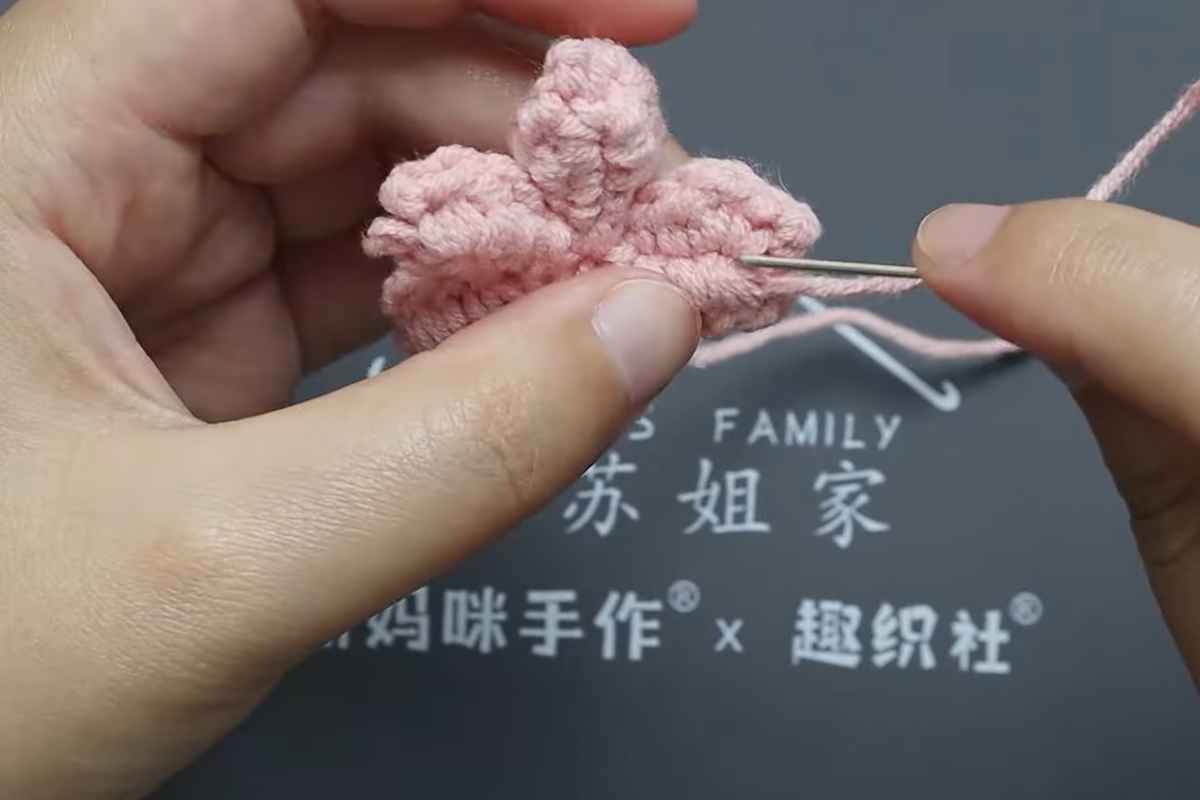
Add an Accent Leaf (Optional)
A single leaf keeps the clip refined and wearable. Make one or two, depending on your style.
- With green yarn, chain 7.
- In the second chain from the hook: single crochet, then half double crochet in the next chain, double crochet in the next two chains, half double crochet in the next, single crochet in the last.
- Chain 1, pivot to work along the other side of the foundation chain: single crochet, half double crochet, double crochet, double crochet, half double crochet, single crochet.
- Slip stitch to the first single crochet to shape the tip. Fasten off, leaving a long tail for sewing.
- For a more sleek leaf, skip one double crochet on each side so it stays petite.
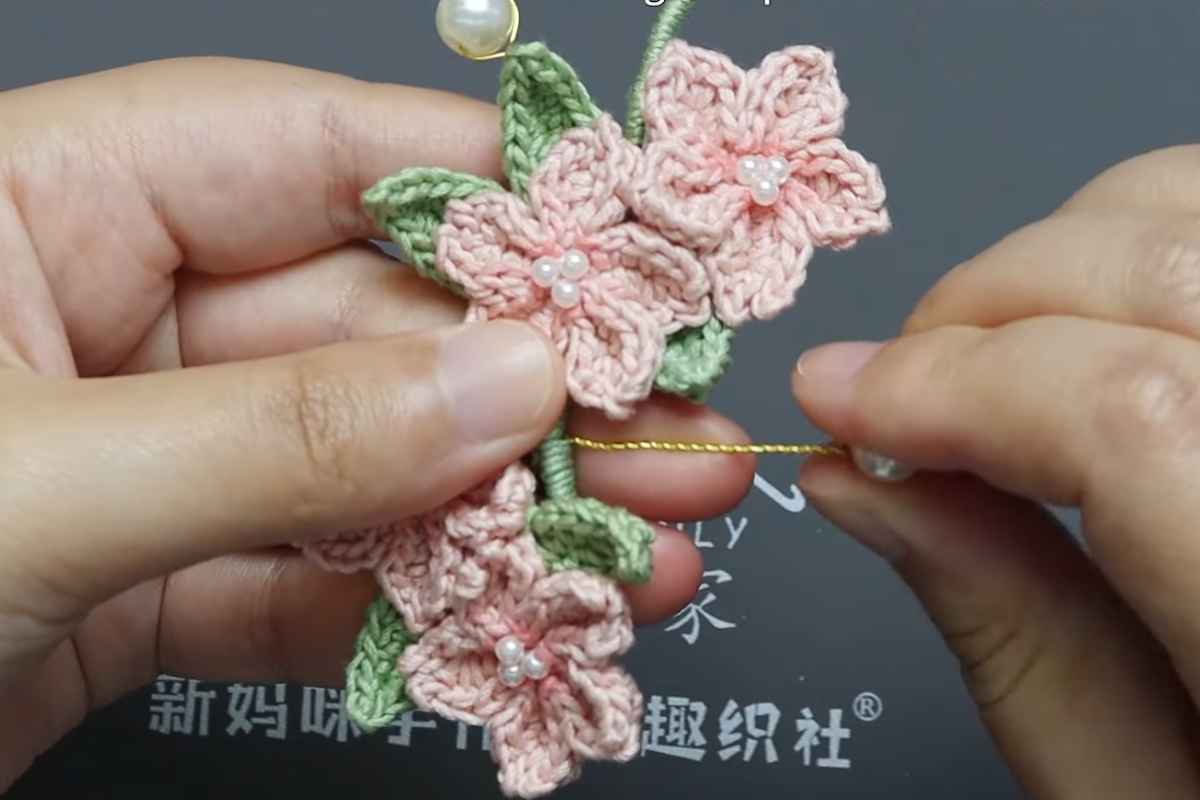
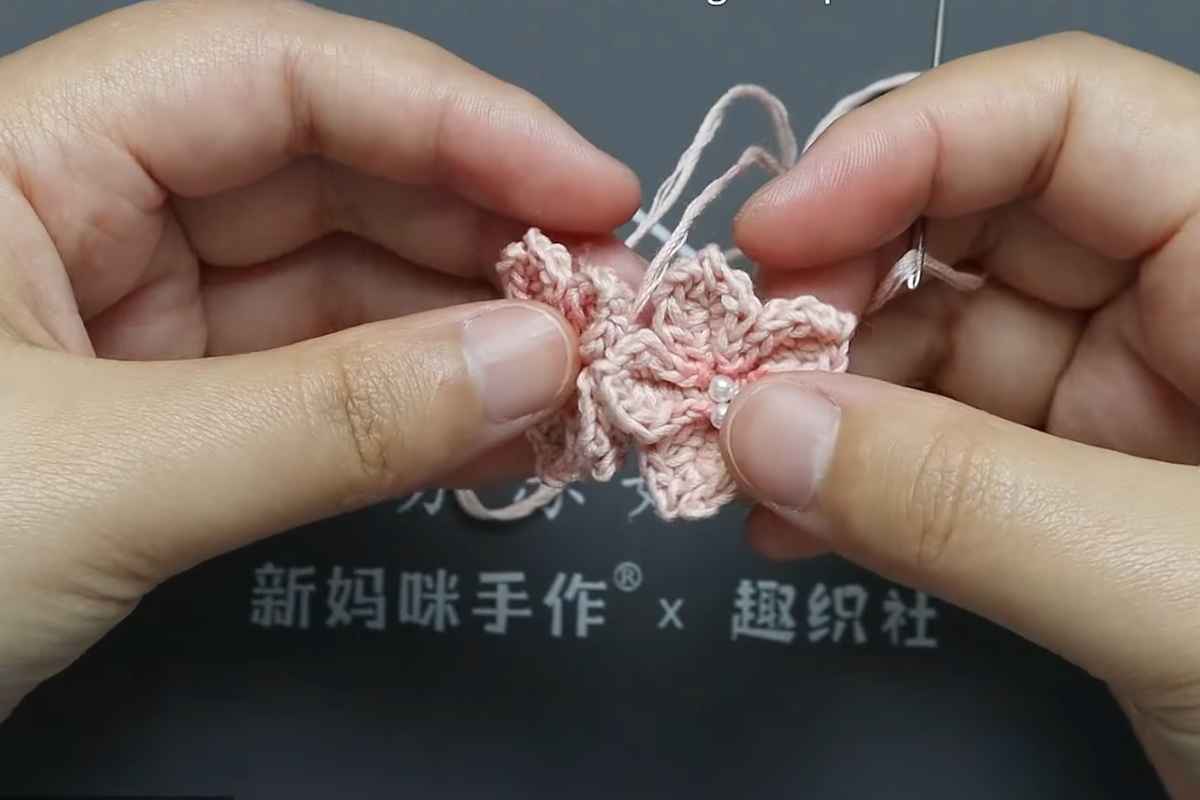
Finish and Mount to the Clip
A clean finish is what turns a cute crochet into a polished hair accessory.
Weave and Shape
- Weave in all ends on the back of the flower.
- Mist lightly with starch (optional) and let dry on a rounded surface (like a small jar) to keep the petals gently curved.
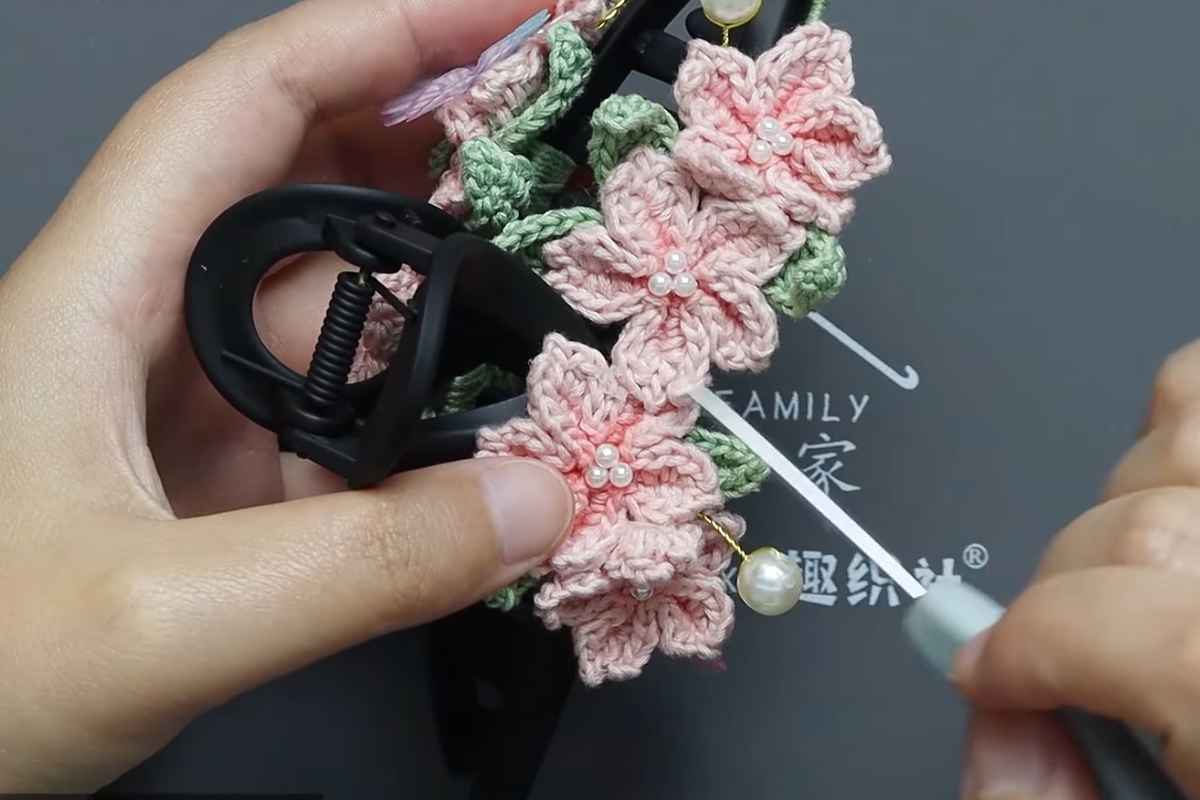
- Add a bead or button to the center if you want a dew-drop effect; stitch it through multiple layers for security.
Create the Backing
- Cut a felt circle slightly smaller than your flower.
- If using an alligator clip, open it and mark where the top prong will sit against the felt.
Attach Everything
- Place a thin line of fabric glue or hot glue on the clip’s top bar (the side that faces your hair).
- Press the felt circle onto the glue and hold a few seconds.
- Add a second thin layer of glue on the felt and press the flower into place, aligning a petal to cover the clip hinge for a clean front.
- Stitch the leaf to the felt through the flower’s back if you want extra durability (tiny tacking stitches are best).
- Let dry completely before wearing.
Keep glue minimal. A thin layer holds better and avoids visible ridges or stiffness.
Customization Ideas
- Soft sunrise palette: pale yellow center with blush or cream petals.
- Bold morning bloom: mustard center with teal or berry petals.
- Mini trio: make three smaller flowers (only the Round 2 petals) and cluster them on a longer barrette.
- Dainty edge: surface slip stitch around petal tips with a metallic thread for a subtle shimmer.
- School-friendly: match uniform colors; add a non-slip grip by gluing a small ribbon strip inside the clip.
Troubleshooting and Pro Tips
- Petals collapsing: Your yarn may be too soft for your hook. Downsize the hook or give a light starch spray.
- Gaps at the center: Add one or two extra single crochet in Round 1 (twelve total), then keep five petals by skipping a stitch as needed.
- Uneven petals: Count your stitches within each petal (especially the two double crochet, treble crochet, two double crochet sequence on Layer B). Consistent counts equal consistent curves.
- Visible glue lines: Work in thin beads of glue and press gently. Too much glue seeps through stitches.
Wear and Care
- Spot clean gently with a damp cloth; avoid soaking the clip.
- If petals flatten in storage, steam lightly (no direct contact) and reshape with your fingers.
- For toddlers or babies, ensure all embellishments (beads, buttons) are sewn securely and supervise while wearing.

Styling Suggestions
- Clip above a loose side braid for a fresh, daytime look.
- Pair with a half-up twist to frame your face softly.
- Tuck the flower just behind the ear for a minimal, romantic accent.
- Stack two clips—one flower plus one plain ribbon clip—for a playful combo.
Simple & Chic
This project is quick enough for a single cup of coffee yet polished enough to elevate your everyday hairstyle. Keep your stitches even, your glue light, and your palette cheerful.
With a couple of practice blooms you’ll find your rhythm, and soon you’ll have a small garden of Flower Morning Hairclips to match outfits, brighten rainy days, or gift to friends.
The best part? Each flower is uniquely yours—handmade, lightweight, and effortlessly pretty.
Images and patterns courtesy of susudiy.com
Enjoy The Video Tutorial

Source: Susudiy
Did you find this post useful or inspiring? Save THIS PIN to your Crochet Board on Pinterest!

More crochet projects for you