
Pumpkin Patch Granny Square Blanket: Free Crochet Video Tutorial

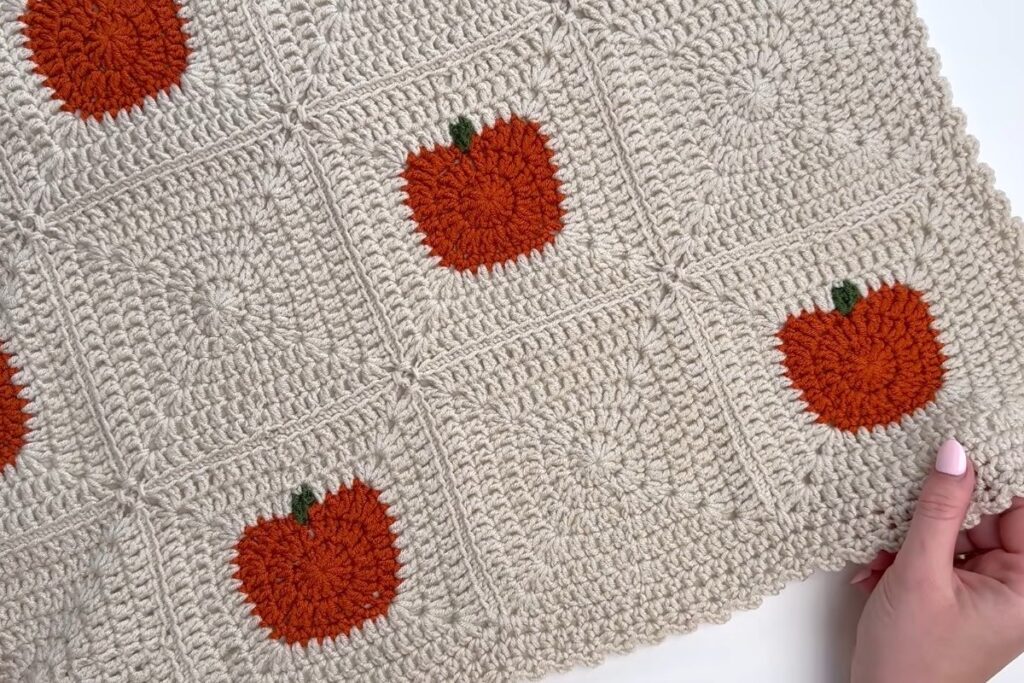
The Pumpkin Patch granny square blanket mixes little orange pumpkin squares with plain cream squares for a throw that feels like fall the moment you spread it over the sofa. It was designed by Emma, MJ's daughter, who works full time behind the scenes at MJ's Off The Hook Designs. She filmed the full video tutorial herself while MJ recovers from back surgery, and she walks you through every stage, from the first pumpkin square to blocking the finished blanket. The pattern is rated easy, so it's a lovely project if you have made a granny square or two before.
The Pumpkin Patch Blanket at a Glance
- Designer: Emma for MJ's Off The Hook Designs
- Skill level: easy, written in US terms
- Squares: 50 pumpkin squares and 49 solid squares, each 5 x 5 in (12.5 x 12.5 cm)
- Layout: 9 squares across in a checkerboard of pumpkin and solid squares
- Approximate size: about 45 x 55 in before the border (our calculation from the square size and count)
- Yarn: DK (weight 3) acrylic in three colors
- Hooks: 5 mm (US H/8) for the squares and 4.5 mm (US G/7) for the border
- Video length: about 56 minutes
What You'll Need

Images and patterns courtesy of MJ's Off The Hook Designs
Emma uses MJ's Off The Hook Designs Timeless Tones, an anti-pilling DK acrylic (273 yd / 100 g per ball). These are the amounts listed for the full blanket:
The Little Square That Started It All
Granny squares are where so many of us fell in love with crochet — and they're still one of the most fun, addictive things to make. This ebook gives you 25 quick and easy patterns explained step by step, plus 12 clever ways to join them into blankets, scarves, cushions and more. Perfect whether it's your first square or your five-hundredth.
🧶 Pick Your First Square – Click on the Image 👆🏼
- Oat Milk (cream, color A): 10 balls, about 2,544 yd. This covers the backgrounds of every square plus the seams and the border.
- Pumpkin Spice (orange, color B): 2 balls, about 400 yd for the pumpkins.
- Olive Grove (green, color C): 1 ball, about 150 yd for the stems.
- 5 mm (US H/8) and 4.5 mm (US G/7) crochet hooks
- Yarn needle, stitch markers, scissors and a measuring tape
- Blocking pins and 4 to 6 blocking mats (24 x 24 in)
If Oat Milk is sold out, Emma suggests the shade Driftwood, which is very close. Any soft DK yarn will work too, as long as your squares come out at 5 in.
Check Your Gauge with One Square
Gauge is measured on a finished square before joining: each pumpkin or solid square should measure 5 x 5 in with the 5 mm hook. Make one square first and measure it. If it comes out bigger, go down a hook size; if it's smaller, go up. With 99 squares in the blanket, a small difference per square adds up to several inches overall, so this quick check is worth it.
How the Blanket Comes Together
The video follows the order you will actually work in. Here is the overview, with the chapter times so you can jump straight to each step.
1. The pumpkin squares (1:36)

Each pumpkin starts in orange from a magic ring and is worked in a few rounds. The third round mixes short and tall stitches, which is what turns a simple circle into the little lobed pumpkin shape. This round is the longest one in the pattern, so it helps to have your pattern open or follow the video closely here.
2. Stems and borders (10:22)
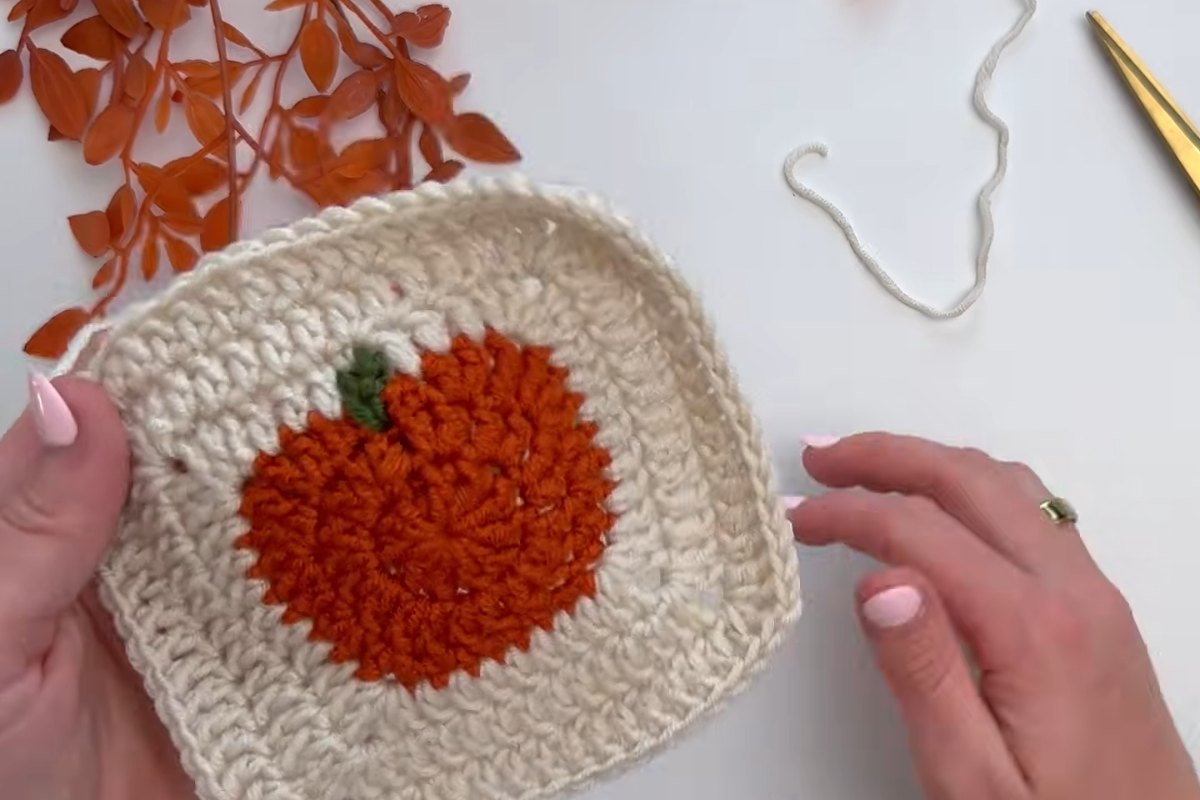
A tiny green stem is added at the top of each pumpkin, and while working it Emma crochets over the yarn tails so there is less to weave in later. The cream border is then built around the pumpkin in rounds until it becomes a square. One detail worth noticing: she joins the cream yarn a few stitches away from the stem so that every round starts in a corner. That keeps the join invisible, and she mentions she updated the pattern after spotting a visible join line on her first squares.
Her efficiency tip: make all 50 pumpkin shapes first, then add all the stems, and only then work all the borders. Working in batches keeps you in a rhythm and speeds things up.
3. The solid squares (22:37)
The plain squares are worked entirely in cream. They also start as a circle and are squared off in the later rounds, so they sit perfectly next to the pumpkin squares. As with the pumpkins, each round finishes in the corner for a seamless look.
4. Joining the squares (37:13)
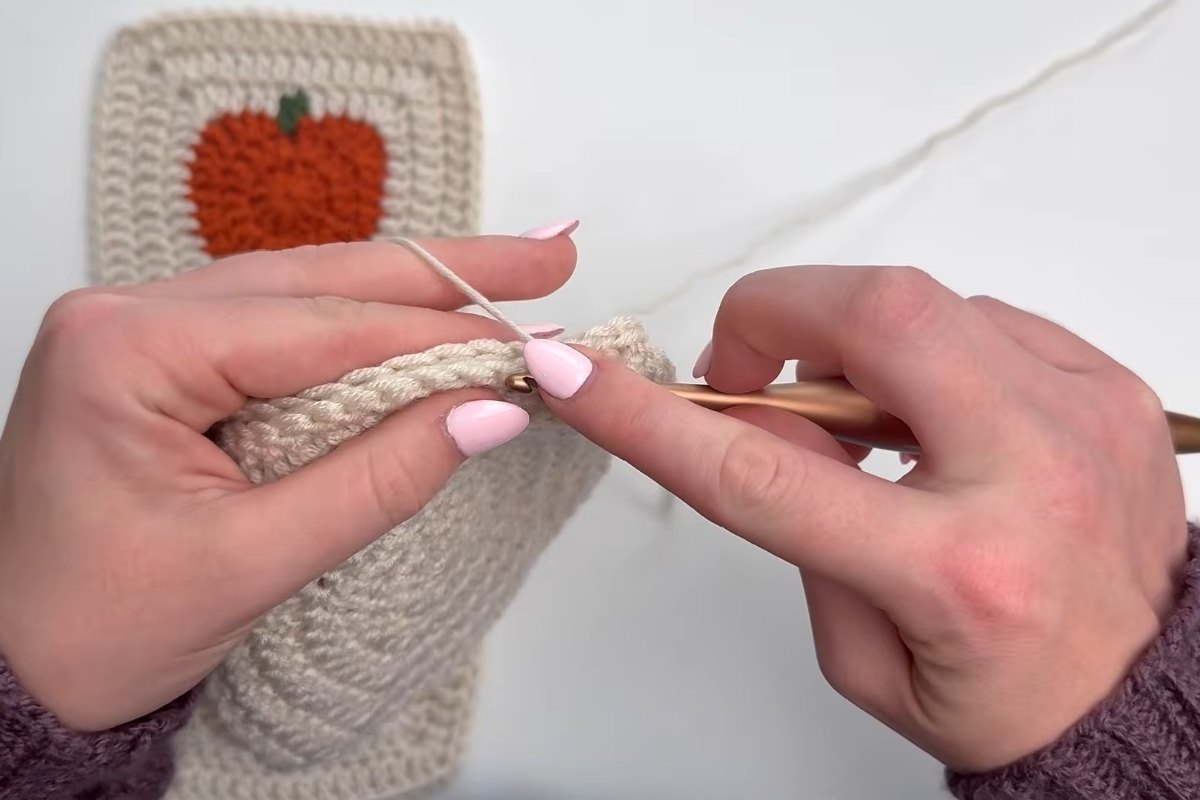
Lay the squares out in rows of nine. The first row goes pumpkin, solid, pumpkin and so on, starting and ending with a pumpkin. The next row starts and ends with a solid square, and you keep alternating to create the checkerboard.
The squares are joined with a single crochet seam worked through the front loop of the square facing you and the back loop of the square behind it. Emma calls it the easiest granny square join she has tried, and it leaves a neat, flat line on the front. You join the squares in one direction first, then turn the blanket and join the rows in the other direction. Keep an eye on the pumpkins as you go so they all face the same way.
Blocking each square to 5 in before seaming is optional, but it makes the edges much easier to match.
5. Border and picot edge (47:51 and 51:48)
The border is worked with the smaller 4.5 mm hook: two rounds of half double crochet with three stitches in each corner, followed by a pretty picot edge all the way around. Where two squares meet, Emma places one stitch in each corner space and one in the seam so the border lies flat.
6. Blocking the finished blanket

Seaming leaves small ridges between the squares, so the last step is blocking the whole blanket on mats. Once dry, the stitches relax and the blanket gets a soft, beautiful drape, as you can see at the end of the video.
Get the Written Pattern
The video shows every step from start to finish, so you can make the whole blanket just by following along. If you also like to have the stitch counts written out, Emma mentions that the full written pattern is available from MJ's Off The Hook Designs.
Enjoy the Video Tutorial

Source: MJ's Off The Hook Designs
Tips for Your Pumpkin Patch Blanket
- Keep your slip stitches loose. At the end of each border round you work into the joining slip stitches on the next round, so tight ones make that much harder.
- Count your squares before seaming. You need 50 pumpkin and 49 solid squares. Laying them all out first lets you check the layout and the color balance.
- Weave in ends as you go. Ninety-nine squares means a lot of tails. Doing a few at a time is far nicer than facing them all at the end.
- Make it your own. Swap the orange for a soft white to make ghost-pale pumpkins, or use deep red and green for apple squares in late summer.
- Change the size easily. Each square adds 5 in, so a baby blanket of about 30 x 35 in takes 6 squares across and 7 rows, and a bigger bed throw just needs more rows.
Frequently Asked Questions
Is this granny square blanket good for beginners?
It's rated easy. If you can make a magic ring and work double crochet, the video will take you through the rest, including the join and the border.
How many squares do I need?
The blanket uses 99 squares in total: 50 pumpkin squares and 49 solid squares, arranged 9 across.
Can I use a different yarn?
Yes. Choose a DK weight yarn and check that your squares measure 5 x 5 in. Acrylic is easy to wash, while a cotton blend gives a lighter blanket.
How long does it take to make?
It depends on your speed, but because the squares are small and portable, it's an easy project to work on a few squares at a time through the autumn.
More Fall Crochet from MJ's Off The Hook Designs
If you love this blanket, the matching mood continues with MJ's Pumpkin Patch hat, the Fall for Granny blanket, the chunky crochet pumpkins in three sizes and the granny stitch pumpkin. For something to wear, have a look at the Hello Pumpkin mosaic cardigan, or browse more crochet blanket patterns.
Pumpkin by pumpkin, this blanket grows into the kind of throw that comes out every September and stays on the sofa until spring. Grab your oat milk and pumpkin spice yarn and enjoy every square.
More crochet projects for you