
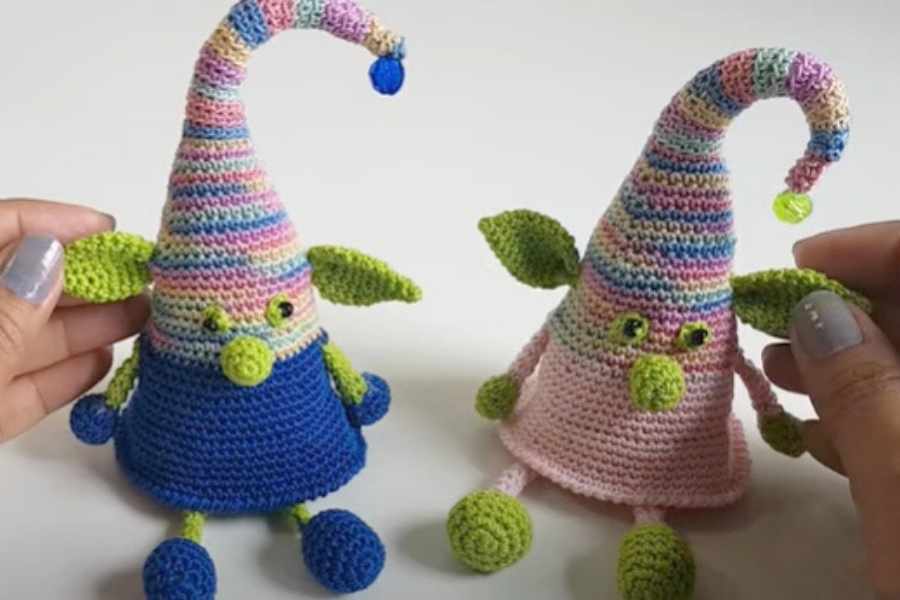
So Cute! Crochet Elf Amigurumi
Crocheting is an excellent way to create cute and cuddly dolls and toys. If you are new to crocheting or amigurumi, then making an Elf with single crochet stitches is a great place to start.
In today's video, you'll learn how to create this magical creature using just basic stitches and a magic ring.
To make the Elf, you'll need a 1.5 mm crochet hook, a stitch marker, fiber filling, and two colors of size 10 thread for the head and body. You'll also need a third color for the ears and other body parts of the Elf.
How to Crochet a Cute Elf Using Single Crochet Stitches
The first step is to create the head and body of the Elf using single crochet stitches. To do this, you'll start with a magic ring and then work in continuous rounds to create the head and body.
Refill Your Creative Cup
Feeling stuck or out of ideas? Let us bring the spark back to your hook. Our weekly emails deliver patterns, tips, and inspiration to keep your creativity blooming.
😍 Bring Your Crochet Mojo Back – Sign Up Now! Click on the image 👆🏼
Once you have completed the head and body, you'll make the legs, arms, and ears separately using the same single crochet stitches.
The author of the video also shared a great hack for adding weight to the hands and legs of the Elf. By crocheting them around some beads, you can keep them in place and shape, which gives your Elf a more realistic feel.
Once you have all the parts of the Elf crocheted, it's time to put them together. Using a tapestry needle, you'll sew the legs, arms, and ears onto the head and body. Then, you'll stuff the Elf with fiber filling and sew it shut.
In just a few easy steps, you'll have your very own crocheted Elf. This project is perfect for beginners and makes a great gift for kids or anyone who loves magical creatures.
Images and patterns courtesy of Crochetwithsumi
Enjoy The Video Tutorial

Source: Crochetwithsumi
Do you know the Basic Crochet Stitches GUIDE?
We can send it to your email right now for free, CLICK HERE for more information.
Did you find this post useful or inspiring? Save THIS PIN to your Crochet Board on Pinterest! 😊

More crochet projects for you