
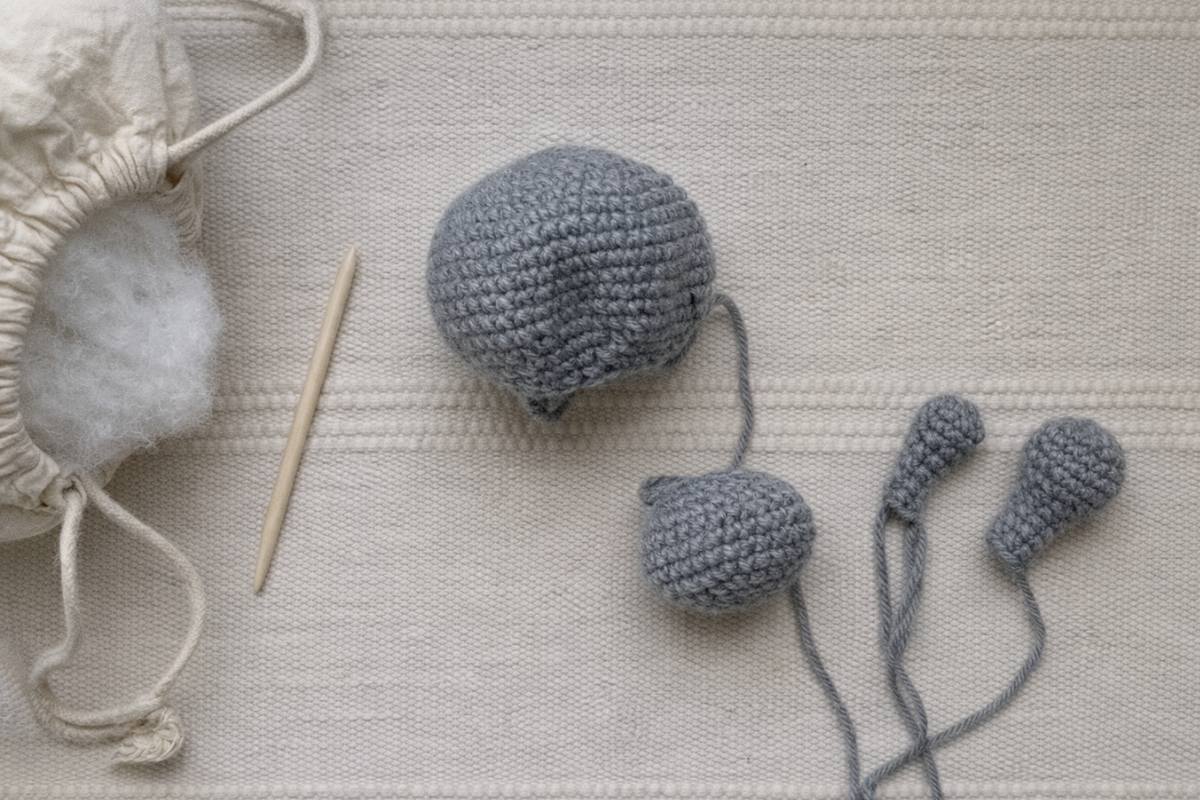
Tips for Stuffing Crocheted Animals

Stuffing can make or break an amigurumi. Even with perfect stitches, the finished toy can look lumpy, uneven, or “overfilled” if the stuffing isn’t placed well.
The good news is that a few small habits can help your crocheted animals look smoother, more shaped, and more professional.
In this video, you’ll learn practical amigurumi stuffing tips that work for all kinds of crochet animals—especially if you struggle with bumpy bodies, floppy necks, or stuffing that peeks through your stitches.
How to stuff amigurumi for smooth shaping and clean stitches

Refill Your Creative Cup
Feeling stuck or out of ideas? Let us bring the spark back to your hook. Our weekly emails deliver patterns, tips, and inspiration to keep your creativity blooming.
😍 Bring Your Crochet Mojo Back – Sign Up Now! Click on the image 👆🏼
When you stuff amigurumi, the goal isn’t just “more stuffing.” It’s an even distribution and controlled shaping. If you pack big chunks in too quickly, you’ll often get hard lumps and random bumps—especially around curves like heads, bellies, and cheeks.
A smoother approach is to add stuffing in small pieces and build the shape gradually. Pay attention to the areas that need structure (like the top of the head or the base of the body) and keep checking the outside of your work as you go.
If you can see the stuffing through your stitches, it’s usually a sign to adjust how you’re placing it—or to rethink how firmly you’re stuffing in that spot.
In the video, you’ll see how to position stuffing so your fabric stays smooth, your stitches stay neat, and the shape looks intentional.
Avoid lumpy amigurumi and keep stuffing from showing through
Two common issues are lumps and stuffing “shadowing” (when the fiberfill shows through gaps).
If your toy looks bumpy, it often helps to break the stuffing into smaller pieces and gently work them into the corners and curves instead of pushing in one big wad.
If stuffing is showing through, try focusing on tension and placement: rather than forcing more fiber into the piece, redistribute what’s already inside so it fills evenly without stretching the stitches.
For narrow parts like arms, legs, tails, and necks, stuffing slowly and shaping as you go can help them hold their form without looking overpacked.
Tip: Before closing your piece, squeeze and rotate it in your hands—this quick “shape check” can reveal flat spots or lumps you can fix right away.
Amigurumi stuffing checklist (quick things to watch)
Add stuffing in small pieces, not one big clump
Shape as you go by, checking the outside often
Fill curves and corners evenly for a smoother look
Avoid overstuffing areas where stitches start to stretch
Do a final squeeze-and-shape check before closing
Images and patterns courtesy of Theresa's Crochet Shop
Enjoy The Video Tutorial

Source: Theresa's Crochet Shop
Once you get comfortable with stuffing, your amigurumi will look cleaner, rounder, and more polished—without needing to redo your stitches. Try these tips on your next toy, and you’ll feel the difference immediately.
Happy crocheting!
— Maggie
More crochet projects for you