
Tunisian Crochet Headband Tutorial: Square Stitch and 3D Relief Knits
If you love the knit-look of Tunisian crochet and want a quick accessory you’ll actually wear, this headband tutorial is a great pick. The square-style stitching creates a neat, structured fabric, and the 3D relief texture adds that extra “wow” without needing complicated shaping.
This is the kind of project that’s perfect for using your favorite yarn and practicing consistent tension—especially if you’re still getting comfortable with Tunisian crochet rows.
How the Tunisian square stitch creates a clean, structured headband
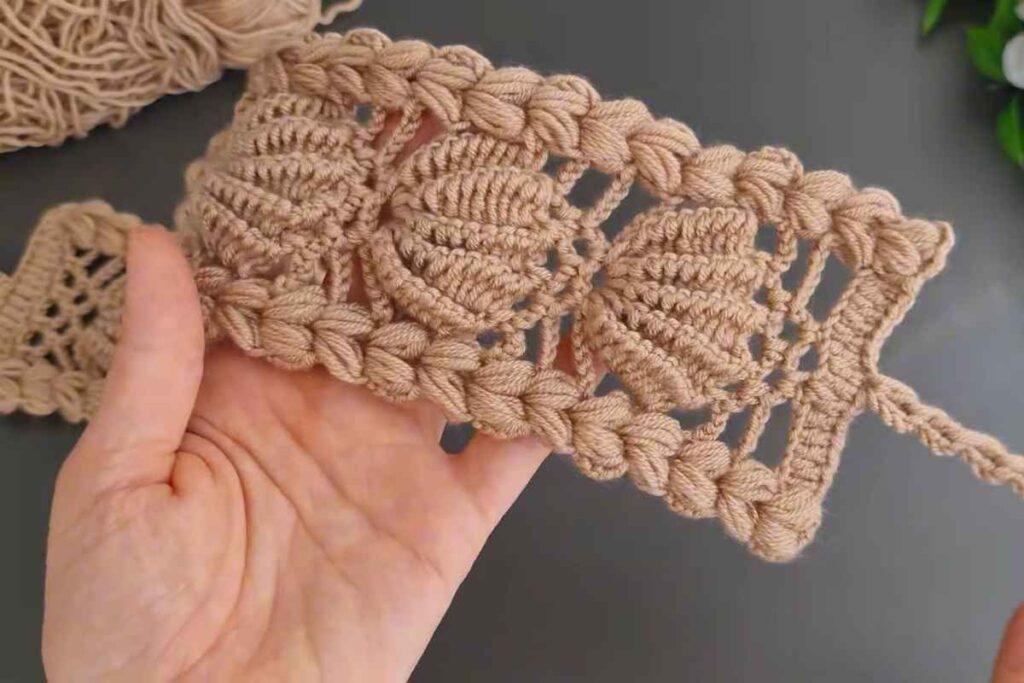
One of the best things about Tunisian crochet is how it builds a fabric that feels dense, warm, and polished—ideal for headbands and ear warmers. In this tutorial, the square stitch pattern helps the headband look tidy and evenly textured, which is exactly what you want for an accessory that sits front and center.
Refill Your Creative Cup
Feeling stuck or out of ideas? Let us bring the spark back to your hook. Our weekly emails deliver patterns, tips, and inspiration to keep your creativity blooming.
😍 Bring Your Crochet Mojo Back – Sign Up Now! Click on the image 👆🏼
The raised “relief” sections are what give this headband its standout finish. That dimensional texture makes the stitches pop, creating a soft knit-like effect that looks impressive even in a simple solid color.
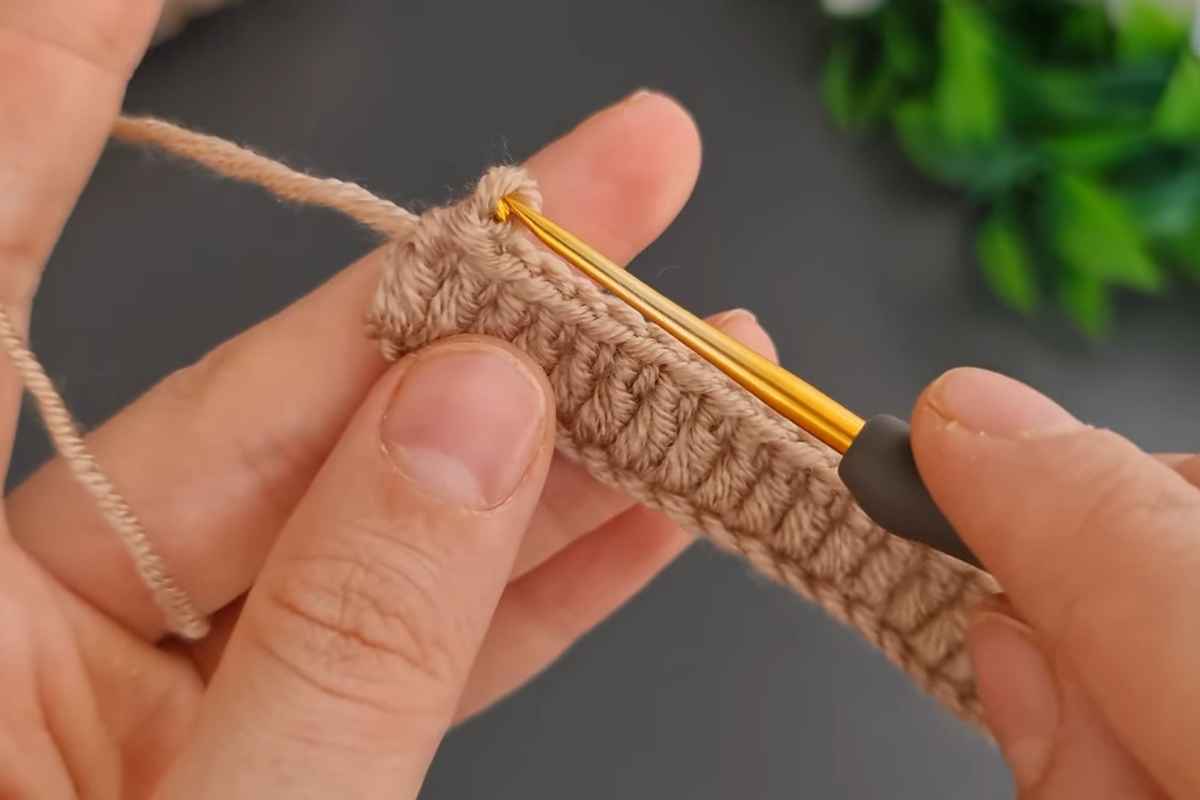
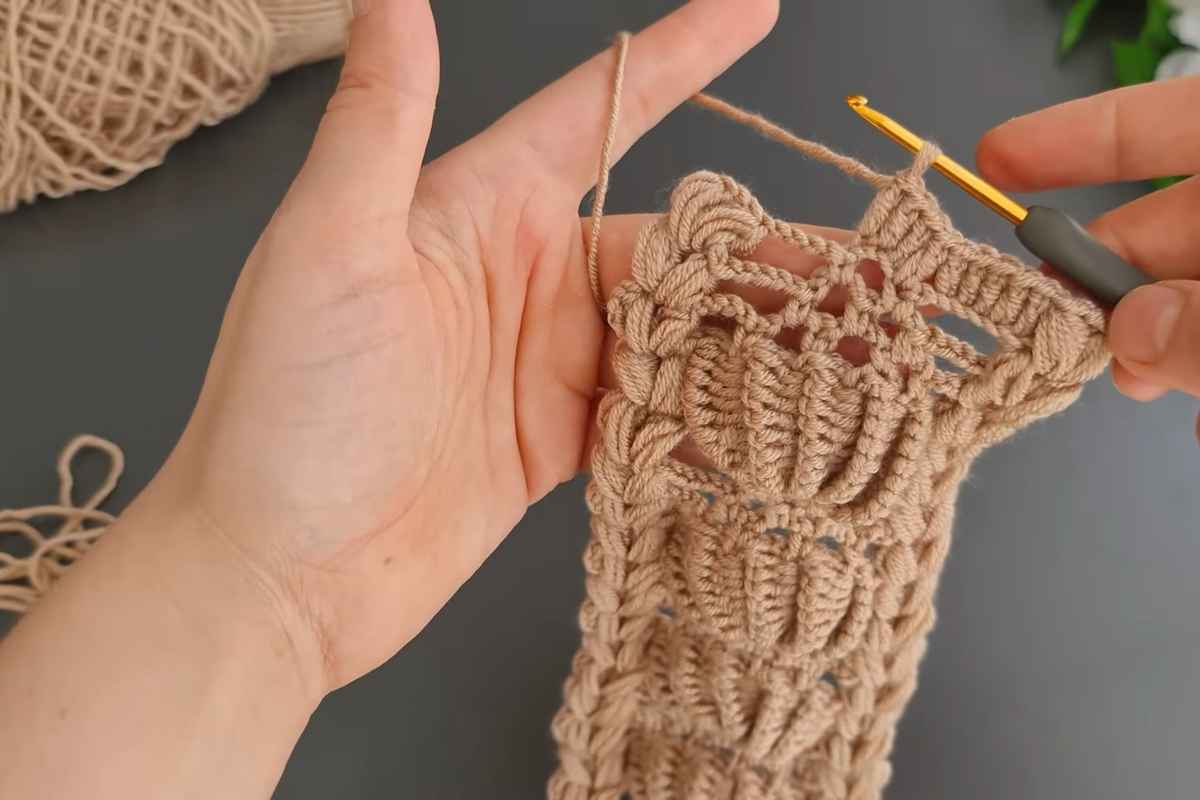
As you follow along, pay close attention to how the stitch loops are picked up and worked back off the hook. Keeping your edges consistent will make finishing easier and help your headband lay flat and comfortable.
Tunisian crochet headband video with 3D relief knit texture
Use the video below to crochet along step-by-step and see exactly how the square stitch pattern and raised texture are formed.

Source: Knitting Love
Quick troubleshooting for crisp texture and smooth edges
Images and patterns courtesy of Knitting Love
If your headband texture isn’t popping yet, try these quick fixes:
- Loosen your tension slightly if the fabric feels stiff or your hook is hard to pull through.
- If the edges are curling, add a simple finishing edge (or a light steam block if your yarn allows).
- Make sure you’re inserting the hook into the same parts of the stitch each row so the 3D relief stays consistent.
Once you get a few repeats in, the pattern becomes much easier to “read,” and your stitch rhythm will speed up naturally.
Happy stitching—and don’t forget to save this tutorial so you can come back to it when you need a fast, giftable make!
— Maggie
More crochet projects for you