How to Build a Treehouse

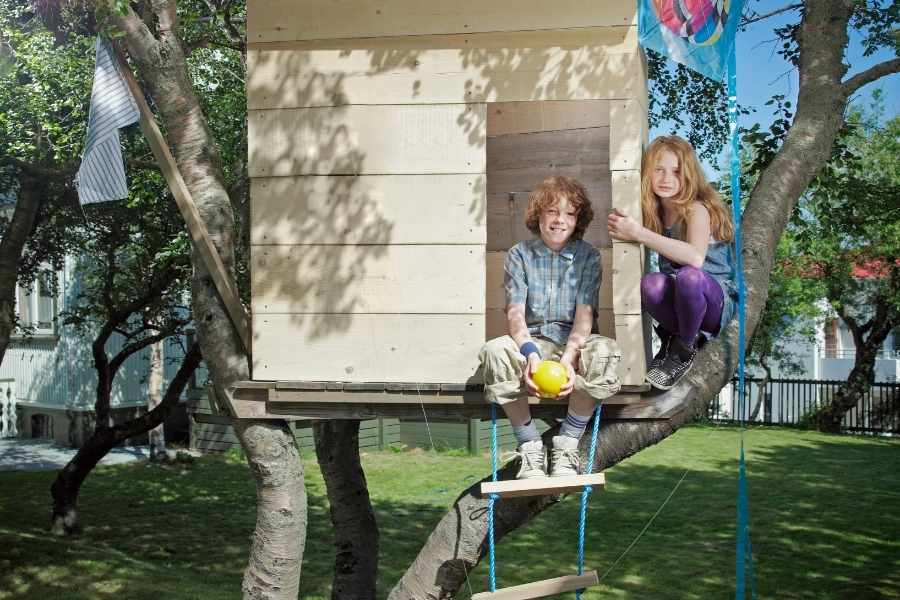
A treehouse is a dream not only for children but also for adults. Thinking of lazy days while reading a book or having a cold drink in a private and elevated paradise is paradise on earth.
However, enjoying a carefree treehouse is only possible when the treehouse is solid and secure.
Learn How to Build a Treehouse
This deck-style outdoor treehouse is safe, basic, and requires only one tree. Difficult and unknown tree engineering is kept to a minimum because the weight of the platform is fully supported by four posts embedded in the ground.
Find the Perfect Decor for Your Patio and Garden!


Alternatively, for a more classic treehouse look, half of the deck can be carried by two trees instead of two posts. Save time by installing pre-made deck railings or save money by building the railing from scratch.
Some treehouses require unusual materials, found only at specialty treehouse supply stores online. However, this treehouse uses basic building materials, tools, and techniques. All materials can be found at your local home center.
Clear the Legalities
There are few, if any, building codes of security and property ownership laws that apply to these little houses in the sky. To be on the safe side, call your local licensing and zoning departments after designing your treehouse plans.
Call your local utility on-call hotline to make sure you don't hit power, sewer, water, or other vital utility lines while digging deep holes for your feet. Also, talk to any neighbors whose adjacent property may be affected by the treehouse about neighborhood etiquette.
What You'll Need
Equipment / Tools
- Tree branch trimmers
- Hammer
- Post-hole digger
- Laser level or bubble level
- Circular saw
- Ladder
- Cordless drill and drill bits
- Set of mechanic's ratchet wrenches
- Carpenter's pencil
- Miter saw
- Tape measure
Materials
- 4 wood stakes
- 2 bags landscape gravel
- 4 8-inches diameter by 48-inches long concrete form tubes
- 8 bags quick-set concrete
- 4 6-inch by 6-inch galvanized adjustable post bases
- 4 5/8-inch diameter J-bolts
- 4 12-foot long 6-by-6-inch posts
- 8 8-foot long pressure-treated 2-by-4-inch posts
- 23 8-foot long pressure-treated 2-by10-inch posts
- 12 2-inch by 10-inch galvanized concealed face mount joist hangers
- 24 1/2-inch diameter by 6-inches long lag screws with matching washers
- 3 1/2-inch long 16d nails
- 1 1/2-inch long 10d nails
- 4 8-feet long by 3-feet high pre-built deck rails, either wood or powder-coated aluminum, each 8 feet long by 3 feet high, as well as deck railing posts and included hardware
- Hidden fastener deck system (optional)
- Rope ladder or extension ladder
- Bungee cords or metal brackets (optional)
Instructions
Choose a Tree
Due to their beauty and strength, deciduous woods such as oak, maple, beech, apple, and ash have long been used to build tree houses. Evergreens like Douglas fir, pine, fir, and hemlock work well too. Make sure the tree is healthy, straight, and as upright as possible.
The lower branches should be trimmed to the desired height of the platform. Then clear another 6 feet of branches above the height of the deck.
Tree Diameter
A rule of thumb: For an average-sized treehouse of 8 feet by 8 feet, choose a tree with a trunk diameter of 12 inches or more.
Mark the Post Locations
Using the tree as the center point of the treehouse, mark four locations for the square-shaped post bases. The pole shoes will be 2.5 meters apart and equidistant from the tree. Mark these locations by tapping four wooden dowels on the ground.
Measure Outer Dimensions
Ensure that the outer dimensions of this square measure 8 feet by 8 feet, not the on-center dimensions. This is vital because the inner dimensions of the floor frame you will create in a later step will be 8 feet by 8 feet; the posts and the frame must align.
Dig the Post Footer Holes
With the pole digger, dig four holes. Dig to the depth required for your area so that each column extends below the ice line. Cover the bottom of each hole with 3 inches of gravel.
Then put a cardboard tube in each hole. Cut each form tube so that approximately 2 inches of the tube extends above ground level.
Frost Line Info
To find your area's frost lines, check with your local building department for this information.
Pour the Footers
Mix the concrete. Fill each form tube until the concrete is level with the top of the tube. Smooth the concrete flat.
With the concrete still wet, insert a 5/8 inch diameter J-bolt into each concrete base. The J-bolt should extend 3/4 to 1 inch above the concrete.
Mount the Posts
Install a column base in each of the four baseboards with the included washer and nut that attach to the recessed J-bolt. Place each 6 "x 6" piece of wood on a post base. Nail with a level and nail the pieces in place with 16d nails.
Temporarily secure the post by nailing two 2-by-4-inch pieces of lumber to each post to form a triangular brace with two free arms resting on the ground.
Build the Outer Section of the Floor Frame
Using four 2-by-10-inch pieces of lumber, create a square that will form the outer perimeter (or edge beam) of the floor frame. The structure must be 2.5 meters long and 2.5 meters wide.
Cut two of the 2-by-10-inch boards so that each is 7 feet by 9 inches long. The other 2-by-10-inch boards are 2.5 meters long. Nail the four boards with 16d nails at the ends to form the square.
Mount the Floor Frame
With two people on the ladder, raise the floor structure above the level of the pole tips. The floor frame should now be wrapped around all four posts. Slide the floor frame down to the desired height.
Temporarily secure the frame to each post with 16d nails. Nailheads should be exposed to facilitate removal.
Using a cordless drill, drill two pilot holes in each post through the 2-by-10-inch frame and into the post. Continue to drive screws and washers into each pilot hole with a ratchet wrench. Remove temporary nails 16d with the claw end of the hammer.

Install the Knee Braces
Remove the temporary 2-by-4-inch plate supports as they will be used to create permanent cross brackets. They can be short knee braces that extend from one post to the floor frame, or they can be longer diagonal braces that extend from one post to an adjacent post.
To create knee pads, cut four of the 2-by-4-inch boards in half so that you have eight 2-by-4-inch boards with each 48 inches long. Place a 2-by-4-inch board at the desired position on the knee pad (45 degrees extending from the hoop beam to the post) and mark the cuts on the back with the pencil.
Cut with a miter saw and test in the treehouse. If it works, use it as a template to cut the remaining three knee pads.
Drill pilot holes, then secure one knee brace per column with 1/2-inch retaining screws. To prevent the lag bolts of one brace from interfering with the lag bolts of the other brace on a post, the second set of four knee pads must be cut more or less than the first. Measure, mark, cut, and secure these clamps as you did the other set.
Set the Joists
Using your pencil and tape measure, measure 12 locations inside the floor frame for the joist hooks. There should be six hangers on one side and six on the opposite side. The hangers should be 40 centimeters apart. You may need to slightly adjust the position of the two middle hooks to accommodate the tree.
Nail the beam hooks in each position with 10d nails. Screw the remaining two-by-ten tightly onto the beam hooks. Then secure the boards and hangers with 10d nails.
For Extra Strong Joists
To increase the joists' strength, double up the two sides of the frame that have the joist hangers with two more 2-by-10-inch boards mounted on the outside of the frame. Nail into place with the 2 1/2-inch nails.
Build the Flooring
The remaining eleven 2-by-10-inch pieces of lumber will be used as deck boards.
Make the face nail on the beams with 16d nails. Or, for a cleaner look, consider purchasing a hidden accessory shelf system. Space boards 1/8 to 1/4 in. When you get to the tree, cut these boards to the proper length.
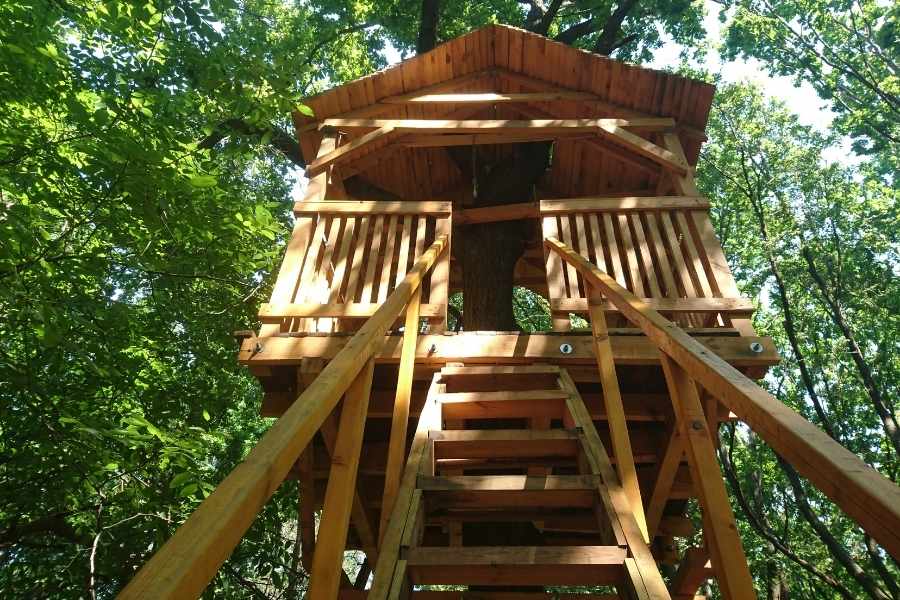
Install the Railing and Ladder
Install the handrail on top of the deck following the manufacturer's instructions. Be sure to leave a section about 2 feet wide for access.
For a ladder, consider the many rope ladders available online that can be attached to the treehouse. Or tilt an extension ladder in place for a sturdier solution. Optionally, secure the ladder with bungee cords or metal brackets to hold it in place.
Rope Ladder Safety
Put a pile of soft mulch or wood chips underneath the rope ladder in case someone loses their footing.
We hope you enjoy watching this video about How to Build a Treehouse

Source: This Old House
Did you find this post useful or inspiring? Save THIS PIN to your HOME Board on Pinterest! 😊

Once again, thank you for visiting our website!
We hope you've enjoyed exploring the content we've created for you.
Give yourself the chance to learn, get inspired, and have even more fun, keep browsing...
Last update on 2025-03-02 / Affiliate links / Images from Amazon Product Advertising API

More Home Tips 👇🏼👇🏼