How to Make a Macrame Shelf: A Step-by-Step Guide

Macrame has seen a resurgence in home decor, with its intricate knot patterns bringing a boho charm to any space.
Among its many applications, the macrame shelf stands out for its blend of beauty and function. In this guide, we'll walk you through creating a macrame shelf, an eye-catching piece that’s perfect for displaying plants, books, or other decor items.
Setting Up for Your Project
Before diving into the crafting, gather the following materials:
- Wooden board (choose a size that fits your space)
- Macrame cord (like jute or cotton, sturdy enough to hold weight)
- Scissors
- Measuring tape
- Drill, screws, and wall anchors (if securing to a wall)
Opt for a cord color that matches or contrasts with your decor, adding either a subtle or bold accent to your room.

Measuring and Cutting the Cords
The first step is cutting your cords to the correct length. A good guideline is to measure twice the length of your board, adding 8-10 inches for knotting. For a compact shelf, 8-10 cords should suffice, while a larger shelf may require 12-15 cords. Once measured, fold each cord in half to form a loop, preparing them for attachment to the board.
This careful setup creates a sturdy foundation for your shelf and ensures the macrame is well-proportioned.
Attaching the Cords to the Wooden Board
Now, secure the cords to the wooden board. Place each folded cord under the board, threading the looped end through, and pulling tight to create a secure lark's head knot. Space these knots evenly along the board, as this will influence the balance and look of your finished piece.
A neat, evenly-spaced foundation will not only support your shelf but will also make the overall design more polished.
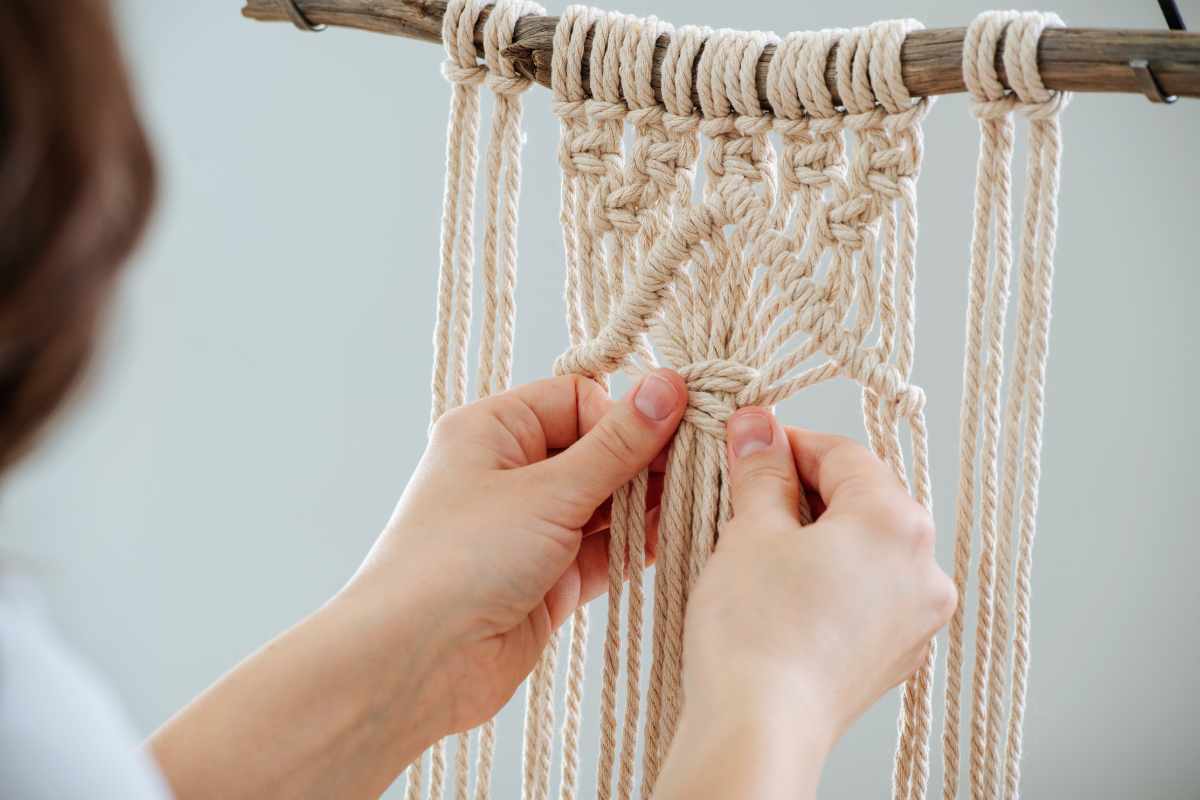
Crafting the Macrame Hangers
With the cords in place, it’s time to begin creating the macrame hangers that will support your shelf. Select pairs of adjacent cords and tie them in a square knot about 5-6 inches below the board. This initial row of knots will form the basis for the shelf’s suspension. Work across each set of cords, creating a row of square knots that will secure the shelf.
Square knots are ideal for providing stability and a cohesive look to your macrame shelf.
Constructing the Shelf
To add structure, continue tying rows of square knots below the initial row, spacing each row evenly as you go. As you build downward, the shelf will naturally start to curve, creating a cradle for your items. Adjust the tension in each knot to keep the board level.
With each layer, your shelf gains both visual interest and functional strength, allowing it to securely hold your decor items.
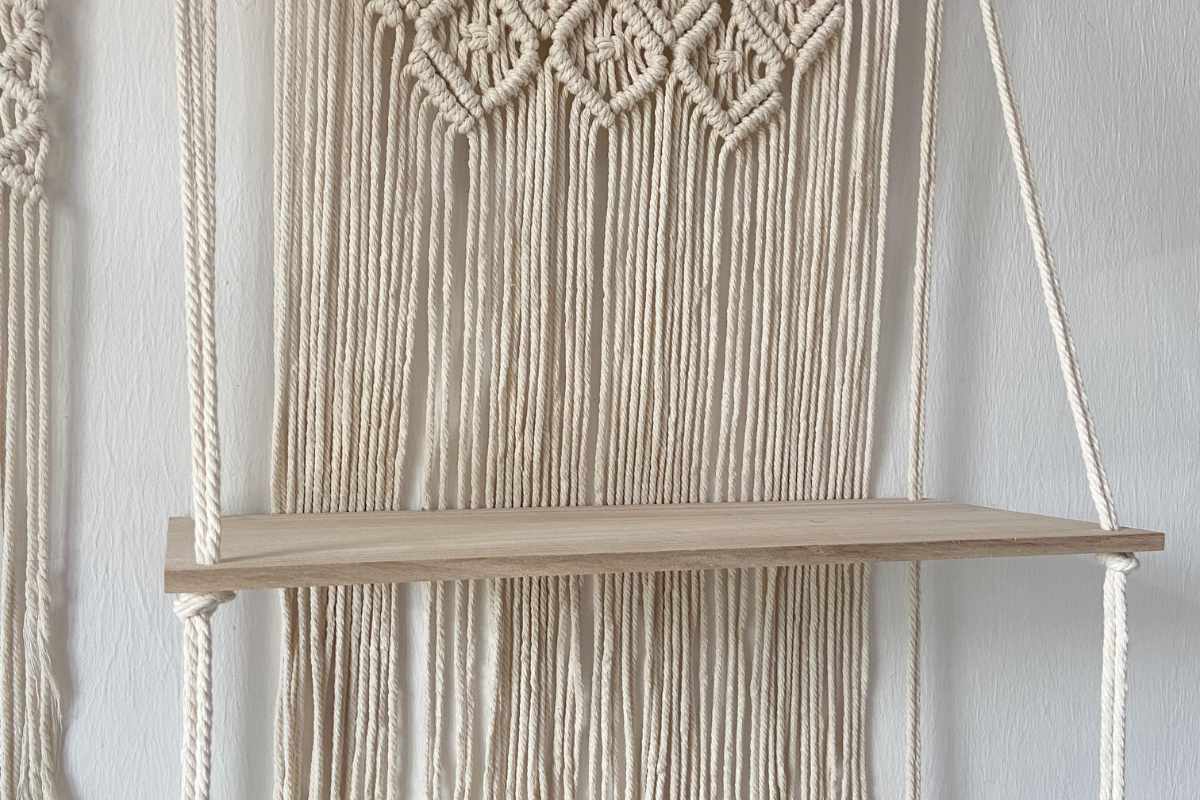
Finishing Touches and Hanging
Once your macrame reaches the desired length, finish with a clean edge by tying a final row of square knots. Trim any excess cord for a tidy finish. Then, hang the shelf using screws and wall anchors if securing it to a wall, ensuring it’s both stylish and safe.
Adding decorative touches like beads or tassels at this stage can personalize your macrame shelf, giving it an extra touch of flair.
Adding a Unique and Functional Piece to Your Home
Your finished macrame shelf brings a custom touch to your decor, blending function with style. It’s a wonderful way to display plants, books, or small decorative items, transforming an empty wall into an engaging focal point. Plus, the shelf’s design can be easily adapted to suit various styles, from minimalist to bohemian.
Creating a macrame shelf is a rewarding DIY project, combining creativity and practicality. With a few simple materials and some patience, you can craft a unique decor piece that adds character and charm to any room. Give it a try, and enjoy the satisfaction of adding your handmade creation to your home.
Enjoy watching the video tutorial

Source: CloudPusher
Did you find this post useful or inspiring? Save THIS PIN to your HOME Board on Pinterest!
Once again, thank you for visiting our website!
We hope you've enjoyed exploring the content we've created for you.
Give yourself the chance to learn, get inspired, and have even more fun, keep browsing...
More Home Tips 👇🏼👇🏼