
Pangolin Scales Knit Stitch: Free Pattern and Video Tutorial


The pangolin scales stitch from Crazy Hands Knitting & Crochet creates rows of small raised scales that overlap like the armor of the animal it is named after. It looks complicated, but the pattern repeats over only four rows, and the video tutorial below walks you through every step at a comfortable pace.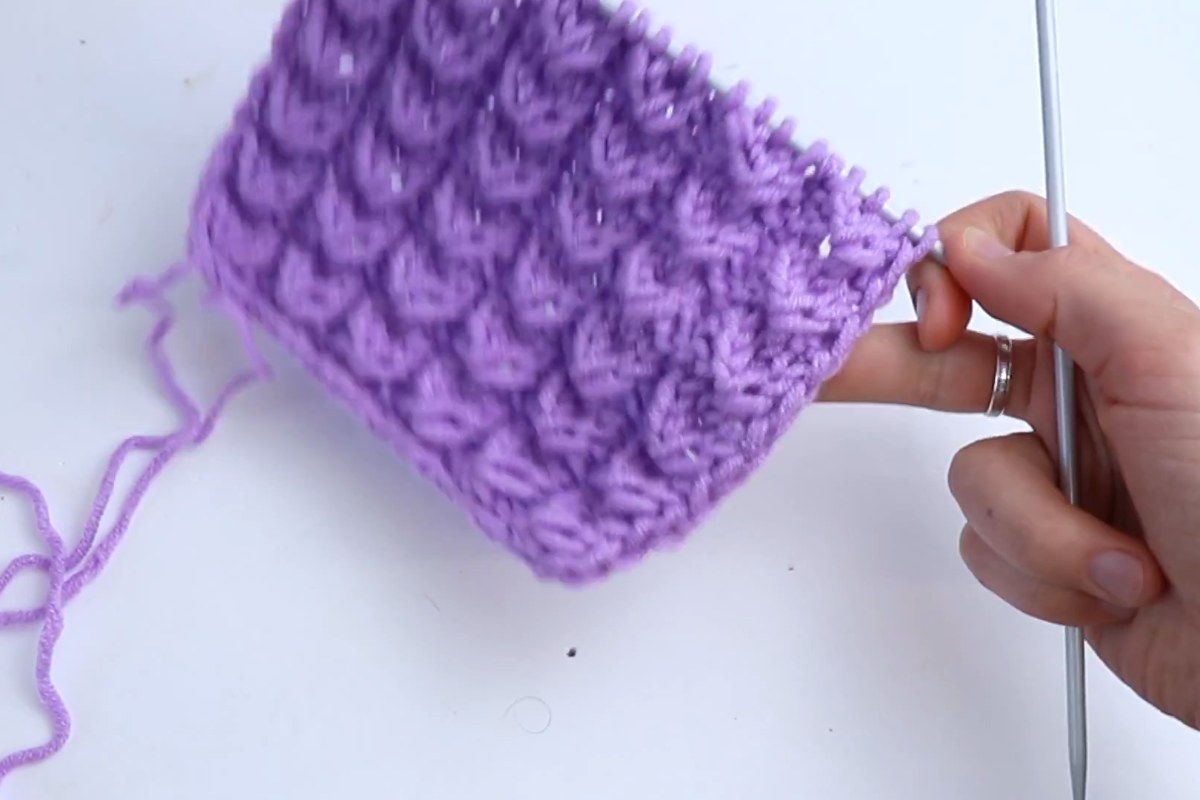
Images and patterns courtesy of Crazy Hands Knitting & Crochet
Pangolin Scales Stitch at a Glance
- Designer: Crazy Hands Knitting & Crochet
- Cast on: a multiple of 4 stitches, plus 3, plus 2 selvage stitches
- Pattern repeat: 4 rows
- Techniques: knit, purl, yarn overs, drawing up a loop between stitches, k2tog and skpo decreases
- Yarn used in the sample: Lanoso Bebe Masal, a 100% acrylic yarn in weight category 4
- Needles used in the sample: 4 mm (US 6)
- Video length: about 8 minutes
How the Stitch Works
Each scale is built from a combination of yarn overs and a loop drawn up between two stitches, which adds extra fabric in one spot. Decreases (k2tog and skpo) then pull those extra stitches back in, so the stitch count stays the same from one repeat to the next. The yarn overs also leave small eyelets, which give the fabric a light, airy look between the scales.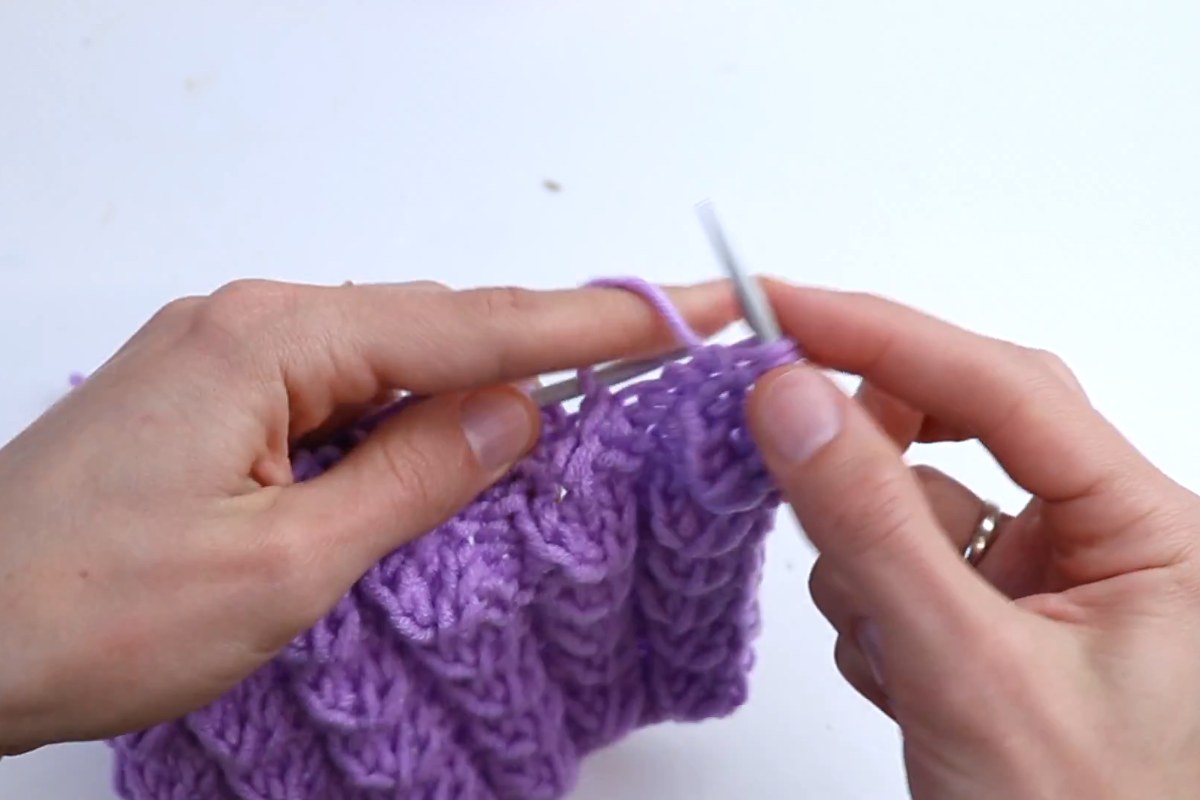
The selvage stitch on each side is worked the same way on every row, which keeps the edges straight and tidy.
Tips for Learning the Pangolin Scales Stitch
Knit a test swatch first. Cast on a small number of stitches that fits the multiple and work a few repeats before starting a bigger project. You will learn the rhythm of the four rows much faster this way.
Use a smooth, light-colored yarn. The scales show up best in a plain yarn without a fuzzy halo, and a lighter color makes it easier to see where to draw up the loop.
Mark the first row of the repeat. A removable stitch marker or a short piece of scrap yarn helps you keep track of where each repeat begins.
Frequently Asked Questions
What can I make with this stitch?
The textured fabric works well for flat pieces such as blankets, scarves, cushion covers or the front of a sweater. Knit a swatch with your yarn first to see how the texture looks before choosing a project.
Do I need any special techniques?
Only basic ones: knit, purl, yarn overs and two common decreases (k2tog and skpo). The one step that may be new to you is drawing up a loop between two stitches, and the video shows it close up.
Enjoy This Video Tutorial About Knitting
Source: Crazy Hands Knitting & Crochet
Did you find this post useful or inspiring? Save THIS PIN to your Knitting Board on Pinterest! 😊

More from Crazy Hands Knitting & Crochet
- Learn to Knit a Ribbed Dash Dot Stitch: A Step-by-Step Tutorial
- How to Knit a Diagonal Knot Stitch
- Learn to Master the Byzantine Stitch with Ease
You may also like